
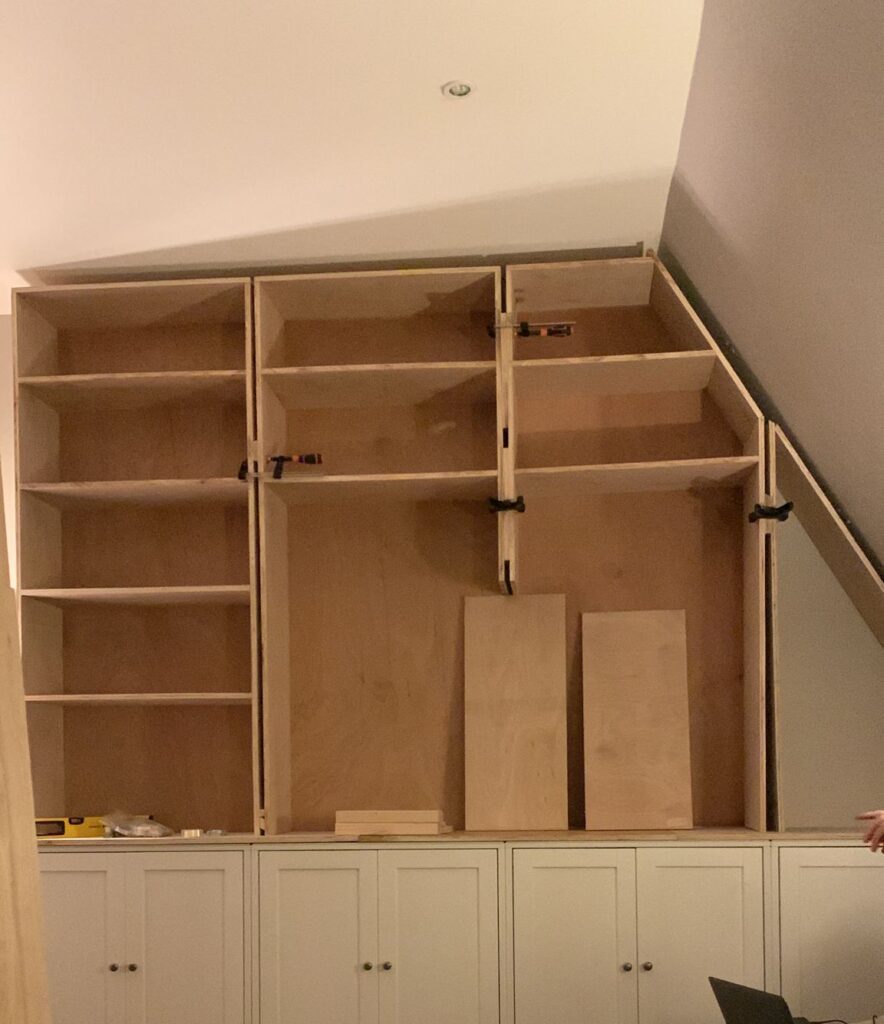

For the custom DIY shelves in the lounge, I wanted a counter top covering the cabinets with a slight overhang. The shelves would be set back slightly. I am mimicking the shelves in our Paris flat, with a sense of depth on the wall of shelves.

I looked at a lot of different options for the counter top. Because I plan on painting the shelves, the material could be paint grade. One option I did consider was butcher block, for a painted / wood combination. But in the end, I decided that might be too rustic for the overall design of the lounge.
I looked into ordering a kitchen counter top from B&Q, but it was expensive and not quite the look I wanted. I certainly don’t want kitchen vibes on these shelves.
In my research, I discovered a few blogs where they were using plywood for the countertop, and this made sense. Simple, straight-forward. I will cover the edges in trim, and again, I plan to paint it.


Constructing the Counter Top
I planned for one seam connecting the two pieces (the shelves are too long for a single piece). But then, I ordered the wrong size. UGH! I transposed two numbers in my email order to the lumber yard, which is a rather expensive (and stupid) mistake. Learn from me, dear readers, and triple-check your measurements when ordering wood or writing your cut list.
I decided to go with two seams in order to use the wood I had mistakenly ordered. I needed to order an additional piece but it was cheaper than ordering all new pieces for the counter.
Research suggested that biscuit joins would be ideal, but I had also seen examples of using pocket hole joints. Since I already had the jig, I went with that.
All was simple and went well. I joined the three boards with pocket holes, clamping them and checking for level.
Except I did not notice that one seam did not line up perfectly until I had glued the counter top to the base cabinets. It was too late. The pocket holes were on the bottom, under the glue, so I could not fix them.
I need to slow down and ensure I am careful at every step. After completing the angled shelves, the counter seemed pretty straight forward. I moved too quickly and got a bit sloppy. Do not be like me!!!
Not to worry, I will have to rely on sanding and wood filler to address the issue. But I am sure I can do it.
At this stage, we had removed the shelves from the top of the base cabinets for the 100th time. (These things are heavy and unwieldy!) I attached the counter top to the base cabinets, using glue and then drilling from inside the cabinets with 2” screws. I was careful to ensure the screws did not come through the top of the counter top. Then, I attached the counter top to each cabinet in several places, so it is extremely secure.
Putting Backing on the Shelf Sections
Now it was time to put the backing on all the shelves before I installed them permanently. I used 6mm plywood, 1 piece per section. For the fit, I cut it to size by lying it on the floor, putting the shelf on it, face up, and tracing around it. I then cut it out with the jig saw, sanded down any rough edges, and attached it with finishing nails all around the perimeter.
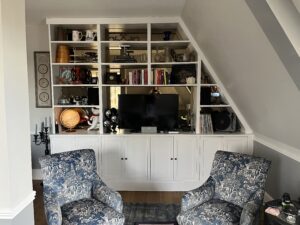
Completed for all 4 shelves, but only then did I realize a mistake in my measurements. Remember that sections 2 and 3 connect with the long open space where the television will go. I used individual boards on sections 2 and 3, so it left a large gap in the opening where the legs would normally be. Not ideal, and I could easily fix it by placing a new piece of plywood lengthwise across the opening instead. But in my case, we will cover the back of the shelves in mirrors, so this will be hidden. (This is a great example of where I just did not realize until I was putting it all together. I hope I will be able to see these things before they happen as I gain more and more experience.)

With the backs on the shelves and the counter in place, we put the shelves in place for the final time. Then I screwed them to the walls and each other. YAY! Join me next time when we get the exciting bits of trim and finishing this beast of a project.

What do you think? Would you attempt this type of project? Any advice you have for my approach? Share in the comments.
If you missed the previous steps of my Custom DIY Shelves, catch up here:


Leave a Reply