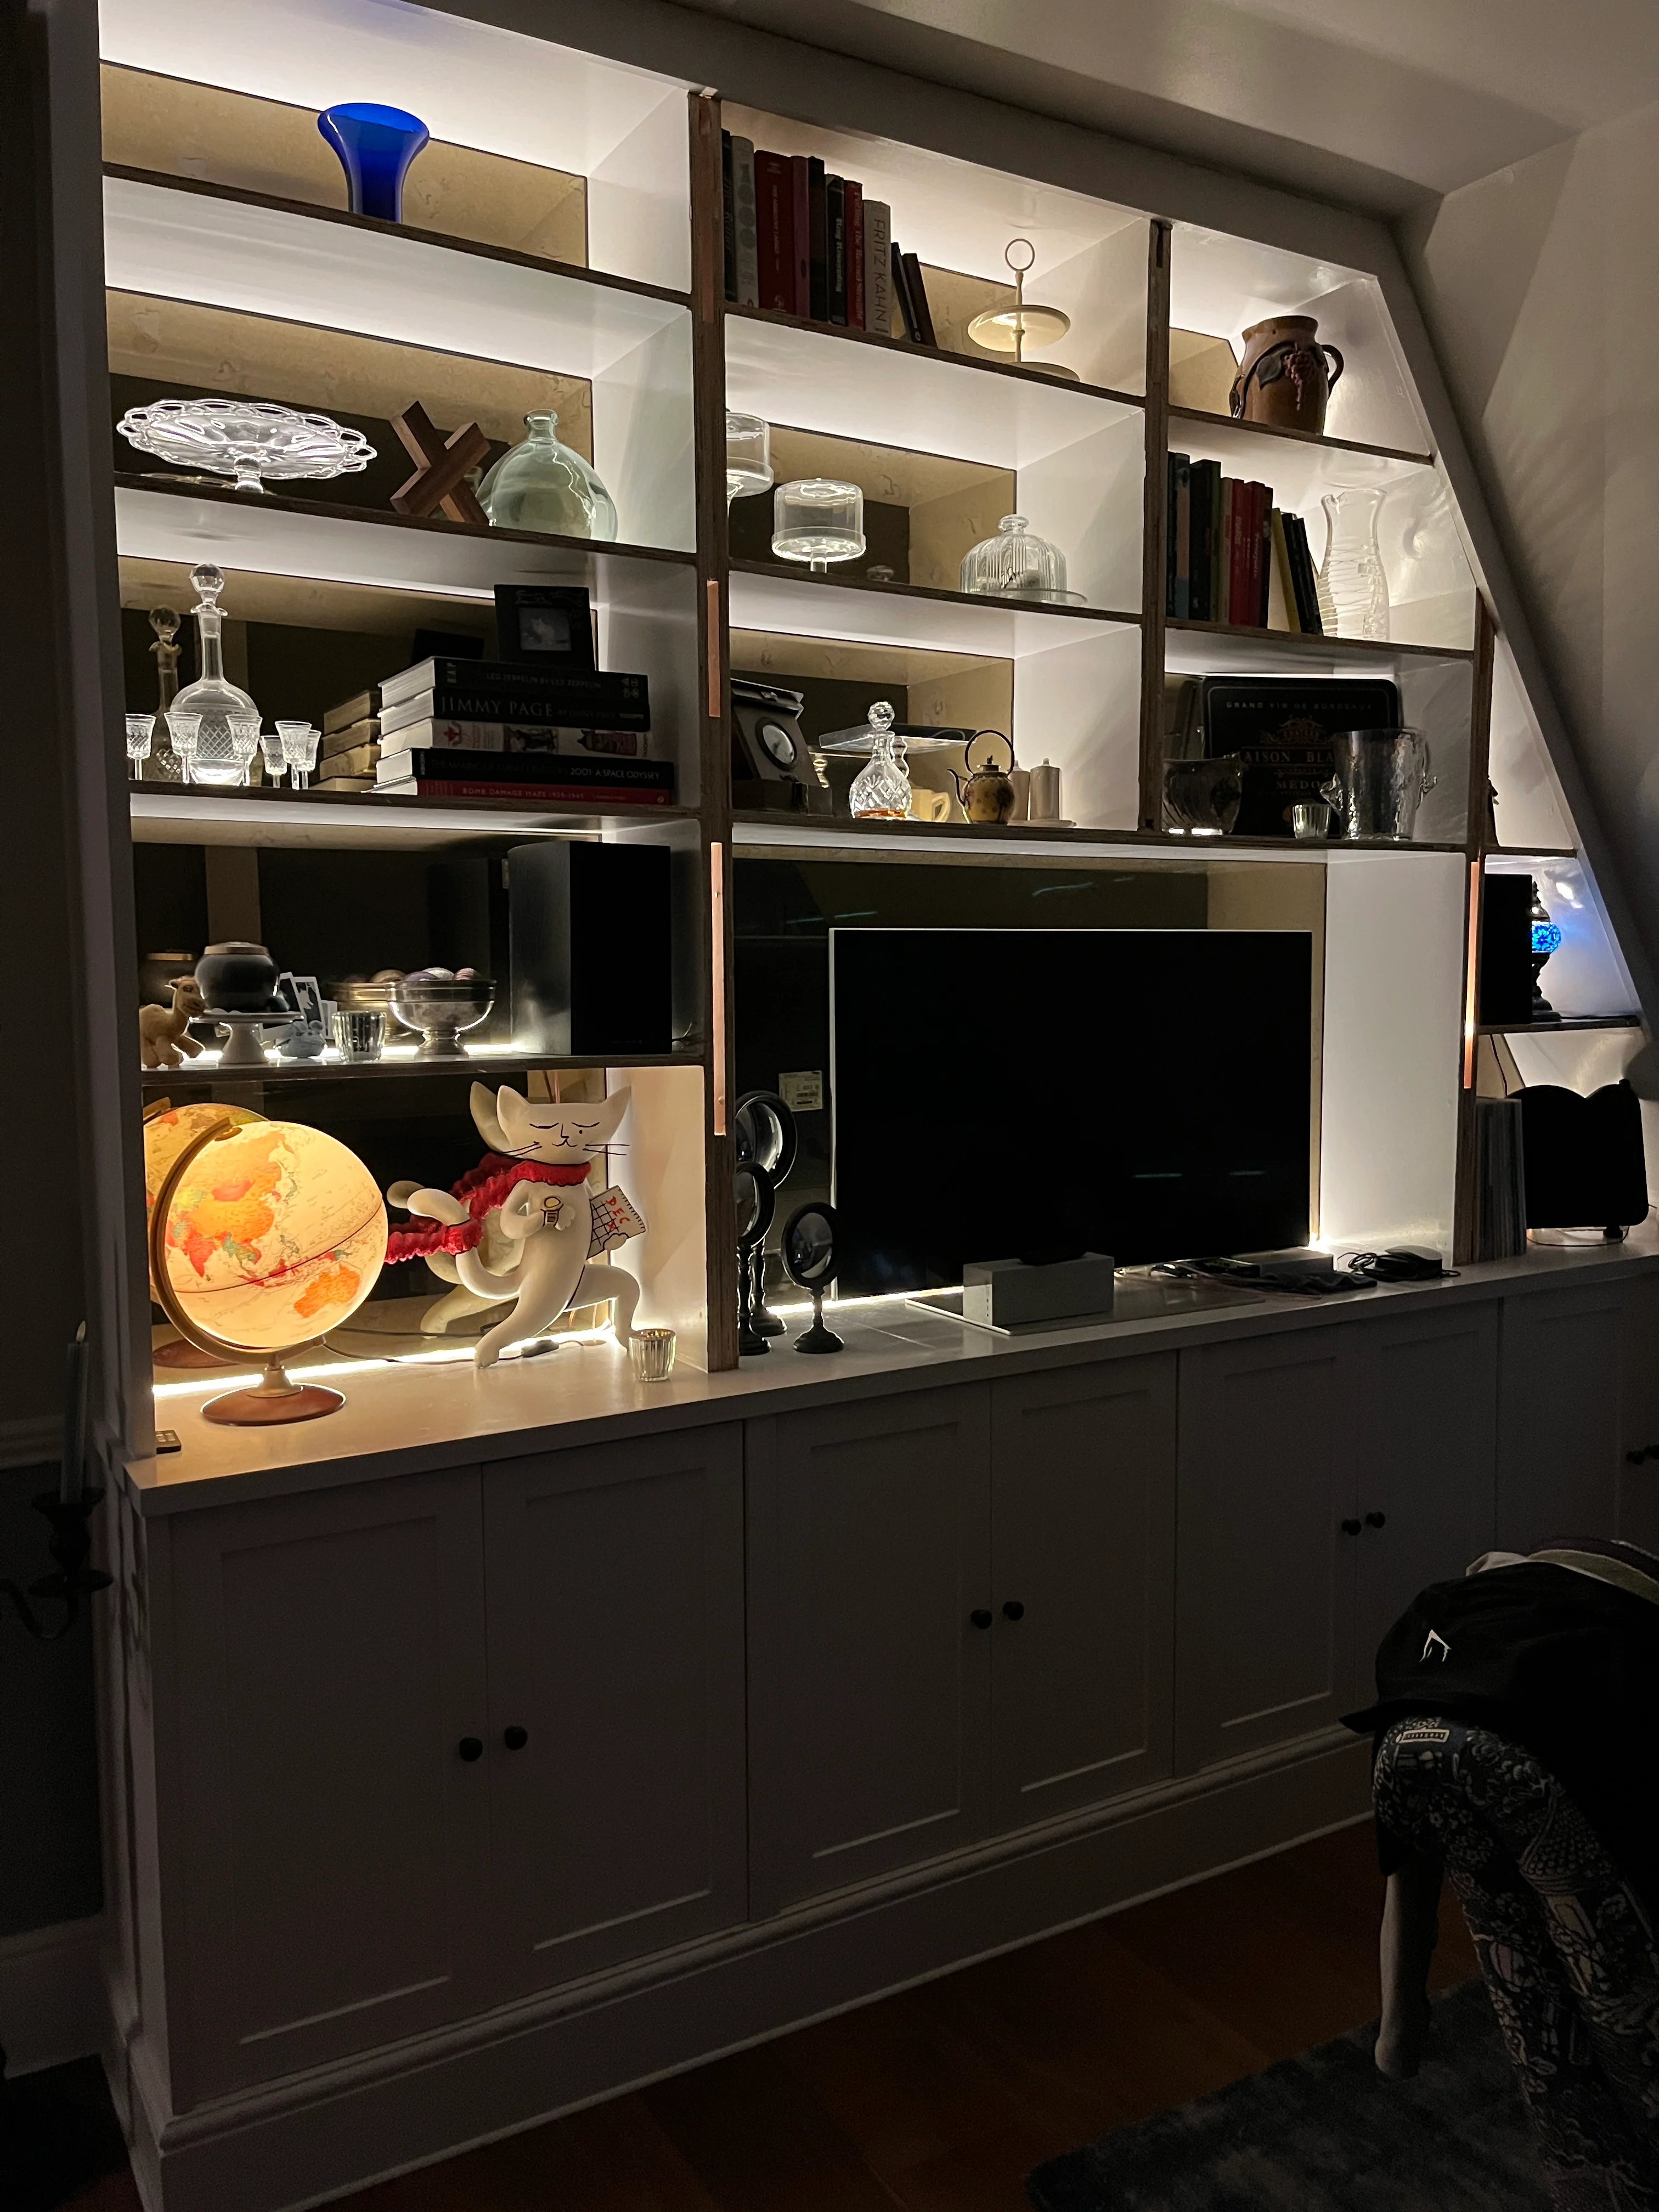
The last few weeks, I’ve been on a mission to refresh the bespoke shelves in our lounge. I began with some organisation hacks in the base units, followed by an unsuccessful attempt at installing accent lighting. I plan to update the trim and paint finish as well.
But first, I need to resolve the issues I faced with installing accent lighting. Today, I am back with an update, with some hard-won success. As with everything, the project is taking longer than planned with more challenges than expected. Why am I continually surprised by this common occurrence?!


Installing Accent Lighting Redux
I shared last week how I tried to add accent lighting to the shelves, after I had finished them. I do not recommend this if you can avoid it. Better to plan ahead and add accent lighting as a part of the original build. I did not think of it until after the fact, so I am trying to add it retroactively. And it is not easy.

Because I wanted to change the trim to something less plain, the timing is perfect for installing accent lighting. Since the cavities between the shelves will be exposed, I can hide the lighting connections here.

However, my lighting layout is rather complex. I cannot hide the connections on either end of the shelves. So the current plan includes 33 connection points! Which might not be a problem, except the connectors I bought are really not so good. Almost every connection was flickering, which is not a good look and not easily addressed once I install the trim.

I spent last week waiting for new connectors to arrive and questioning if my approach was really the right one. Unusually, I did not do any research for this project at the start. Silly me, I thought installing accent lighting would be super simple, completed in a few hours. Not so …
To Solder or Not to Solder
Once I sought out help, the Interwebs provided several different avenues of thought. I considered soldering the wires, which is admittedly a much better way to connect light strips. It is more durable and stable. Once I accepted that I might need to learn to solder, I then went down a rabbit hole. Soldering lighting strip to lighting strip. Soldering wiring to lighting strip. So many approaches needed, given my connection points. I could find no way to solder strips to one another in an X- or T- shape, which is what my layout calls for. In the end, I decided this might be a bigger job than I could tackle.
Pro Tip: If in doubt when it comes to electricity, always err on the side of caution.
A New Type of Connector
Once my new connectors came in, I decided to give them a try, but honestly, I was not expecting much. I had almost resigned myself to this project not working out without the help of a professional electrician.

Importantly, the new connectors are much more substantial than the plastic clips I had tried on the first go. Like the original connectors, they are plastic, but much stronger, and they have screws which make contact with the copper connection points on the wires. I gave them a try, replacing a few of the more unstable connections, and they are definitely more secure. They are really enjoyable to use, but you have to be careful not to lose the tiny screws!!! #speakingfromexperience
However, I could not get three connection points to work in the connector. Two connections worked great, as an L-shape, but the third, creating the T-shape I needed, would not.
My complex lighting layout needs multiple connectors, with both three and four strips needing to connect to one another throughout. A two-strip connection throughout would not work.

At this point, I decided to give up, thinking not for the first time that perhaps this is a job for a professional electrician. I started pulling out the lighting strips that I had installed, preparing to just accept unlit shelves.
An Illuminating Revelation?
But as I was pulling out the different connections, a new thought came to me. What if instead of three separate strips in one connector, I ran a single strip up the cavity, with the connectors threaded on to it and connecting to the strip on each shelf.
Like this:

In my previous drawing, I treated most of the shelves separately, and then needed to make multiple connections to reach the shelves above and beside. This creates greater instability with so many connections. With my revised approach, the connectors are really just a single connection between two wires, and the complexity decreases significantly. From 33 separate connection points to just 11!
I tried it out, and it worked a treat. I fortunately had a long enough spare lighting strip to serve as the connection to all the shelves in a column, and all the original strips I had cut would still work. Admittedly, it might seem a bit wasteful as the long connection strip of lights will be hidden in the cavity and all that light wasted. These strips are not cheap. But without soldering wiring in its place and needing a different type of connector, I am okay with this approach, as there is not much I could do with the strip anyway.
As I started installing the accent lighting in this fashion, I began to think that this was actually the correct way to use the connectors. One long strip running through, connecting to a strip in a T-shape. Two strips in a T-shape, not three.

Once I had sorted this approach, the install went fairly quickly and without issue. Except that I had not ordered enough connectors. UGHHHHHHHHHH!
I had planned to mix and match the connectors, keeping only the original plastic connectors that seemed to work well and in the places where I needed a 4-point, or X-shape, connection. But with my new layout and the improved performance of the screwed connectors, I decided to replace everything. Sadly, I was four connectors short.
I ordered these connectors from Hi-Line, and they were very efficient delivering them within four days. Not quite Amazon Prime Next-Day delivery, but well worth the wait as the performance is superior to anything I could find on Amazon. I also took the opportunity to order some end-caps for the wires where they stop at the end of the shelf and do not connect to anything. I do not know if this is needed, but it seems to be neater and good practice.
Another few days before I could get to the project again and finish connecting everything with the new connectors.
When connected properly, the connections were so much more secure, with limited flickering which was easily adjusted by tightening the screws and ensuring a solid connection. This feels much better than the previous outcome.
Yet One More Consideration
As if there has not been enough to consider in what I thought would be a simple afternoon project, there is one other area that caused some issues: polarity. The strip lights have a positive and negative connection, as all electricity does. Because the strips are so thin, it is hard to see it, but they are marked + and -. You need to make sure your strips are matching when you make connections. Positive to positive (+ to +) and negative to negative (- to -).
The connectors have a natural cavity that matches the shape of the strip, but I sometimes found the connections did not work, unless I flipped the strip over and inserted it upside down in the connector to match polarity. Not ideal!
This happened because during my layout, I did not think about polarity, so some of the strips got turned around and the connections did not match up. Pay attention to this when you are cutting and laying out the strips at the start.
In my case, a few times I had to re-route the strips through the pass-throughs and into the cavities, flipping them so the polarity on the connection was correct. It is better to insert the strips into the connectors the right way instead of flipped over. So this was yet another headache for me, because threading the strips into the small cavities and getting them to come out the front so I could connect them was not an easy task! To do it more than once … UGHHH!

Power Considerations
Sadly, I wish that I could say that all’s well that ends well, but as I finalised my efforts at installing accent lighting on the bespoke shelves, I kept thinking about the electric load on the single power connection.
My shelves take up an entire wall, and I used a lot of lights. Two rolls of 10-metre lights, with a small bit of waste. So approximately 17 to 18 metres in total. I had hooked everything into one power supply, but the experts recommend no more than 10 to 12 metres on a single supply. While the electric flow in LED strip lights is quite low, you can still overwhelm the power transformer, which could be a fire risk. As well, the further the lights are from the power source, the greater the risk of them dimming, which creates an uneven lighting effect.
If you decide to tackle installing accent lighting using LED light strips, make sure the power supply is fit for purpose for the wattage of your lights. To determine this, multiply the number of metres of lighting strips used times the wattage per metre, which you can find on the packaging. Experts also suggest adding 20-30% extra wattage to your calculation, so you do not overpower the transformer. In my case, 17 metres x 7.5 watts per metre = 127.5 watts. With a 20% to 30% buffer of 25.5 to 38.25 watts, my power transformer needed to be sufficient for 153 to 165 watts. It was rated for 72 watts, far short of what is needed for my layout but fine for the 10-metre length it came with.

Back to the drawing board, I decided to break the layout into two separate lines with two separate transformers, and then use an extension lead to turn everything on with one switch. We do not plan to change the lighting settings often, but when we do, we’ll need to use the two remotes for each of the two lines.
It is not ideal, and I could probably have an electrician to come sort this, but for now, I’ll make it work in this way.
My third and final layout looks like this, to account for the correct wattage and power load:

The fix was not too difficult, just changing a few of the connectors and running the power supply on the opposite side of the shelves for the second run of lights. Although again, I had to flip a few strips to match polarity, so more headaches with re-threading some of the strips into the cavities. Oh well, at least it is done now!

Let There Be Light!
To finish everything up and prepare for adding the trim, I carefully tucked the wires into the cavities, making sure everything was well connected with no flickering.
It was only then that I removed the adhesive backing from the strips, and laid the wires in place on each shelf. Until now, they had been simply lying in place, in case I needed to switch, flip or move them around, which I did … multiple times!
To put them in place, I aligned them up to the back mirrored wall, ensuring no twists through the pass-throughs into the cavity and out to the next shelf. I added end caps where they ended without a connection.

I highly recommend only taking the step to afix the light strips at the very end, once you are absolutely certain that everything is as it should be. No sense having to peel up adhesive strips to replace them because the connection was not right.
Et voila! Let there be light! Finally!


Next Up: New Trim and Paint
Installing accent lights has been a much harder project than I ever could have imagined. I know, it is electricity, which always requires more effort to ensure safety. But seriously, three different attempts for this project seems rather excessive. I guess that will teach me to not under-estimate any project … or will it?
Oh well, it is now done, and as always, I have learned a tonne! And I am grateful for that.
For all you intrepid DIY-ers out there who are considering a similar effort, I hope my frustrations and learnings can help you if you tackle your own accent lighting install. In hindsight, while I absolutely love the look, I am not sure if I would tackle this project had I known how challenging it would be!
But, if you decide to, here are my top tips from my own experience:
- Installing accent lighting is best done as part of the original design, not after the fact.
- Plan your design, and try to minimise connection points for greater stability.
- If you know how or are up for the challenge, soldering makes the most stable connections.
- Do not forget polarity: + to +, – to -. Consider this as you lay out your strips.
- Pay attention to power load: metres x wattage per metre; add 20-30% buffer.
- If in doubt, always call an electrician.

Join me next week, as I hopefully complete this little (?) refresh by adding new trim, coving and paint to my bespoke shelves. I have ordered some MDF trim and am just awaiting its arrival. Fingers crossed we can get this project done by next weekend! As always, I have other things I need to move on to! #evertheoptimist
Happy DIY-ing!


Leave a Reply