Door and window hardware can be incredibly powerful additions to your home, bringing a completely new feel to a room. But does installing new door knobs feel like it could be beyond your skills?
I certainly felt that way myself. In fact, I knew installing new door knobs was beyond me. Based on past experience!
I once received a beautiful painted porcelain door knob as a gift. It came from Anthropologie, and it was creamy white with a blue, grey and black filigree pattern. It was beautiful and just my style. I wish I had a picture, but sadly, I do not.
I installed the beautiful door knob on the bedroom door in our little Paris flat. It looked great, but it never worked very well. It would stick or not turn at all, and I really could not figure out why.
One day, a friend stayed at the flat, and I forgot to say anything about the tricky door knob. Of course, she closed the door and got stuck in the bedroom, with no way out. She rang me in the middle of the night in a panic. But as I was thousands of miles away, I could not do much. It was stressful, to say the least, but she did finally manage to break her way out. The door knob did not survive, but I’m sure I would not have used it after that any way!
After that experience, suffice it to say, I was loathe to ever install another door knob. (In hind sight, the knob did not come with a latch mechanism and did not work well with the original one.)
Overcoming My Fear of Installing New Door Knobs
That all changed recently when we recently bought all new door knobs for the flat. We had these terrible builder-grade silver handles that came with the flat. They looked cheap and ugly. And the one on the bathroom door, which gets the most use, would not stay attached no matter how many times I tightened the screws.

I was inspired by the door knobs that Jenna Sue Design chose for her home. The rectangle face plate is so elegant, and I love the dark colour. We went with metal knobs instead of glass, but in a very similar look.


I bought the knobs when I was in the US earlier this year, as I could not find them in the UK. I tried to buy them at Lowe’s, where Jenna Sue bought them. Unfortunately, they were only available on-line and would not arrive in time before we left.
Fortunately, I found the same knobs on Amazon, and they arrived just in time. (The link here is to the UK store, where they now offer them.)
The brand is Schlage, which is a well-known and well-regarded brand in locks and security. We needed six knobs for six doors in our flat. One door is a closet, so it did not need the locking mechanism, but for simplicity, we ordered the same for all the doors.
I will admit, I was worried about the install, following my Paris experience. But I did not want to pay someone to do it. And I wanted to face my fears and see if I could overcome!
While I hit a few snags along the way, Schlage had me covered, with a brilliant step-by-step on-line video. And the Interwebs had me covered for a few tricky bits as well.
Now let me cover you, in case you decide to take on installing new door knobs. in your home. It is fairly straight-forward and nothing to be worried about.
Here’s a guide for installing new door knobs in your own home.
Tools Needed
- Door knob
- Screwdriver
- Drill with hole saw attachments (more on this in a moment)
- Hammer (optional, for loosening the old handle)
The Process
Remove Old Door Knob
The first step is obvious: remove the old door knob.
Reggardless of the type of knob you have, there will be screws that hold the knob on the door. Or there may be some type of face plate that unscrews to reveal the screws holding the knob in place.
In my case, there was a metal ring that unscrewed to reveal the screws. It was a bit tricky to get the ring unscrewed. It had been in place for some time and the paint had formed a bit of a seal around it. A few whacks with the hammer helped to loosen it, and then I could unscrew it. But be careful not to damage the door, or the handle if you plan on keeping it to use on another door.
I then unscrewed all the screws on both sides of the door, and the two door handles slipped apart.
NOTE: You need to unscrew the door handles first, not the plate on the side of the door, which is called the latch plate. You must first remove the door handles before you can remove the latch plate on the side of the door. Ask me how I know this! 🙂
Once the handles are removed, unscrew the latch plate on the edge of the door and remove the latching mechanism. You can then remove the strike plate on the door jamb by removing the screws.
Preparing the Door for the New Lock
Now that you have removed the old lock, make sure the hole for the new lock is the right size. This stumped me with my install, because the hole was too small for the new lock. My lock required a 54mm hole. Simple enough to drill a bigger hole but with a hole already there, the hole saw had nothing to bite into to steady it for drilling.

I considered creating a wood plug for the hole, then re-drilling the correct size. Which is a fine solution. To do this, you cut a piece of wood the same thickness as the door and glue it in place. Once the glue is dry and the plug secure, you can re-drill the new hole using a hole saw. The drill bit can grab the new wood and the hole saw remains steady and in place.
However, I found a simpler solution, as creating filler plugs for six doors would add a lot of time. And it was not necessary if I had the right tool.
A door installation kit provides a template for drilling holes for door handles. This kit includes a plastic template that fits over the edge of the door where the handle should be installed. It provides a clear place to drill with a guide. It is perfect for creating a brand new hole for a door knob on a new door.

But it is also perfect if the hole you have is the wrong size, as I do. The template helps steady the drill in place, and it worked perfectly for my needs. It also has a template for the side of the door, which I needed later. (Stay tuned, more on that coming up.).

The template easily attaches to the door using the screws for the strike plate. You can create these holes with a drill and bit if you are drilling into a new door that has no holes yet.
The template also comes with two saw hole bits and arbor, in standard sizes needed for doors (25mm and 54mm). Once I got the template, it was quick work to drill the right sized hole.

Using a Hole Saw
Let me take a moment here to share some tips, in case you have not used a hole saw before. It is one of my least favourite things to do, because it can be dangerous. But with the right care and technique, you can do this.
First up, take care and be aware that the drill can easily get away from you. You are drilling a large surface area at high speeds, so the drill can easily choke up, or stop spinning, and the drill handle can go flying out of your hands. This can be painful for you, twisting your hands and wrists. And you can damage the surrounding areas, like floors and walls, if the drill twists out of your hands.
To prevent this, make sure you cover the floor if you do not want to damage it. I put down a piece of thick cardboard and a moving blanket. Then go slowly with the drill, and stop often. Do not ram the drill through at a high speed, but take a few passes, starting at a slow speed and building up, but never at the highest speed.
If you feel the drill bit getting stuck, stop, pull the drill bit out of the hole, and then try again. Always go slowly and not at the highest speed. Patience is critical here.
The drill bit gets hot from the friction, and if you try to do it at a high speed and in one go, you also might burn the wood. Burn marks may be hidden by the door knob, but this can also be dangerous if you touch the drill bit while it is so hot. And it is not a good technique, as it increases the chances of the drill choking up and flying out of your hands.
Additionally, you should drill from both sides of the door. You want to minimise splintering and break-out, so start on one side of the door, drill a few millimteres deep, then move to the other side and do the same.

I went back and forth a few times, until the drill bit passed through the entire door and the hole was cut.
You will want to use a bit of force on the drill, so steady the door with your foot and press against it with the drill. But not too much, and do not force it, as again, you can cause the drill to choke up in the wood and lose control of it.
One final note: if you can and have numerous knobs, splurge for a better saw hole drill bit when installing new door knobs. I had two drill bits that came in a kit of bits. I had used them a few times for other projects, but after three doors, my drill was choking up quite a lot and it was taking a lot of effort to cut the holes. It turns out, my drill bits were worn out, which can also be dangerous.
I splashed out on a highly recommended hole saw, the Starrett, that is supposed to last quite a while. Of course, once I received it, I realised the arbor shank I had did not fit, so I had to order that too. While a bit more expensive, I can confirm that the last three holes went much smoother, thanks to a very sharp, high-quality saw hole bit.

So in summary, using a hole saw can be a bit intimidating, and again, it is not one of my favourite parts of DIY. But it is necessary when installing new door knobs. With the right care, and taking it slow and steady, you’ve got this!
Installing the Door Knob
Once you have the correct sized hole drilled, it is time for the fun part: getting the door knob in place.
First, install the latching mechanism. This slots in to the hole in the side of the door, and you can see it come through the large holes you have drilled. Make sure you install it in the right direction. The flat part of the latch should face the swing of the door. In other words, the flat part sits against the door jamb and holds the door in place. (I installed mine the wrong way on the first go, so the door would not stay closed! An easy fix, just take it out and switch it around.)

Fit the latch plate against the door to see if it fits. It should be flush with the door, and if you are replacing a handle, chances are good it will fit right into the cut-out from the previous plate. You might need to chisel out a bit of wood to make it fit if the shape is different.

To adjust the sizing of the cut-out, put the latch and latch plate in place, and use a chisel or a pencil to create an outline of the cuts needed. Remove the latch and latch plate, and chisel the wood out, using slow and shallow cuts. Keep doing this until the face plate is flush with the door and will not prevent the door from closing. Use the screws to secure the latch plate with latching mechanism in place.
Next up, install the two door handles on either side, ensuring the long pin goes through the locking mechanism. In my case, there were instructions to remove one of the door knobs from the plate so I could reach the screws.

Once the two door handles are in place, screw them to one another, using the screws provided. Make sure the handle and/or face plate are level, and do not over-tighten, as you do not want to strip the screws. Check that the door handle turns and the locking mechanism works.
The Final Step: The Door Jamb
Finally, you need to install the strike plate on the door frame jamb. Just like the latch plate on the edge of the door, you want the strike plate to sit flush with the frame. It should not interfere with the opening and closing of the door. It might fit in the previous indent from the old face plate, but if it does not, use the same technique to chisel the wood away until it fits.

Pay attention the plate is in the right position for the locking mechanism to slot in place. This should be correct from the old door, but just in case, you can mark the position of the lock on the door jamb with a pencil by holding the door close to the jamb. Then install the face plate according to the marks.
The (Almost) Final Reveal
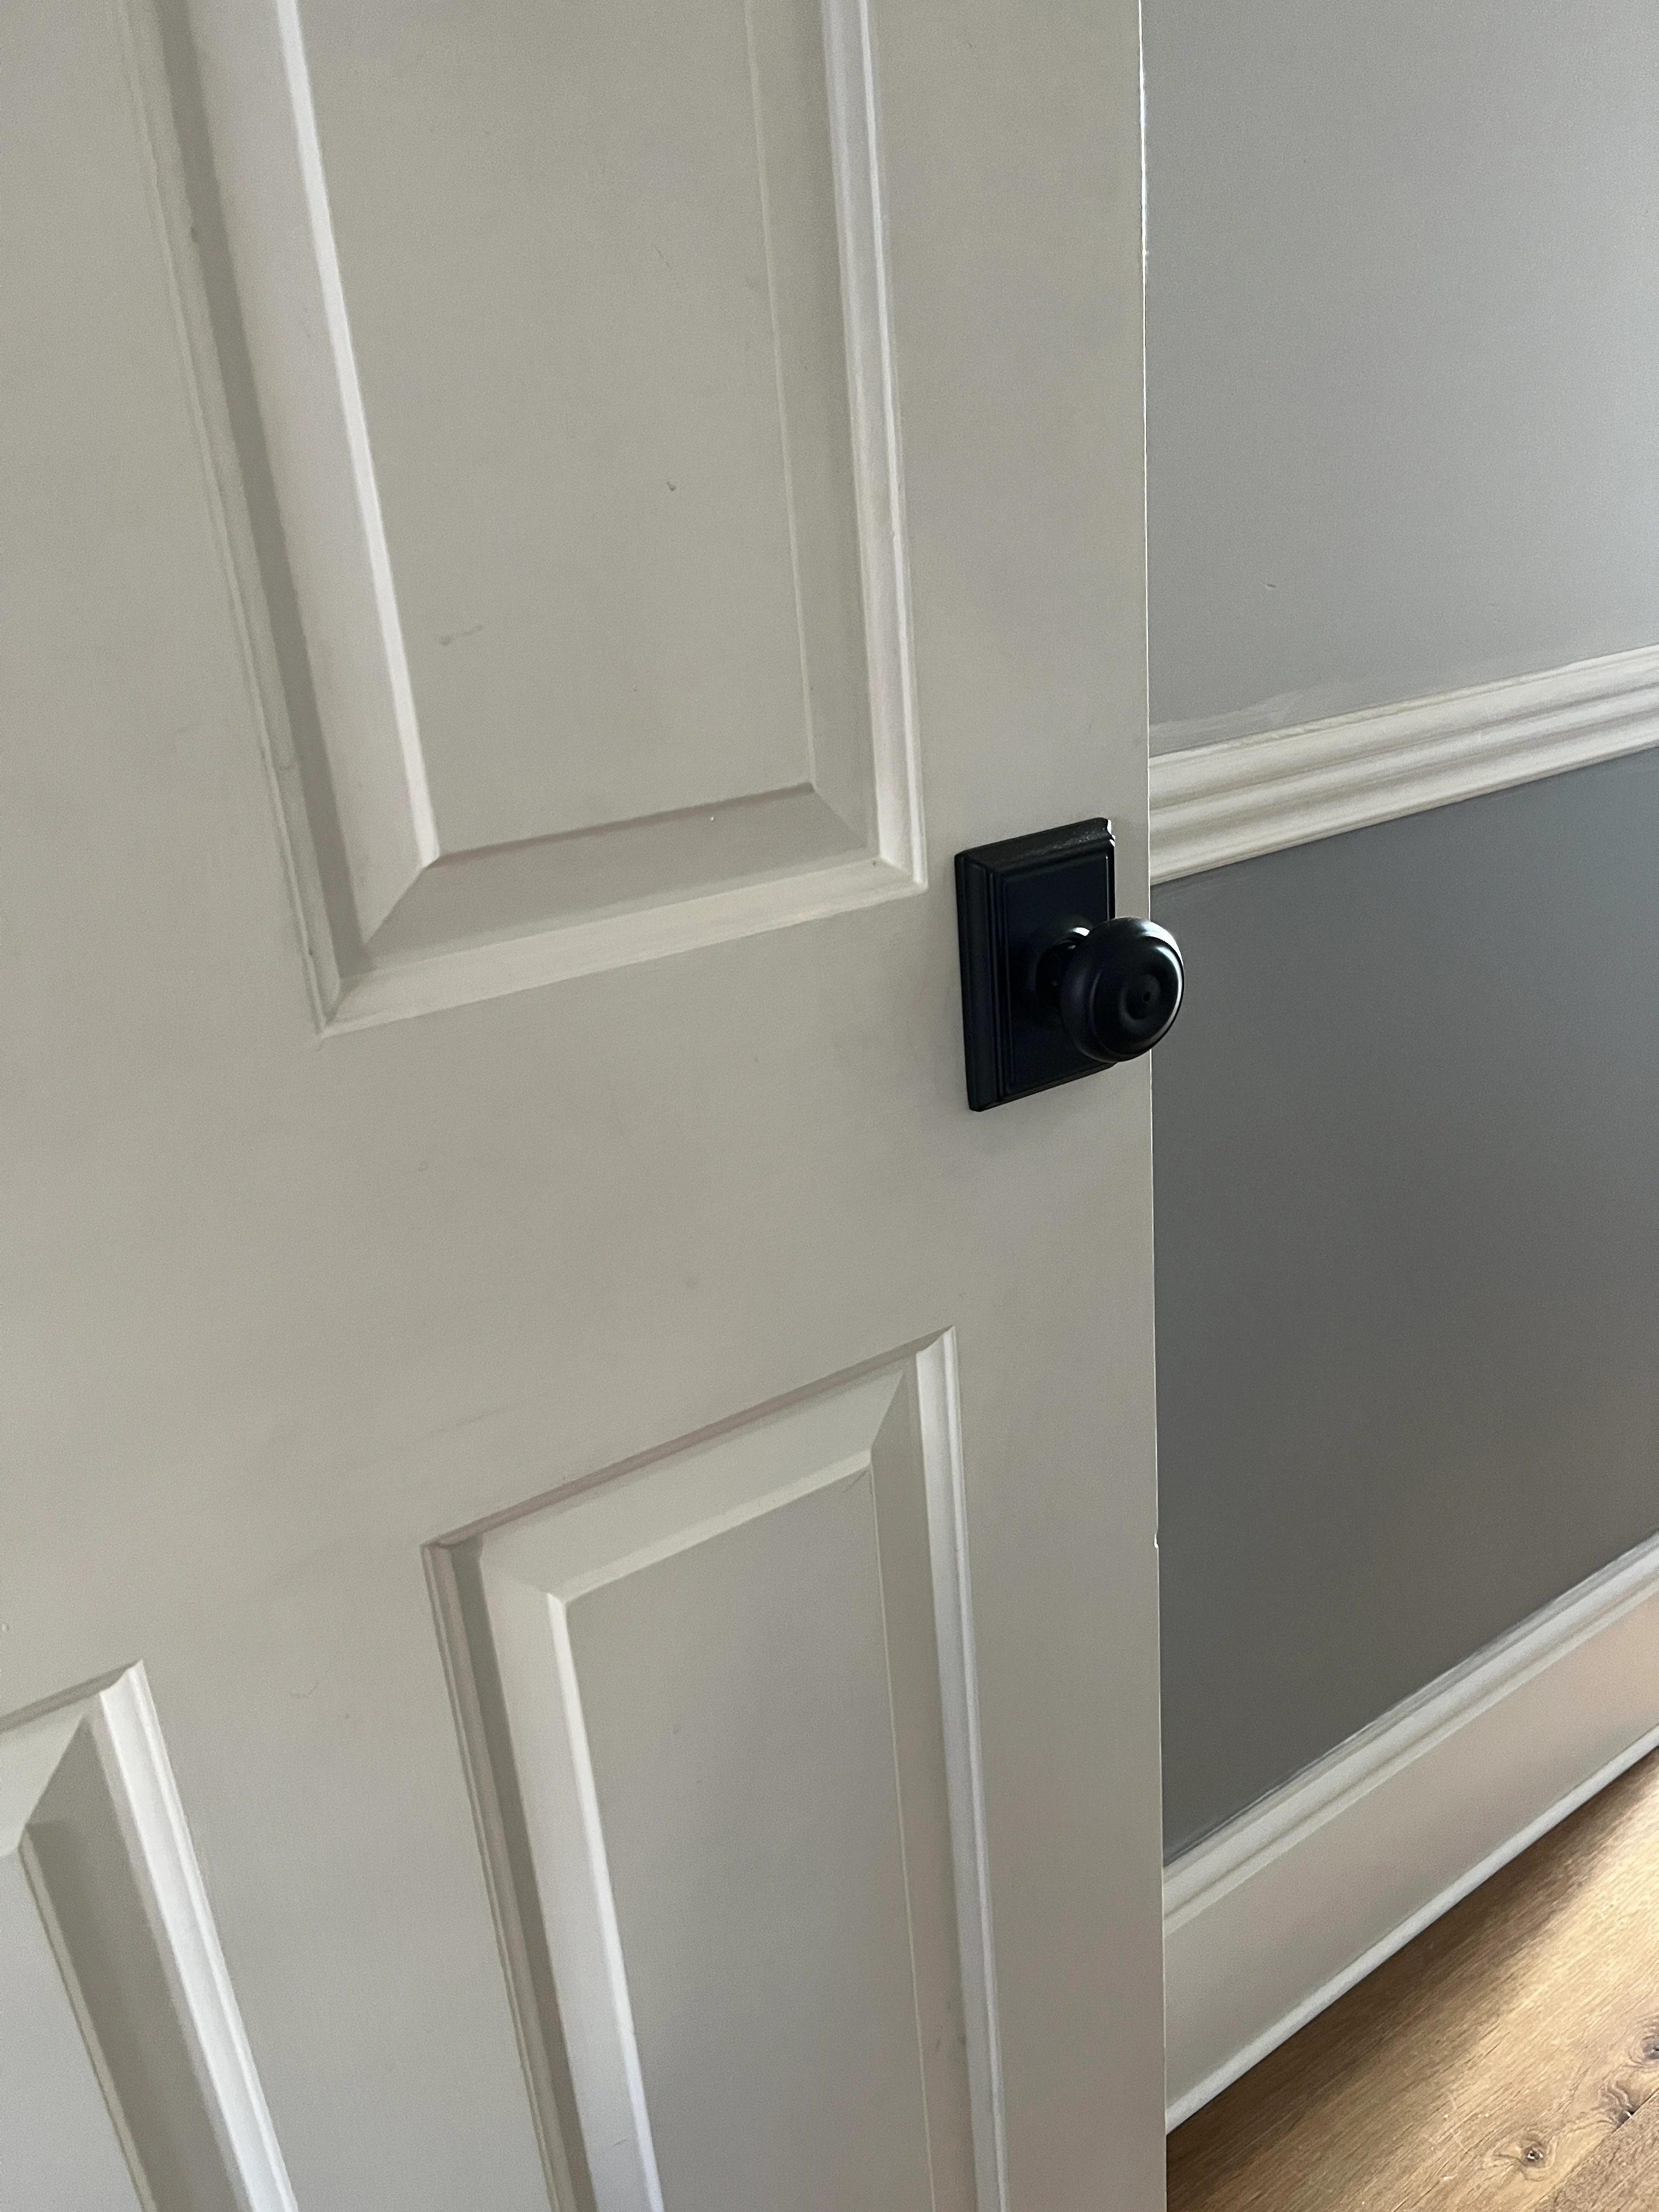
Here is my first lock installed. I love it, and it works beautifully! The face plate is so elegant, and I love the dark bronze colour.

I installed four of the six locks over the course of a week, not including the delay with ordering the door installation template and the new hole saw and arbor. Every door went in just like the last. The hardest bits were removing the old door knobs and drilling the holes. Installing new door knobs is not so difficult, and the impact is absolutely worth it.

A Slightly Different Installation
And then I got to the last two doors, for the two bathrooms.
The original handles had separate locking mechanisms, so I knew I would need to plug the second holes, because the new handles have all-in-one locks.

I removed the handles and discovered very different locking mechanisms, with huge cut-outs in the door jambs.

I needed to plug the door jamb, as well as the second hole for the lock, so I cut a piece of wood the size of the hole in the jamb and glued it in place. Fortunately, I have a lot of spare wood sitting around just for this purpose.

I then drilled out a hole for the latching mechanism into the new wood in the side of the door, using a 25mm hole saw. The template I purchased includes this sized hole saw and the , and it includes the template for this hole too, which is just brilliant.
If you need to do the same, make sure the wood plug is secured and the glue dry. I also used a clamp to hold the piece in place and ensure it did not shift from the weight of the drill and hole saw.

Once I had drilled the side hole, I then drilled the larger hole for the door knob, which went through both the door and the wood plug. And from there, installation was essentially the same as with the other doors.
I did need to do a bit more chiseling for the latch plate, and I filled and sanded the hole left by the locking mechanism, although the wood plug covered most of the hole, except a thin place on the actual door.
The jamb on the frame also needed to be adjusted, as there was a huge cut-out for the two piece handle and locking mechanism. I was able to get the face plate hung without making any modifications, but it does not look very nice with a huge gap in the wood.

I need to properly fill this with a wood plug as well, but as we were having guests over for a dinner party, I needed to make sure we had a working handle in the guest bath. In the coming weeks, I will come back to this, as part of several frame plugs that I need to cut. (Because I changed over the bathroom door to swing inward instead of outward, I also need to cover the hinge cut-outs, so I will do this all at once.)

Besides the less-than perfect frames for the two bathrooms, these new door knobs are spectacular.


But have you ever noticed, for every task you complete, a new one or two seems to get added to the list. This time, with the addition of new door locks, I now can see how desperately I need to paint the doors. They look a bit dingy against such stunning knobs. I am slowly trying to get all the trim and doors in the house painted, room by room. But that will have to be for another day.
For today, I am going to bask in the beauty of my new door knobs and the new-found skill I’ve gained, installing new door knobs. Combined with my efforts to trim down doors that scrape the floor or rug, and changing the swing of a door, I am building quite the skills working with door.s

What do you think? Will you give this project a try in your own home? Go ahead, you’ve got this!
Happy DIY-ing!


Leave a Reply