
As I continue to improve our tiny little terrace, today I am excited to share a quick and impactful project with you: how to refinish metal furniture. Sometimes, a quick project with immediate results can be just what you need, and this project fits the bill perfectly.
The new slatted privacy wall and the addition of a living wall to our terrace have dramatically improved the space. It is so cozy and comfortable compared to before.

But in the corner of the terrace, I still had an eyesore to contend with. A freestanding metal shelf, meant to hold plants but really just gathering rust.

I was a bit intimidated by the idea of a huge effort to refinish metal furniture. How challenging would it be to remove the rust and refinish the shelf? I do not have days or weeks to remove the rust so the shelf could be repainted.
I imagined needing to use the multi-tool with some type of metal sanding attachment, or perhaps some mix of chemicals, left on to dissolve the rust before needing further sanding and fillers for the rusted bits. It was all overwhelming and not how I wanted to spend my limited time for DIY-ing.
Imagine my surprise when I discovered that a few simple tools and an afternoon of my time were more than enough to refinish metal furniture and bring this shelf back to its former glory!

If you are looking for a quick and simple project with high impact, consider dedicating an afternoon to refinish metal furniture for your garden or terrace. A quick win, and certainly something you can benefit from as we head into summer.
Let me share the process with you.
Tools Needed
- Metal furniture
- Steel wool or a wire brush
- Vinegar or baking soda (depending on how bad the rust is)
- 220-grit sanding block
- Outdoor metal paint: I used Hammerite in black
- Paint brush
- Soap and water, and cleaning rags
The Process
First up, make sure you are in an open, well-ventilated space. Outdoors is ideal if possible.
Lay out a large sheet of plastic, to capture all the rust particles and catch any paint drips or spills. Place the metal furniture to be refinished on the plastic, and have your tools nearby.

Note: Depending on how old your metal furniture is, you may need to take precautions against lead paint. My shelf was purchased at Homegoods in the US about 20 years ago, so I knew that lead paint would not be an issue. If it could be, wear protective gear, including eye mask and respirator. (This is the respirator that I have, which I can highly recommend and is not terribly expensive.)
Remove the Rust
The first step to refinish metal furniture is to remove the rust. Begin by rubbing the steel wool over the piece of furniture, working at the rust spots. You should see the rust fleck right off and the area become smoother and more uniform. Continue going over the furniture, removing the rust and returning a flat and even surface along the entire piece. Make sure to get into grooves and joints, so these areas are freed of rust too.


In my case, the steel wool worked wonders. Most of the rust came right off and the remaining surface was uniform and clean. You can still see where the rust was, but running your hand over it, it is smooth and unnoticeable. The rust was not as bad as I expected, as it was really only surface rust.
If the steel wool does not work in certain areas, or if there is a significant amount of deeply embedded rust or rigid peeling paint, you might need to use the wire brush and perhaps a paint scraper. Go gently, so you do not damage the metal, but brush and scrape away the chipping paint and any significant areas of rust that the steel wool could not get. In extreme cases, you might need to use a chemical paint stripper to remove stubborn areas. If so, make sure you choose one that works on metal, and follow the instructions.

For my shelf, I had a few deeper rust spots, so I sprayed some vinegar on them to help dissolve them. You can also use a paste made of water and baking soda. Apply the vinegar or the baking soda paste, let it sit for 10-15 minutes, and then wipe it away. Work at the rust with the steel wool or wire brush, and it should come away.
Sand and Clean
Once you’ve removed all the rust and have a fairly smooth surface, do a light sanding with a high-grit sandpaper. This just helps further ensure a good surface for painting. I used a 220-grit sanding block to lightly smooth over the surface. Test the block out on a hidden area to make sure it does not mar the surface before tackling the entire piece of furniture. Unless your metal is really soft, it should be fine.
Next up, clean the furniture with soapy water and rags. Just a touch of washing-up liquid in some warm water is perfect, or you can use sugar soap dissolved in some water.
Let the piece dry thoroughly. You can also dry it with rags, if you are in a hurry for the next step (which I was!).
Prime and Paint
Now you are ready for the real transformation, with the addition of paint.
Choose a paint meant for metal and for exterior use, assuming your furniture is for the garden or terrace.
I used Hammerite, in smooth black, which includes a primer and paint in one. Remember, I wanted this to be a quick and easy project, so the idea of not having to prime and then paint was quite appealing to me. The directions say you can paint over rust, but I would still take the steps above to remove as much rust as you can.
If your metal is gouged or damaged from removing the rust and old paint, you might want to prime with something more substantial that will help cover the gaps and give a smoother surface. In this case, I would recommend Zinsser Bull’s Eye 1-2-3, which is a magical product that helps cover all kinds of issues. Make sure you get the one for metal surfaces in this case.
Ideally, spray painting would be the perfect approach for metal furniture. I have not yet taken the plunge to purchase or learn spray painting, so it was a paint brush and roller for me. Because the surface areas were not too big, I decided in the end to just use a brush for the entire piece. A roller could have been good for the shelves, but the brush worked fine. I used a thick coat of paint, so the brush marks just disappeared.

Choose the method that works best for you and for what you have to hand.
I used an oil-based paint with a strong smell, so again, make sure you have good ventilation and plenty of protection for the surrounding areas.
For my shelf, one coat of paint was sufficient. It took a good 12 hours to dry, so I left it out overnight. Sadly, we had a quick bit of rain about 3 hours after I had finished painting. It only lasted a few minutes and was quite light, but the shelf was too wet to move, so I had to leave it in the rain. The next morning, it had some rain spots, but it was not too bad. I could have repainted it, but as it lives outdoors and will be covered in plants, I decided not too. Again, this is meant to be a quick and easy project!

While I was at it, I also painted this little wire plant carrier in black, as it needed a bit of a refresh too.

A New Piece of Furniture With High Impact
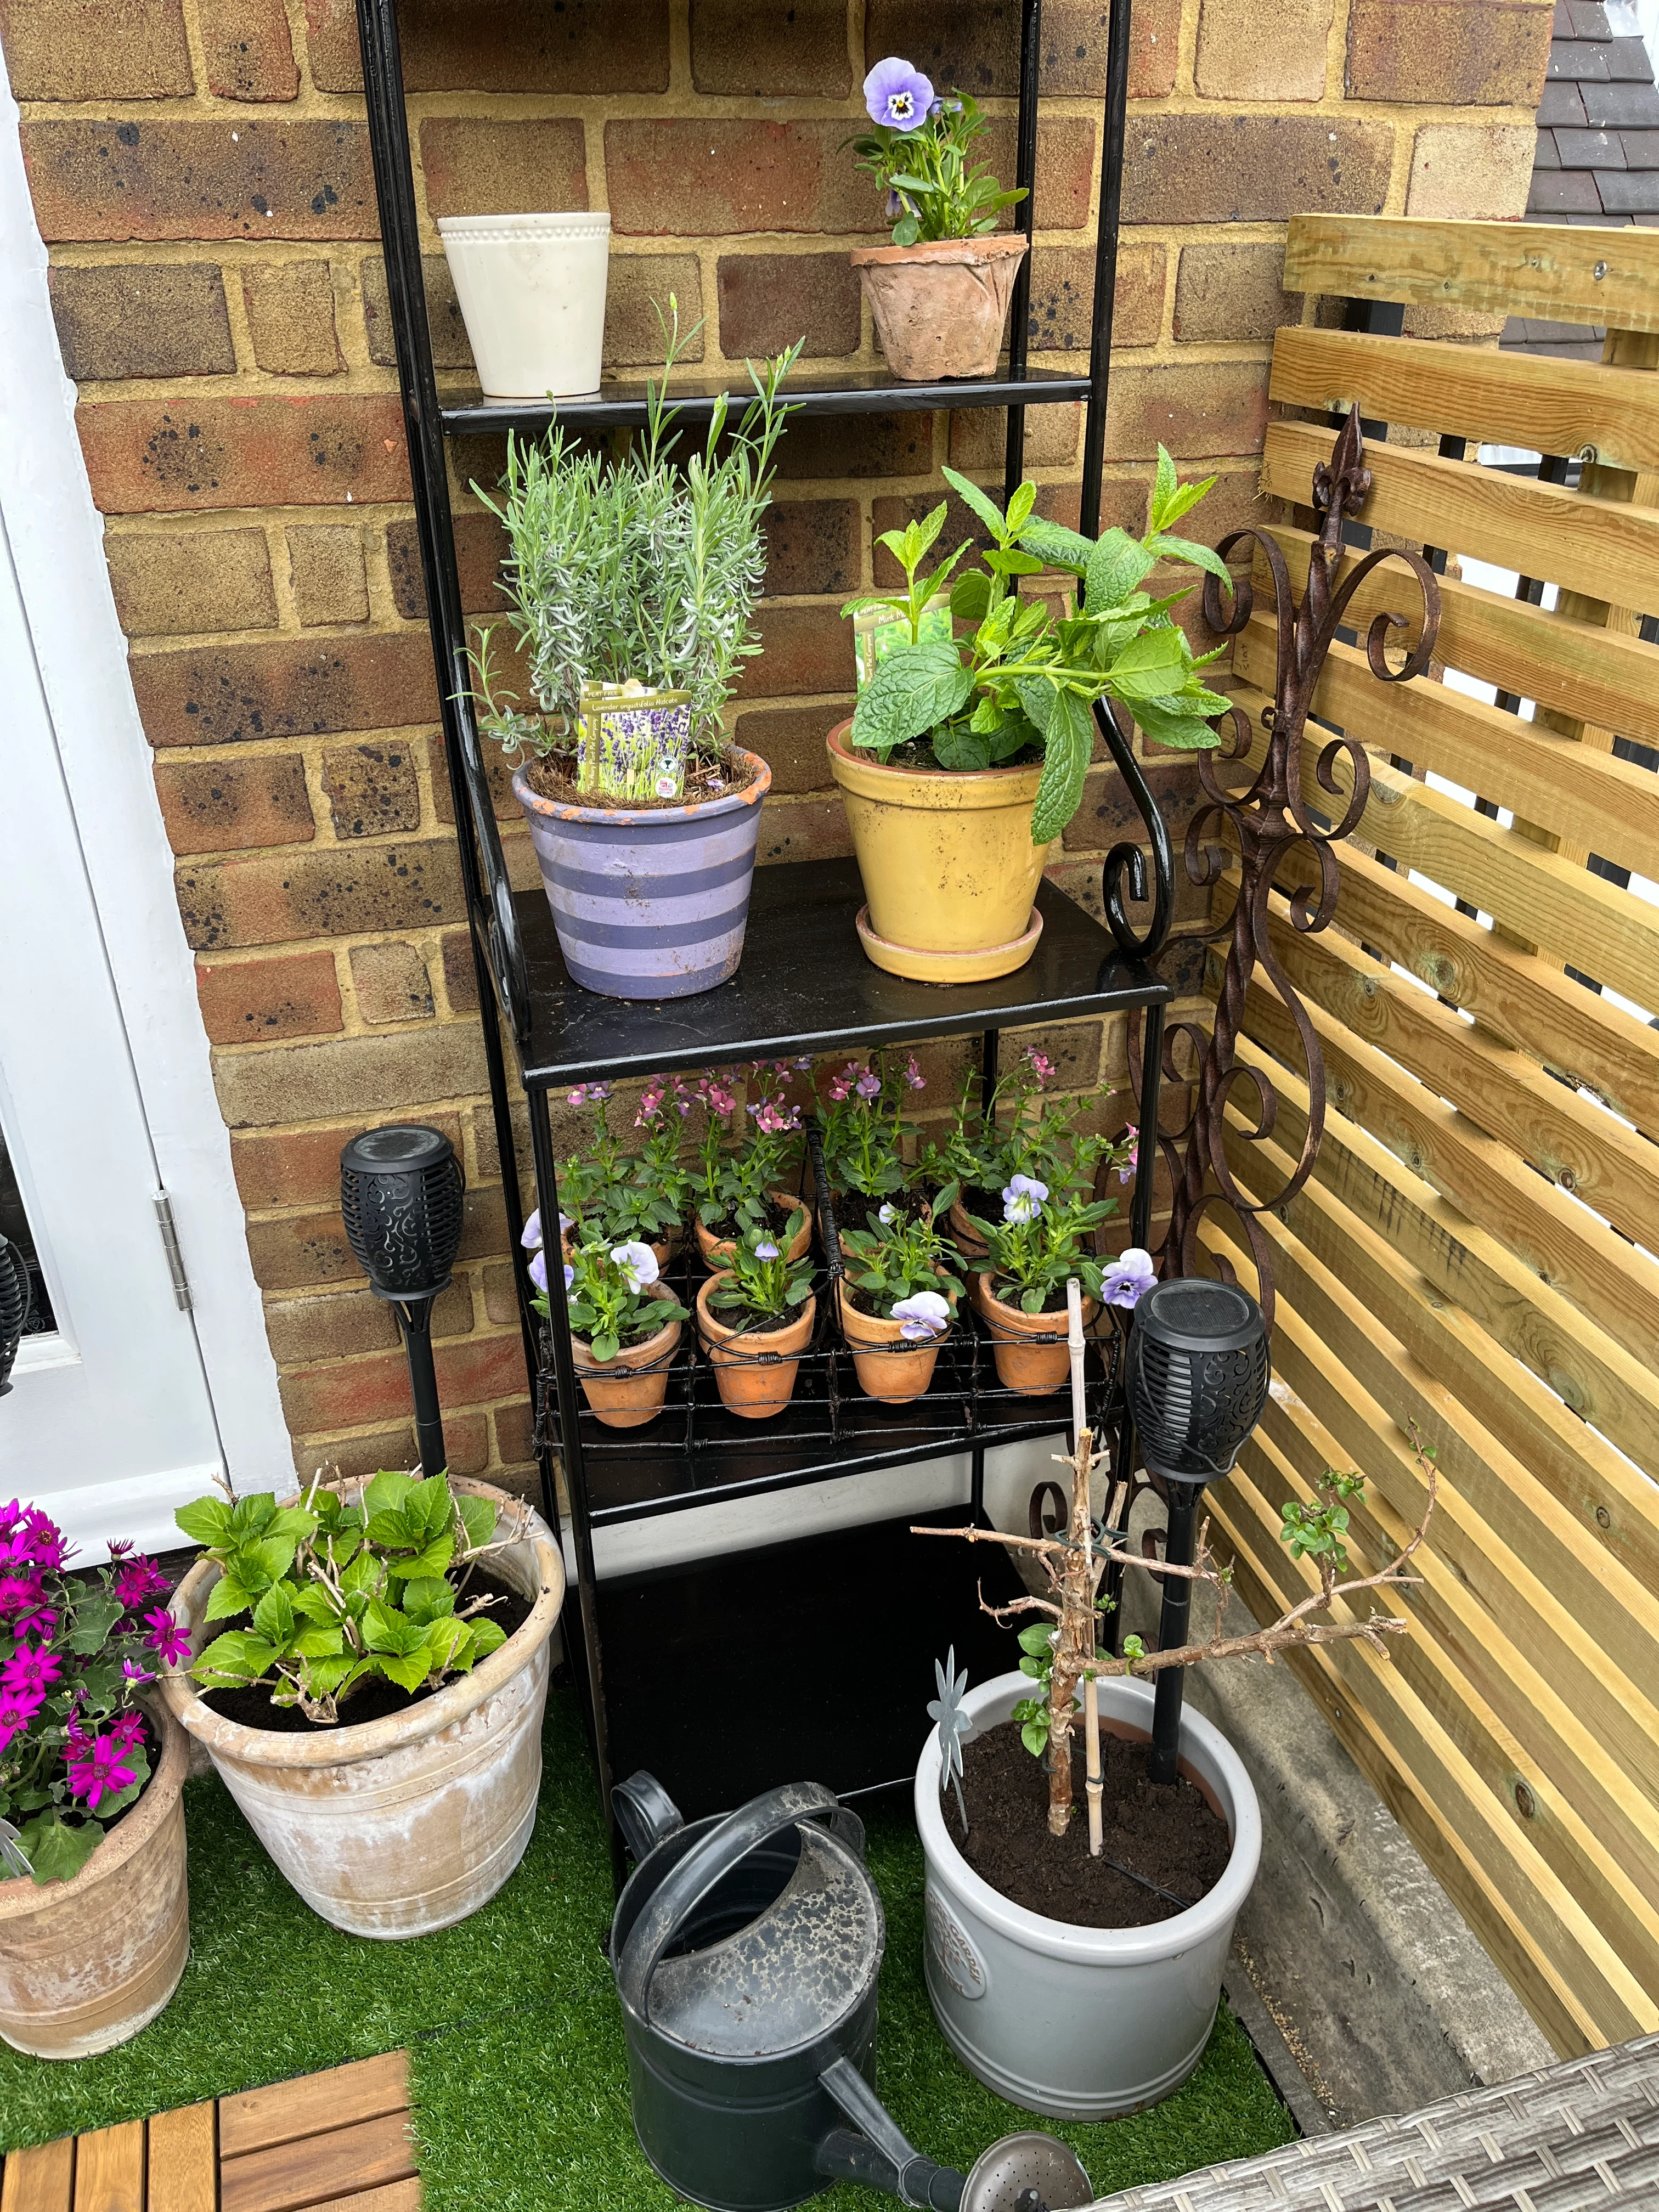
Once the paint was dry, I put the shelf in place. What a difference! I love the black paint, which is dramatic compared to the former brown colour of the shelf. The shiny paint finish also makes it stand out compared to the previous matte finish. Overall, it looks so fresh and clean.
As well, it should hold up with the addition of the outdoor paint, and I’ll clean it each season and touch up any areas as needed, in hopes it can last for many more years.
The addition of plants is the final touch, bringing a warm and inviting atmosphere to the terrace, and making it even more of a cozy space for relaxing and enjoying the sun we are having here in the UK.


Good luck if you decide to tackle a similar project to refinish metal furniture. It really is a surprisingly easy and quick project that can deliver immediate and high impact in your garden or on your terrace.

Happy DIY-ing!


Leave a Reply