

The day has come. Building custom shelves. This is so much more than assembling pre-made shelves. This is building something from scratch.
I must admit, this is the part of the build I am least confident in. Somehow, I need to build custom shelves big enough for the television while accommodating a slanted ceiling on one side. Pre-made shelves are not an option. And there is very little on the interwebs about these challenges to guide me.
I am on my own on this one.
Although, after lots of reading, Woodshop Diaries has convinced me that I can do this. She offers great tutorials on building shelves, outlined step-by-step.
The Materials for Building Custom Shelves
I’ve ordered the plywood from a local lumbar yard. After reading poor reviews of the B&Q plywood offerings, I decided to try something else. I found great reviews for Hitchcock and King on-line and called to discuss my needs. They were helpful and could deliver the plywood to me as well, which was a big help.
Since my tool collection is still quite small, I needed them to cut the shelves for me. I am not yet ready to invest in a circular or table saw. (Not to mention, I do not have room for a table saw!) I debated going to BLOQs, but getting all of these board in my car would be impossible.
The lumber yard charged a small fee for the cuts, but it seemed reasonable for the convenience. Once everything for my custom shelves arrived, I labeled the pieces with masking tape to keep everything organised.
Pro Tip: Double- and triple-check your measurements. I made a mistake on the length of the counter top board. It can be salvaged, I will just have two seams instead of one, and for the expense, I will make it work. Learn from my mistake!
My Newest Tool for Building Custom Shelves: A Pocket Hole Jig
I’ve purchased a Kreg pocket hole jig and the associated screws specifically for building custom shelves. Everything I’ve read on the DIY blogs says pocket holes are one of the best ways of joining wood.
I recognise that to the purist woodworker, pocket holes are not as good as a dovetail joint. But then again, neither is building with plywood. I am going to accept my limitations and go with pocket holes. But, I do want to learn dovetails, mortise and tenon joints and biscuit joints at some point. Just not for today.
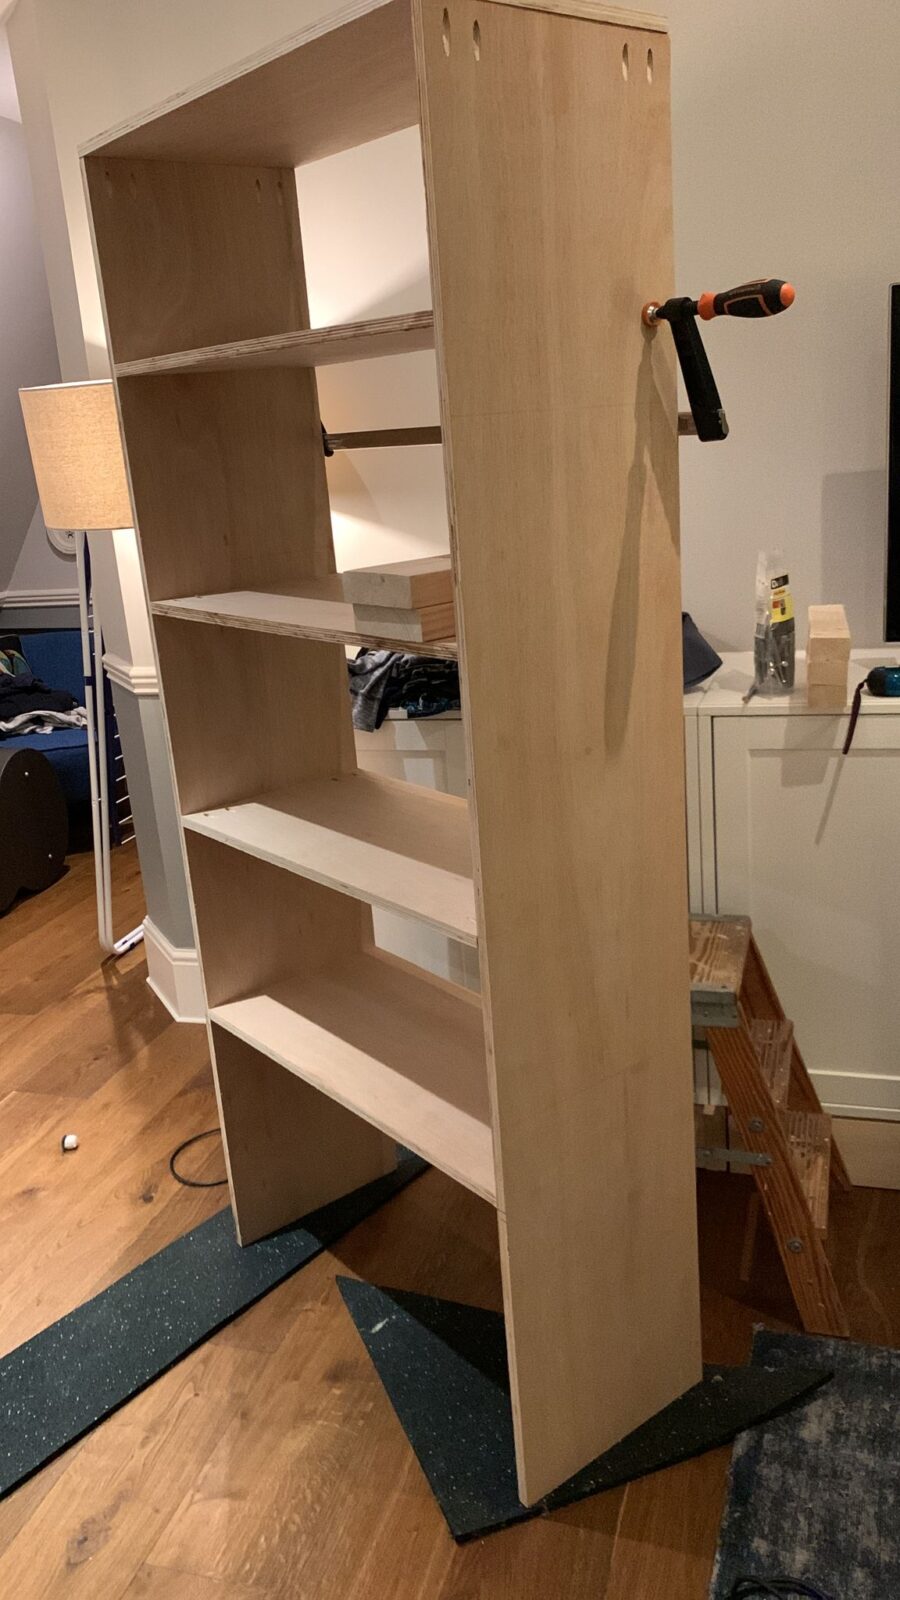
Building Custom Shelves: Section 1 is the Easiest
I started with the easiest section first. The left side is a straight set of shelves, the width of the Havsta cabinet it sits on. The depth is 35cm, which is 10cm less than the Havsta cabinet. This will give a slight overhang on the counter top, with a bit of depth and interest.
The length of the section shelf is 80cm, and there are 4 shelves of different heights. The bottom shelf, which is actually the countertop, is 45cm high, to accommodate a few decorations we have. Specifically, a unique turntable that plays vinyl records on their sides, so you can watch them spin. It is mesmerizing!

The next three shelves from the bottom are a height of 33cm. The top shelf is slightly shorter at 30cm. This leaves space for the countertop height (18mm plywood) and trim across the top.

I drilled pocket holes into the boards, paying close attention to ensure they are on the least visible side. I’ll fill the holes in, but still better not to see them where possible.
To ensure a straight edge and perfectly square corners, I’ve invested in 4 corner clamps. I’ve also needed to buy a long clamp that can span the 80cm of the shelf. I think these clamps might be my favourite tools. I love the precision. There is something very satisfying about tightening the clamp and seeing the wood pull into a straight formation.
The first section was fairly easy, and I completed it in a few hours. I love it.
My husband helped me to hoist it up on to the Havsta cabinet, and it looks good!
Of course, this was the easiest one. Next up, the 2nd and 3rd shelves are tricky.
Section 2 Must Accommodate the TV
Section 2 has slightly different measurements: the bottom two shelves and part of the right side must be eliminated to accommodate the television. It will have only 3 shelves at the top, with a long left leg and a short right leg.
It is not difficult to build, just a bit awkward without a second side to hold it up. I will attach section 2 to section 3, which is the opposite configuration, with a long right leg and short left leg. This leaves a large space for the TV, with three shelves across the top.
Once section 2 was built, we hoisted it up beside section 1. We needed to prop up the right side with spare wood because it does not have a right leg. I feel positive about conquering the TV challenge.

Section 3 Has an Angled Ceiling Challenge
In addition to the TV adjustments, we needed to angle the top right of section 3 to fit under the ceiling.

I started with the easy parts. I attached one of the shelves that is not impacted by the angle to the short left side. Here, I need to make sure the shelves are level and they line up to the shelves on the left sections.
The shelf directly above the TV is actually one long shelf that spans sections 2 and 3 and connects them. The divider between the two sections will sit on top of the long shelf and be screwed into it.
Now for the angled bit. This is where it really gets tricky. The height of the right leg is shorter, at 133 cm (vs 180cm of sections 1 and 2), to accommodate the angle. To check it, we hoisted the shelf back in place and put the right leg of shelf 3 in place. I clamped it with the corner clamp to the long shelf above the television. We took it back down and I attached it with pocket holes. Up it went again, and I measured the top shelf, which is under the angle.
This took a lot of work, as it was difficult to figure out the angles. I was missing a crucial formula and despite doing okay in maths in school, I could not figure it out. So it was a lot of trial and error.
To make matters worse, my miter box could only cut about 3/4th of the width of the board. I used my jig saw for the remainder of each board, but it was not the most precise. As this will all be hidden by trim and caulk, I think it will be okay.

I finally got the top shelf on section 3 in place and level/square. We hoisted it up again, this time without needing the additional wood to prop it up, and it looks good.
Section 4 Is All Angles
It took a few days before I could tackle section 4. I really needed to get in the right mindset, as this is the hardest bit. The smallest but most complex of the four sections, it is entirely under the slanted ceiling. Since I am still not confident of the angles, I am not sure how it will go.
At first, I planned to build it off of the angled ceiling. I need the same gap between the angled ceiling and the shelf as the flat ceiling, and building off the ceiling seemed the most precise approach.
To do this, I attached furring strips to the ceiling at intervals, using anchors. Next, I attached a piece of plywood cut to size to these strips. This is the right hand side of the shelves / top of the angled shelves. But I could quickly see it was not even as the ceiling/wall is uneven, and this would not work. I took it down and sat defeated in front of the shelves, unsure what to do.

I finally decided to just build the shelf on the ground like I’ve done the others. Then I could slot it into place. The trim could cover the uneven gap between the wall / ceiling and the shelf.
First, the left leg, which is slightly shorter than the right leg of section 3. I measured this by holding it up next to section 3. Not the most precise, but it works.
There are only 2 shelves in this section, so I attached them to the left leg. I measured the length of each shelf by clamping it to the left leg and marking the end. I angled the ends of both boards on the right side to match the slope of the wall / ceiling.
With the left side of the shelves in place, I attached the right side / angled top of the shelves. The corner clamps do not work on angles other than 90 degrees, and I could not use pocket holes. I screwed angled screws from the top of the board into the side of each shelf. It is not precise, and I broke a drill bit at one point, but I got it done. These are small shelves and do not need to hold significant weight.
Sadly, when we put the shelves up, one of them was not level, so I had to redo it. But I quickly fixed it, and the shelves are done.
Caulk and trim are my only hope to make this work. It is a bit rough, but I hope it is going to look okay in the end.
Stay tuned next week, to see how things progress. Do you have any tips for angled shelves and ceilings? Clearly, I need to refresh my maths skills!
If you missed the previous steps of my Custom DIY Shelves, catch up here:


Thank you for your post. I really enjoyed reading it, especially because it addressed my issue. It helped me a…