
The day has come … finally. The big reveal of a project that has taken a long time, but which I believe is well worth the wait. DIY custom shelves in our lounge.

When we last left off, the DIY custom shelves were almost complete, and I had even done a bit of styling (mostly because I needed to get things back in place, as we were living in a mess while I worked!).
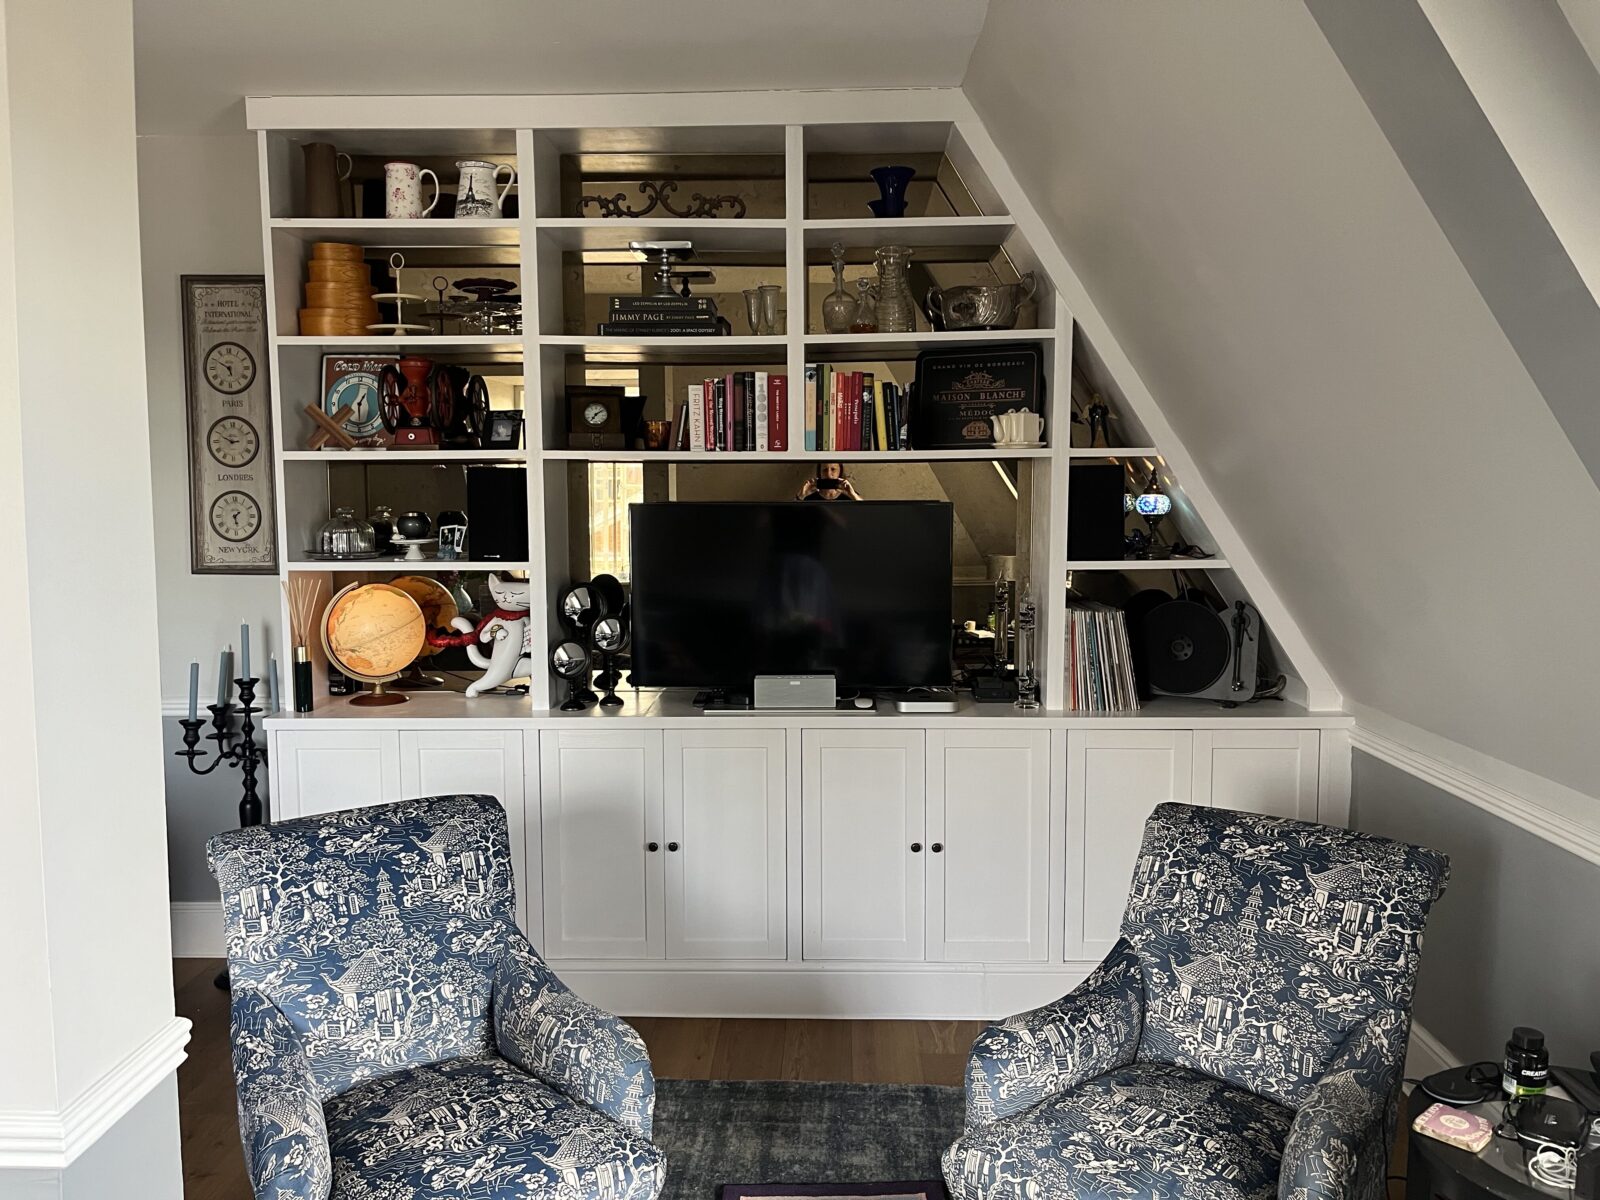
Today, I want to share the final step that I think really makes the shelves … antiqued mirrors on the back wall, to reflect light and bring a bit more warmth to the space.

This idea came from our original inspiration, the shelves in our Paris flat. A small space, the Paris flat used mirrors in several places to give a sense of depth and space.


Given that our London flat is not much bigger, I wanted to apply the same principle, and these DIY custom shelves were the perfect place.

For the mirrors, I considered doing the antiquing myself, following several blog posts, including this one from Jenna Sue Design. But after months of work, my husband convinced me that this once, purchasing rather than making would be a good idea. He also insisted on professional installation, since the tiniest measurement mistake could result in cost increases.

A friend recommended Lister Glass, and I chose the bronze antique mirror, to bring some warmth to the space. We tend to go more with silvers and chromes, but we had just purchased the cutest bronze drinks trolley, and I thought this could be a nice complement. The cabinet knobs are also a bronze colour.
Installation was simple, and while the cost was not insignificant (approximately £1200), it was worth it for the convenience and confidence of it being right. I can highly recommend Lister for the service, selection and quality. (This is not a paid recommendation, just a review of my experience.)

A lesson for the future: it would have been better to plan for the mirrors before I built the shelves. Then, we could have bought 4 large mirror panels and built the shelves over them. But, in typical Stacey-style, I did not think of this until after. Which meant we needed 15 custom pieces, most of which were different sizes and shapes. This added to the cost, so learn from me on this one.
Regardless, I am so pleased with the result and how much it elevates our DIY custom shelves.
And a few more pictures to get the full effect.


I’ve titled this post final reveal, but there are still a few things I may do in the future to further enhance these shelves. My husband would like more ornate trim, and I’ve been looking at cornices and other effects that might bring a bit more fun to the shelves. (I need another line of caulk along the top too, as it shrank a bit since application.)
We also may repaint the shelves in a shinier paint finish. This is F&B Wevet in Estate Eggshell, which is a light sheen. While I do not want a full gloss, a bit more sheen may further help reflect light. As glossier paint shows off any marks in the wood, I will need to improve my sanding technique a bit in a few places.
And finally, I really want to add lighting. Again, I should have planned for this, as now will be difficult to hide any wiring. If we redo or augment the trim, that will be the time to add a string of lights, like these.
For now, though, I plan to just enjoy what I have built. There is always room for improvement and things I could have done differently. But considering that I am not a professional woodworker, I am really pleased with the shelves I have built for our lounge.
One last picture, because I cannot resist. A side-by-side comparison with and without the mirrors. What do you think?


I’d love to hear your thoughts on the final result, the potential future improvements, and your own experiences.
In the meantime, I’m already planning my next project. Watch for details coming soon! (Hint: it involves the kitchen.)
If you want to see the entire build, see parts 1, 2, 3, 4 and 5. The inspiration post is here.


Thank you for your post. I really enjoyed reading it, especially because it addressed my issue. It helped me a…