
Do you have flooring that you want to change but are not sure what to do? Have you considered installing vinyl tiles as a short- or long-term option? Today, I am sharing my experience and a tutorial for how to install vinyl tiles to update a space.
We did a mini-renovation of our kitchen last summer, and one of the top issues to address was the ugly orange tile floor. Who chooses orange tile?

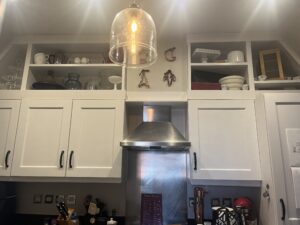
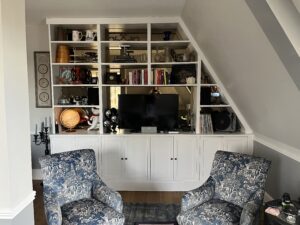
We added in more storage, including a luxurious appliance garage (which still needs doors added), a roll-out spice rack, and shelves in the space under the angled ceilings. We refreshed the wood cabinets which also had an orange hue, by painting the uppers in a creamy white and the lowers in a sky blue. It looked great, except for that orange tile.


I painted the orange tile at the same time I painted the cabinets, but it was not a success. The paint started peeling almost immediately, and in such a high-traffic area, I cannot recommend this approach.

We’ve lived for awhile with the orange tile peeking through the white paint, as if to mock me. It has continued to get progressively worse with more and more orange peeking through. The result is that the overall floor looks dirty and dingy.
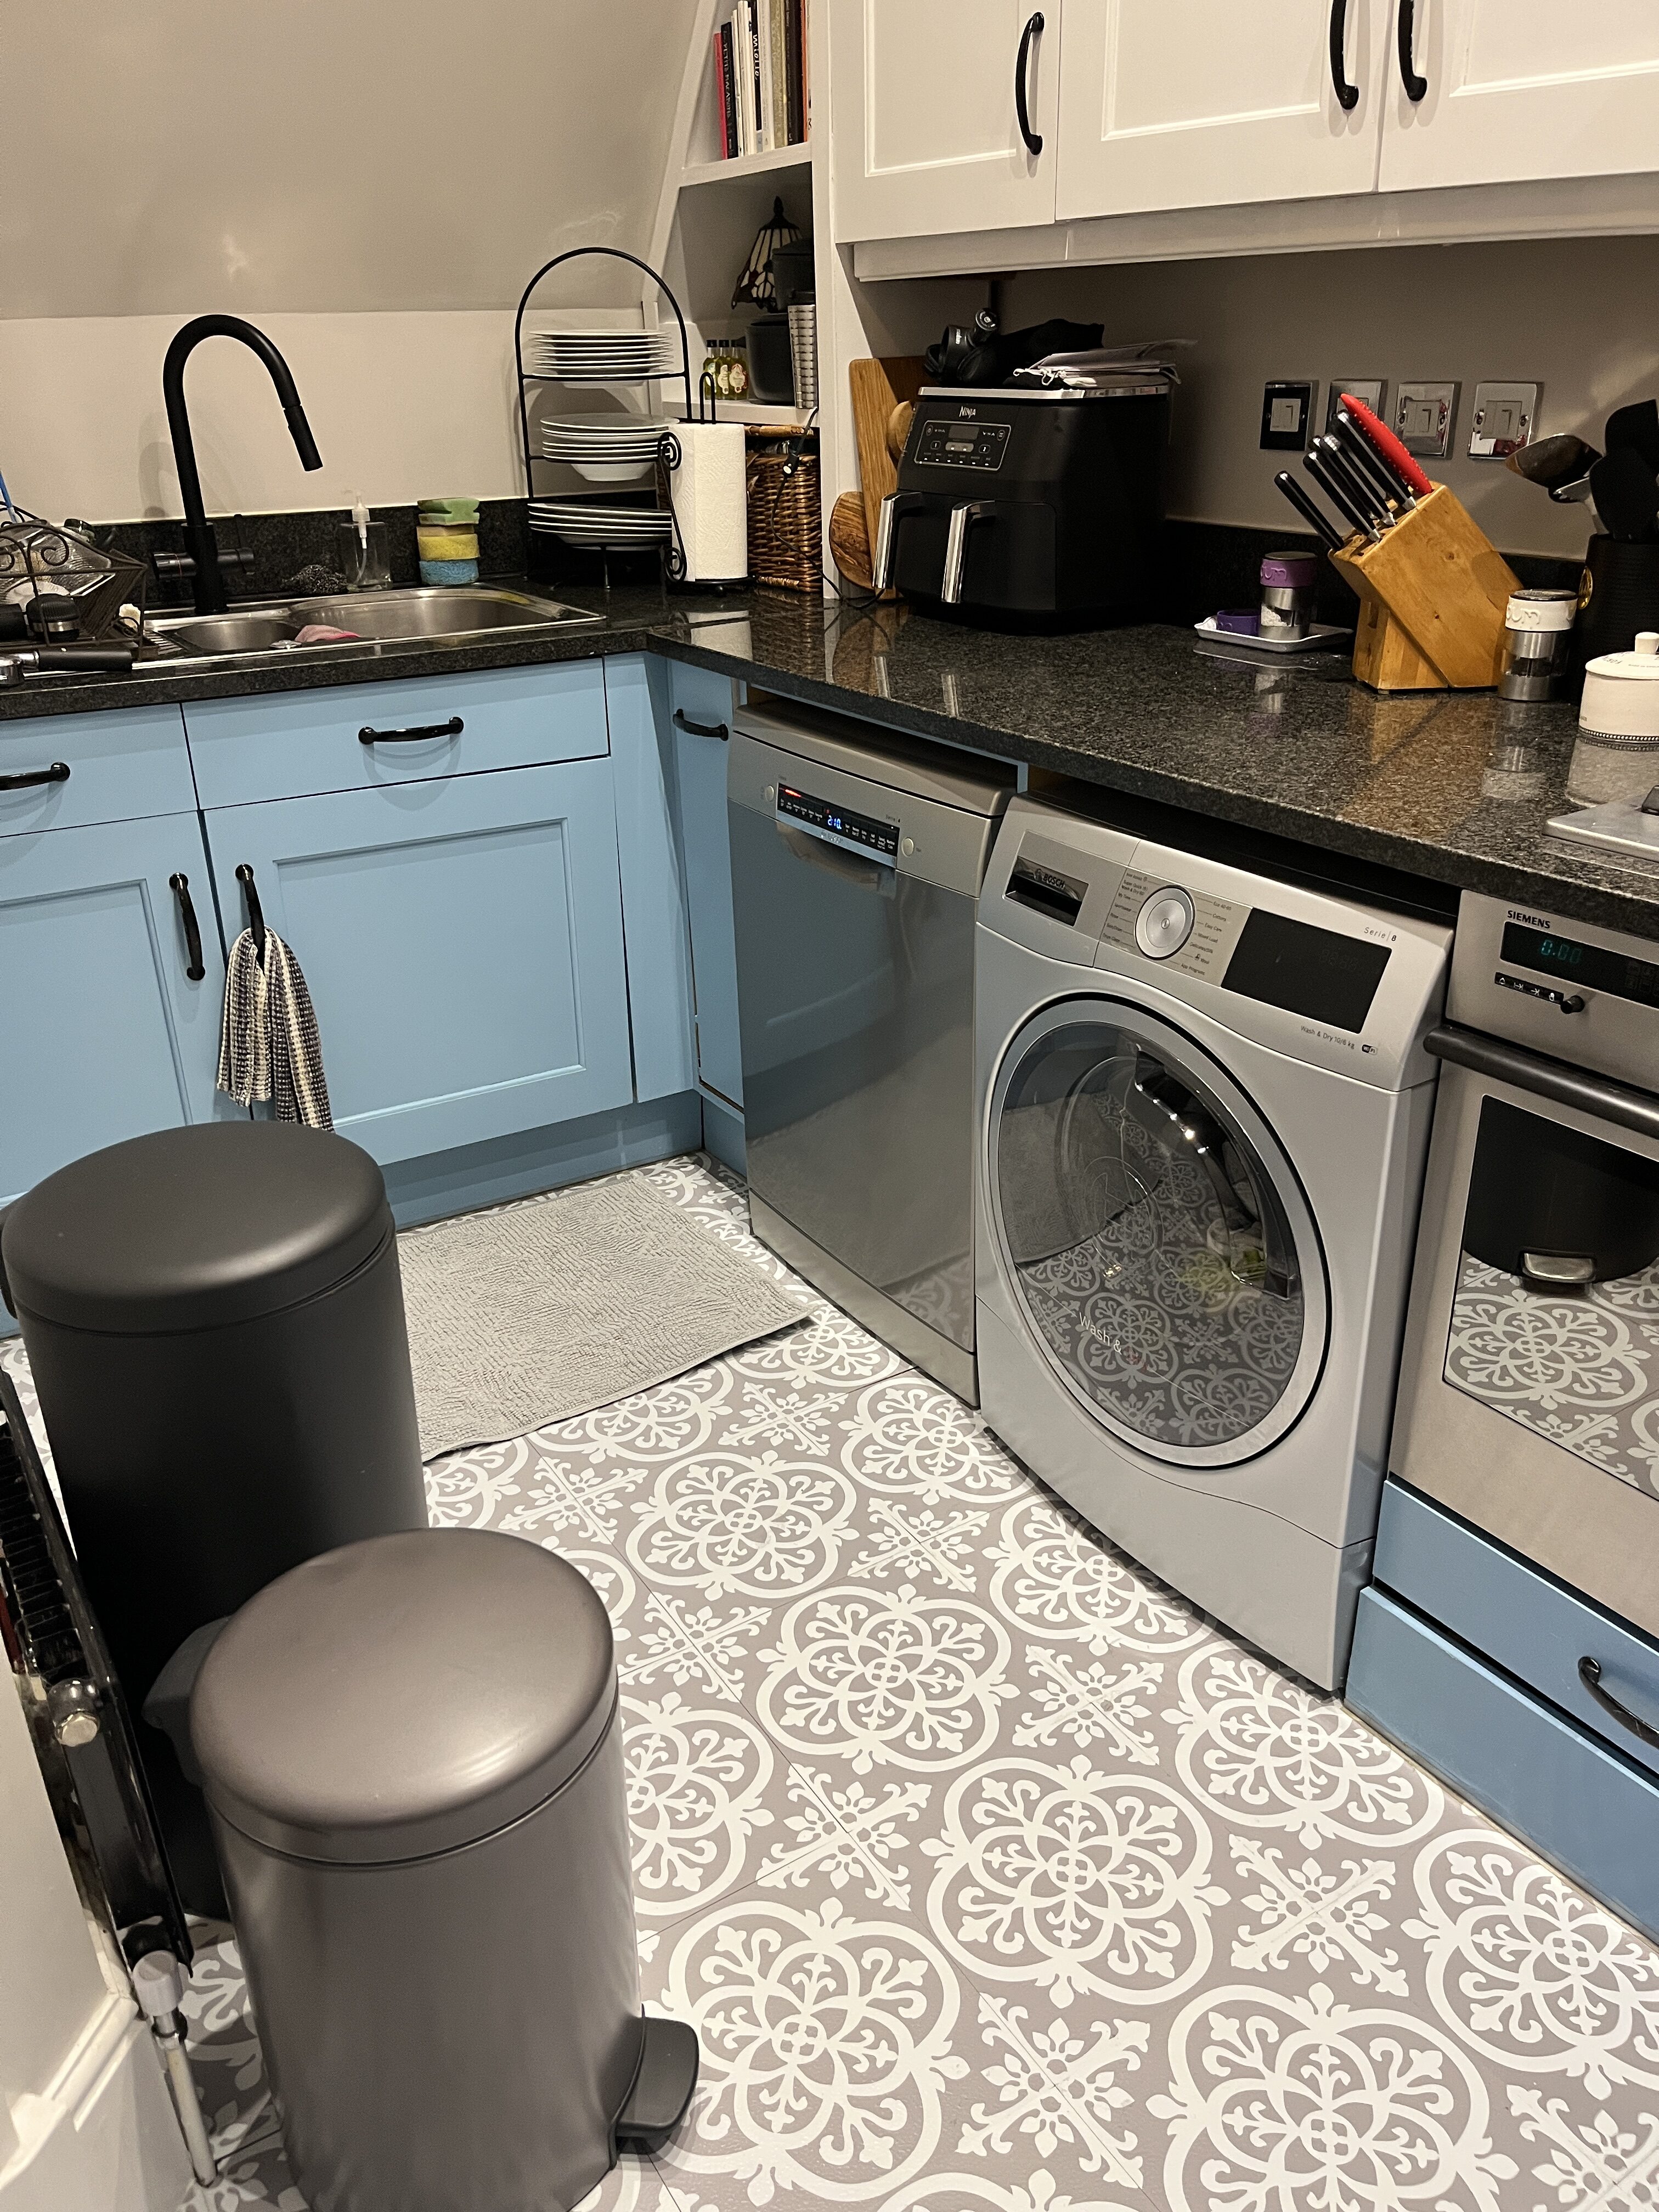
Until this weekend, when I tackled it head on. I installed vinyl tiles over the painted, peeling orange tiles.

Why Install Vinyl Tiles?
We will not be ready for a full kitchen renovation for a few years. When we take this step, we will knock down a wall and create an open kitchen adjoining our living room. When I do this, we will extend the stunning wood flooring from the living room into the kitchen. (We purchased extra wood for this purpose, which we store behind the couch!)
For now, I just need a simple option to cover the orange tiles until we can replace the floor. I do not want to spend a lot, but I also want something durable that looks good.
When paint did not work, I discovered I could install vinyl tiles on top of the existing flooring. The tiles are thin, so it does not add too much height. This is important, as the floor leads into the living room flooring without a threshold. It seems fairly durable, and there are many great colours and pattern choices .

The process to install vinyl tiles is fairly simple and can be done in a day or so, depending on the size of your room and the obstacles you need to tile around. My small kitchen took one evening after work, plus a Saturday morning, approximately seven to eight hours in total.
It does not take any special skills, but it is a bit messy. The adhesive really sticks to your hands, clothing, anything that it touches. (It does what it is supposed to, even where it isn’t supposed to!) Measuring tiles to go around obstacles can be a little tricky. But I have some good tips to share with you on this step.
One note: I would not recommend that you install vinyl tiles over an existing floor as a long-term solution. I am not sure how durable this will actually be. But as a short-term solution (a few years perhaps), or if adding to sub-flooring as a more permanent solution, vinyl tiles can be a very good option. Of course, we will see how long these last, but so far, so good.
How to Install Vinyl Tiles
Tools Needed
- Vinyl Tiles
- Spray Adhesive
- Utility knife and/or scissors
- Laser level or chalk line
- Straight edge / ruler
The Process
Calculate how many tiles you need
To get started, you need to determine how many packs of peel-and-stick vinyl tiles you need. Calculate the area of the room by multiplying the length times the width. Then find the number of boxes you need. For my chosen tiles, 12×12 inches, each box of 10 tiles covers 10 metres.

My kitchen is a rectangle but with an angle on one end, so it was not super easy to calculate. I calculated the area of the square part of my kitchen. Next, I added in a rough calculation for the odd angle. I divided this figure by 10 square metres (total coverage of 1 box) for eight boxes total. This amount was perfect, with only two tiles left and limited wasted tiles.

You may want to add a few extra tiles to your final calculation, in case of mistakes or tiles that need to be replaced.
Clean the floor and remove any obstacles
As with any project, you need to start with a clean surface before you install vinyl tiles. Hoover and mop your floors, removing any stains, debris, etc. If your floors are particularly dirty, you can use sugar soap or vinegar and baking soda for a deep clean. Make sure the floor is completely dry before installing the tile.
I removed the flaking paint where it was peeling, but otherwise, I placed the tiles directly on top of the painted tiles and did not try to remove all of the paint.
You also need to remove any obstacles from the room, as best you can. I removed the toe kicks from our kitchen so I could tile underneath the cabinets. This kept me from having to cut tiles to end at the toe kicks. It also ensured a smooth transition from the visible floor to underneath the cabinets. I only went in as far as needed beyond the toe kicks. It is not necessary to cover the entire area below the cabinets as this is never seen.

As well, I did not remove or pull out the installed appliances (washing machine, dishwasher). In my case, I was able to cut tiles to slide under these appliances, which was easy and looks good. You can pull out these appliances and install vinyl tile underneath them, especially if this is a more long-term solution for you. If you do, remember to include tiles for these areas in your tile purchase.
For our refrigerator, which is set against a wall but is not covered by a cabinet or other structure, I moved it out once I had tiled everything else and then tiled in its space before moving it back into place.
Do a Dry Fit with the Tile
Before committing to the install, you want to do a dry fit. This is where you lay your tiles out on the floor to get a sense of layout, any problem areas and to make sure you have enough tiles.

Start by marking the middle of your room, with vertical and horizontal lines. You should lay the corner of your first tile where these two lines meet. Because I was laying tile on top of tile (although the sizes were different), I chose an existing tile in the middle of the room and used two of its edges as my starting point.
Once you place your first tile (without adhesive, just sitting in place), use a laser level to create a line to follow with the rest of the tiles. You could also use a chalk line to do this.
Lay out your tiles, spreading out from the centre, following your level line. The tiles should be snug next to one another, so you get as close to the final layout as you can without sticking the tiles to the floor.

In this dry fit phase, it is not easy to be very precise, as the paper backing hangs over the sides of the tiles, and they can shift a bit as you add more tiles in. Not to worry, it does not need to be perfect. But get as precise as you can without fretting too much.
Adjust Placement and Finalise the Layout
An important part of the dry fit is to make sure you do not end up with any odd or difficult cuts or that you do not have an odd tile placement that is visually disruptive.
Adjust the tiles as needed, shifting from the centre line if that can help the layout. Just ensure you adjust all the tiles and are not creating another problem with your adjustments.
In my case, I decided to adjust the tiles slightly so I had a straight line of uncut tiles along the wall. Opposite the wall, the tiles would run underneath the toe kick, so this would minimise the cuts I needed to make.

While I adjusted everything, I failed to note one small area that would be affected: a tiny triangle at the entrance to the kitchen. This is not ideal, but in the whole scheme of things, I am not too worried, and it is not terribly noticeable, as long as the adhesive holds and it does not come up with excess foot traffic.

Stick the Tiles to the Floor
Once you are happy with the layout, it is time for the fun (and slightly messy) part: sticking the tiles to the floor with adhesive.
Starting at your centre point, or wherever you adjusted it to based on your final layout, peel off the backing, spray on additional adhesive, and press it firmly in place.
Be precise here, ensuring you are placing the tile straight and level. This tile will be the guide for all other tiles, and it will set the tone for the rest of the room. So make sure you get it right. Use the laser level or chalk line as your guide for this first tile and all the tiles that follow.
I got into a bit of a groove with laying the tiles. For each tile, I took the following steps to install the vinyl tiles:
- I made sure the design aligned with the tile next to it. This required rotating the tile and aligning the design at the edges. The instructions say to rotate the tiles to make them match, and I was able to get most of them to match really well, although a few are a little off. This is not very noticeable given the pattern though.
- I then laid the tile face down on a large sheet of spare paper, to protect the tiles and floor underneath. I peeled the backing off, then sprayed a healthy amount of extra spray adhesive onto the tile backing. I made sure to spray the edges really well to help prevent curling of the tiles later on.
- I put the tile in place, pressing down on all edges and ensuring the tile was really sticking. If needed, I lifted a tile to replace it or an edge to spray more adhesive, but this should be done quickly, within moments of putting it in place.


Here is the adhesive I used to install the vinyl tiles, which seemed to work well.
The instructions say for best results to let it cure for 3-5 minutes before afixing it to the surface. I did not do this. Waiting for each tile would have taken ages, so I am counting on the built-in adhesive and the spray adhesive working together without needing the curing time. We will see.
The instructions also say that you can spray both surfaces. I also did not do this. It felt a bit messy to try and spray each spot on the floor without spraying the tiles already in place, and because this was my first time installing vinyl tiles, I did not want to work in big sections but rather tile by tile. You might want to try spraying a larger area and several tiles, letting them cure for a few minutes, and then afixing them in groups. If you have a surface that you think might be difficult for adhesion, this could be a good way to go.
One final note here: these tiles already have adhesive. It seems quite strong, and it would be less messy than adding the additional spray adhesive. But all the reviews I read for installing vinyl tiles say that the adhesive is not strong enough. The tile instructions specifically say not to use another adhesive, but after the issues with the painted floor, I did not want to take any chances, so I used extra adhesive. I cannot comment on how this project would work without it, but let me know in the comments if you’ve gone au natural with just the built-in adhesive backing.
Lay All Uncut Tiles First
Working out from the centre of the room, stick down all the tiles that do not require cutting or adjustments. Build off of the installed tiles, using them as your guide. Keep checking that your lines are level and each tile is pushed snugly against its neighbour on all sides.
You can work row by row, but I found that doing about three or four tiles in a row and then adding tiles below and above that row worked well. I built out from the centre in groups of about nine tiles in three rows of three. This approach helped keep the tiles aligned both vertically and horizontally.

Add the Bordering Tiles That Require Cuts and Adjustments
Once you have laid all the tiles that do not require any cuts or adjustments, you should have just the edges that border the walls or furniture. Now, you need to customize the tiles to fit these areas.
Straight Cuts
In some areas, I needed to cut the tile straight across. This was the simplest cut. I simply held the tile in place upside down (with the top facing down to the floor), and I marked the place on the back where I needed the tile to end. I used a straight edge and a marker to mark a line across the back, matching the cut mark. A utility knife or sharp scissors will cut through the tile; I found scissors to be a bit easier for most cuts.

Notches
Some of my tiles needed to be notched to go around the radiator pipes or around the feet of the washing machine, dishwasher. and lower cabinets.
Here is the process, which seems difficult but once you do it a few times, it starts to make sense.


It sounds complicated, but once you do it a few times, it starts to make sense. The two things to remember are to turn the tile upside down for marking, and cut the opposite edge of where you made your original marks. This is because when you flip the tile right-side up for placement, the original marks will be on the opposite edge, not where you need the cut to be.
Angles
No project in my house or on this blog would be complete without some angles! One corner of the kitchen has an angle, and the entrance is also on an angle. This can be a bit tricky to measure, but here are a few tips to try.
Dry fit the tile as best you can in place upside down. Mark the two edges where the tile needs to be cut. The tiles are flexible, so you can push them down a bit in most cases to make the marks. Then connect the marks with a straight edge, cut the line as cleanly as possible, and test the fit, adjusting as needed.
I was conservative in my cuts, cutting before the cut line and going back to adjust. This helped prevent over-cutting and wasting tiles.

In a few cases, the angle had some uneven edges or several different angles as well. For these, I used some spare paper and created a template, folding and cutting the paper in the space until I had the right shape. I then traced this on the backside of the tile and cut it out. Again, remember that because you are tracing on the back of the tile, you need to turn your template face down, so the face of the tile and face of the template are facing the same way.


Final Cleaning and Adjustments
Once I had all the tiles in place, I went back over them and made sure there were no edges coming up or other issues with adhesion. There were a few tiles that were not sticking as much as I wanted and you could see small gaps, or feel them with your bare feet. I peeled them up and added more adhesive, and in one case, I replaced a tile. If this happens with a tile that you’ve had to cut, make sure you trace the shape onto the new tile, for ease.
You can also use something heavy to weigh down an edge and see if that helps. I used a cast iron skillet, fondue pot and meat press, all which were nice and heavy.

When you are happy with all the tiles, you will probably need to clean up some bits of adhesive that squeezed out between the cracks, especially where the four corners meet up and there is excess adhesive. For this, I used some mentholated spirits and the scrubby side of a sponge. Nail polish remover might also work, but test this on a spare tile first, as that stuff is potent.
I also ran a line of caulk between the tiles and the wall, as well as around the architrave at the door. I needed to cut back some of the caulk so the tiles would lie flat, so adding in a small bead at the end gave a more professional look. This is optional, but it does add a nice finishing touch.
Stand Back and Admire Your Work
I am just so pleased with our new floor.

I really hope it will hold up, because it looks really good. Installing vinyl tiles has brought a complete change to the room, and the pattern really livens things up a bit. Of course, the starting point set quite a low standard with the peeling painted orange floor.


I am so happy that you can no longer see the orange tile! And unless an entire tile comes up or the tiles start curling up, the orange floor below should remain hidden, as it should be!
What do you think? Would you install vinyl tiles in your home? I will keep you posted on how my floor holds up and if we have any problems. I really hope you will not be hearing from me about this floor again until it is time to do the full kitchen renovation.
UPDATE: Since laying the vinyl flooring, it has held up really well, but we have had a lot of adhesive squeeze up through the seams over the first few weeks. Most of the seams have had a good amount of adhesive come through, which has collected dirt and dust.

I bought some white spirit, which is used for cleaning paint brushes and the like. Using a small amount of the spirit on a sponge, the adhesive came right up, and I had cleaned the entire floor in about 15 minutes. If you take this step, be careful, because the spirit is highly flammable. Keep it away from any food, people or pets, and wear gloves while ventilating the area. To be extra safe, I mopped the floor with water afterwards, just to ensure I had gotten all of the alcohol cleaned up.

What a nice clean floor, without the adhesive peeking through.
Happy DIY-ing!


Leave a Reply