
Today, as shared in my last post, we are not yet ready to take on a big kitchen renovation. But living with some of the more difficult aspects of our kitchen for two+ years feels a bit difficult. (I’m looking at you, tiny dorm fridge!) Some smaller kitchen updates could help, including building more storage in the dead spaces above and around the cabinets.

I feel invincible after building our bespoke shelves in the lounge, so I am ready for my next project.

We’ve decided to do a few things that can bridge the gap to a full kitchen renovation, including building more storage.
Kitchen Updates = New Appliances
For our kitchen updates, before we get to building more storage, let me tell you about an important change. We are investing in new appliances that do not require rewiring, re-routing pipes or changes to the floor plan. They also need to be usable in the new space when we are ready. For that reason, we won’t replace the oven right now, as that would require cutting countertops and moving cabinets since I want a larger oven than our current model (I’m dreaming of 8 hob burners and 2 ovens!), but that is beyond the scope of this mini-DIY.
We chose Bosch for our new appliances: a dishwasher, a washer/dryer and a full-sized refrigerator. For the fridge, we needed to find a new place in an already small space, which we thought might require some cutting of the counters, but in the end, it fit perfectly for this DIY.
We purchased each appliance over a few months, to space out the costs, all from John Lewis, my favourite UK department store, timed around sales and vouchers when possible! (This is not a sponsored post, just a sincere shout-out to a brand I really like.)
I cannot say enough how much the appliances alone have changed the feel and utility of the kitchen.

But wait, there’s more …
Building More Storage to Maximize Space
Building more storage in our kitchen update will make the most of the dead space. In our kitchen, we have dead space above the cabinets and along the sides, under the slanted ceilings. This is a perfect place to add more storage.

Because this is a temporary measure until we can do a full renovation, I want to minimize costs for this kitchen update. I am using left-over plywood from the lounge shelves and trying to make it go as far as possible when building more storage. With the added benefit of having fewer remnants that need a home in our small flat! I have had to purchase a bit more wood, but I’ve kept costs as low as possible.
I am also treating this as learning ground, to continually improve my building / woodworking / DIY skills. So I am okay with imperfection, as long as I am gaining knowledge for the next time.
Building More Storage Above the Cabinets
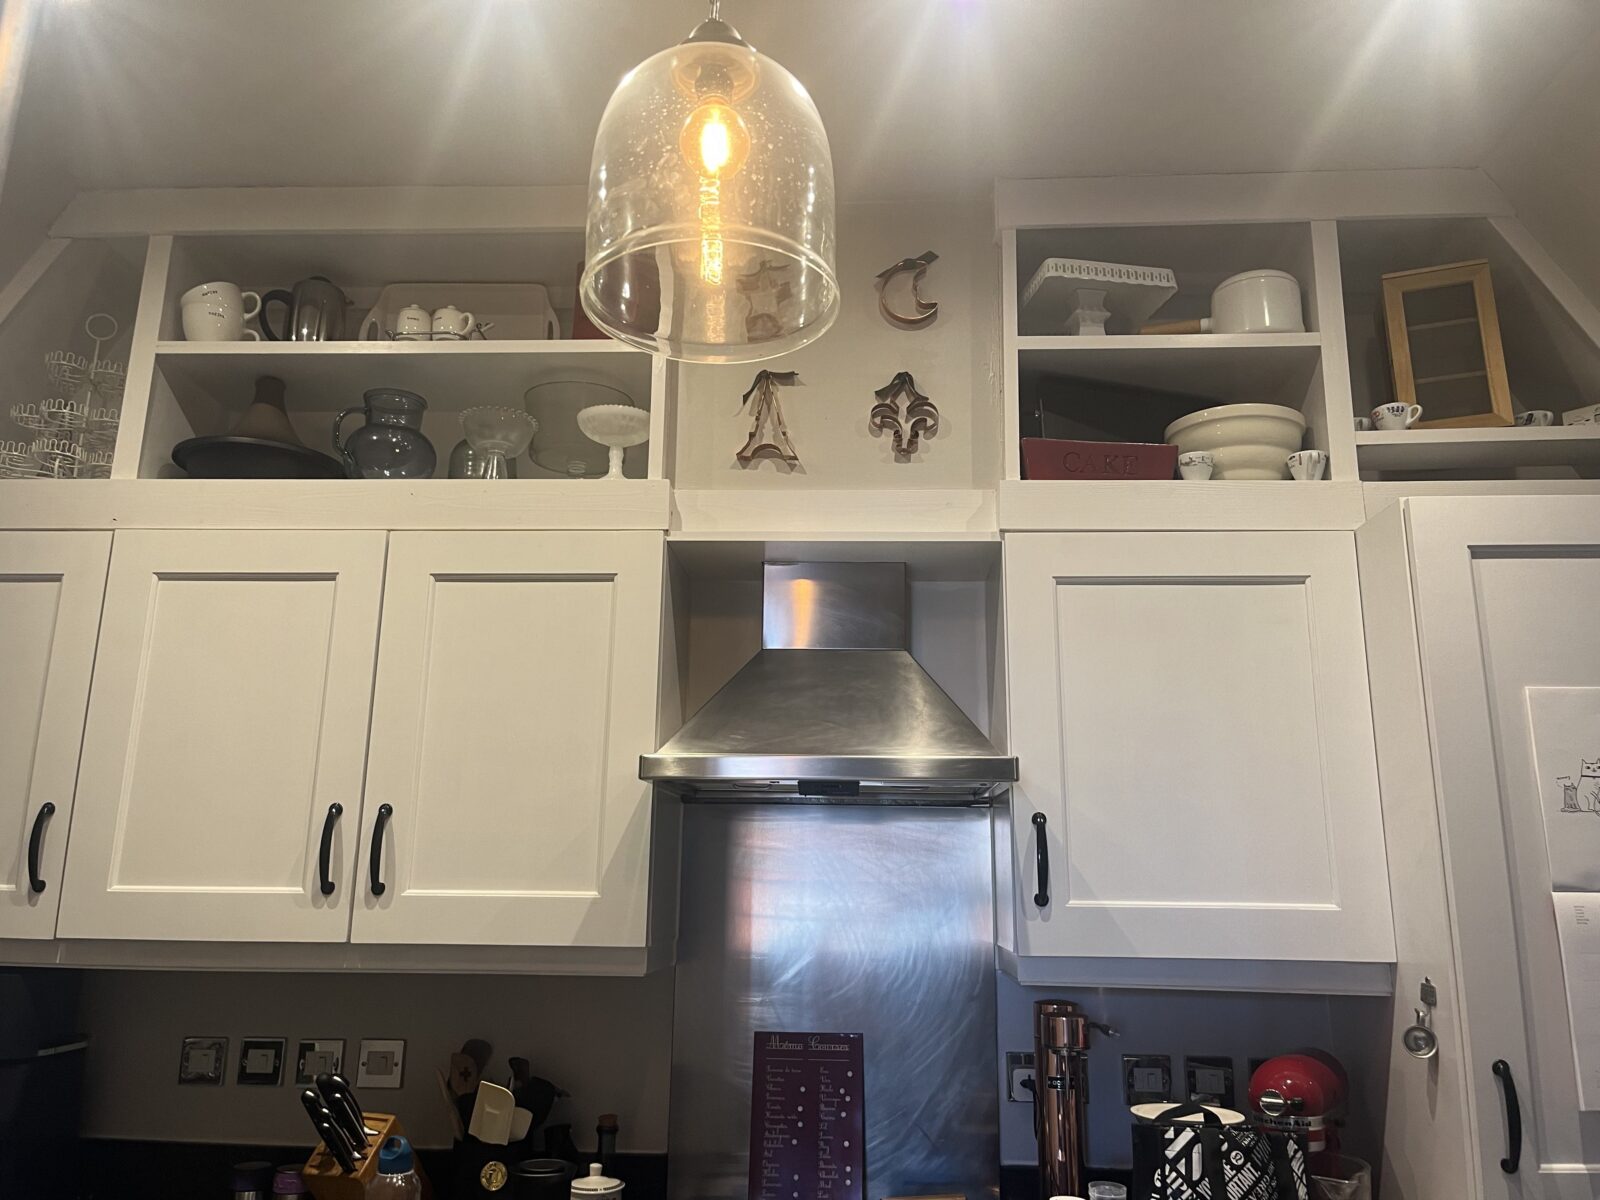
I began with the dead space above the cabinets. This is a simple area, with straight cabinet boxes/shelves for the most part. Before beginning, I removed the decorative trim at the top of the shelves. I thought I might reuse it, but it was so grimy from years of grease that I decided not too. It also has a larger footprint than I want to give up, so I can maximize storage.
For building more storage for the kitchen updates, I measured the areas under the flat ceiling and built boxes, using plywood and pocket holes. I built a small base to separate the top shelves from the cupboards and ensure clearance for the doors. I decided on two shelves for each box, considering the items I want to display to get the right height. The vertical spacing is based on the cupboard doors below.

It is important to remember that anything stored up here will collect grease and dust over time. No cookbooks, which would be difficult to reach anyway. (I debated a rolling ladder, but as nice as it could look, this would just be constantly in the way in such a small space.)

We needed to work around the flue for the boiler (the boiler lives in the tall cupboard). This took some creative work to ensure it looks nice but is also safe and secure. Fortunately, it is not too visible when standing on the floor.

Angled Shelves on Either Side
Next, I measured out for side shelves, under the angled ceiling. I used the same technique as with the living room shelves, building shelves on the ground before sliding into the space.

After building and sliding them into place, I realised that the boiler cabinet is deeper than the others. (How did I not notice this?) I could have made the right shelf deeper, but as this is a temporary solution, I did not re-do it. What do you think? Does it look off? It is even with all other cabinets, but sits back from the boiler directly to the left.

As with the lounge shelves, I added backing and furring strips to affix to the walls with anchors.
Trim and Finishing Make All the Difference
I trimmed the shelves out to make them look more finished and to cover the uneven areas. I was using the wood I had on hand, and in hindsight, some of the pieces look unfinished. For example, the planed pine boards for the trim look fairly rough compared to the plywood and some of the other trim. Painting will cover some of the grain, but in hindsight, I should have sanded these boards more. I might consider replacing some of these pieces at a later stage, but for now, they are okay.
I applied trim to the horizontal pieces and inner vertical pieces, and larger boards to the top and bottom of the shelves. There are a few areas where gaps between the walls need to be better covered, but I ran out of wood. I might go back and fix this at a later date. But again, this is a temporary kitchen update and it is really only noticeable if you are looking for it.

I actually enjoy caulking because it makes such a difference. But this time, I bought a new kind of caulk and really struggled with it. It kept popping out of the canister in bursts, almost like there was air in the container, rather than a smooth even stream of caulk. So there are some messy bits. I finally gave up and went for my trusted brand of caulk that works well. I was able to finish things up that afternoon with a much smoother and even finish. Have you had this issue before?

The resulting kitchen updates are a pretty dramatic improvement, both in terms of space gained and overall look.

The shelves bring more warmth to the space, and the side shelves accentuate the charm of the angled ceilings. I will not add doors, as this just adds costs, but I do worry that the small space will look cluttered. We will have to watch this.
What do you think? Warmer and cozier or too risky for increasing clutter? (Ignore all the stuff stored on the shelves in these photos. #reallife. We have to live in the space while I am working in it, so process photos look a bit messier than the end result … I hope!
Next up: Painting the cabinets and the new shelves. Here is a sneak preview of the final cabinets and shelves with paint. We are making quite the impact.

Beyond paint, I also plan to build pull-out shelves in place of the fridge/freezer, to house a sort of appliance garage. And I designed a pull-out spice rack for a small dead space in one corner of the cabinets. Join me next week to see how we are getting on.


Thank you for your post. I really enjoyed reading it, especially because it addressed my issue. It helped me a…