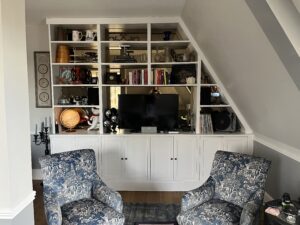
This week, I’ve returned to the built-in bespoke shelves installed in our lounge last year. Following last week’s successful reorganisation of the hidden storage, today I planned to share how to add accent lighting to the upper shelves.
Sadly, this project has not gone quite to plan. What should have been a simple and quick project to add accent lighting has resulted in a lot of frustration. And it is not yet complete. But perhaps some of my challenges can help if you are trying something similar.
For context, when I first built the shelves, I wanted to add accent lighting. But I did not come up with the idea until after I had installed the trim and it was too late. While the shelves still look great almost a year later, the plain trim lacks a bit of impact. Replacing the trim will enhance the look and give access the inner workings of the shelves, so I can now add accent lighting.

When considering how to add accent lighting, I did a lot of research. In the end, I chose LED lighting strips for the accent lighting. These lights come in thin strips that you can easily cut and re-connect, without any training in electrical work. They have a low profile so the lighting effect be the focal point. And, they are quite versatile, with several settings, a dimmer, and even a strobe! (Not sure I will need this feature, but you never know!)
It should not be a terribly challenging project, but if you want to add accent lighting to your own decor, it takes a bit of planning and effort to get everything perfectly positioned. And I’ve learned the hard way that making connections between the lights is not as easy as it should be. Because I did not plan this as part of the original build, I’m facing some challenges.
Today, let me share where I’ve gotten to, with the hopes of completing the project next week.
The Tools Needed
- LED Lighting strips
- Connectors (more below on specific needs; this has been my most challenging part of the install)
- Chisels, flat-head screw drivers, etc., for helping remove the trim
- Hammer
- Scissors for cutting the lighting strips
The Process for How to Add Accent Lighting
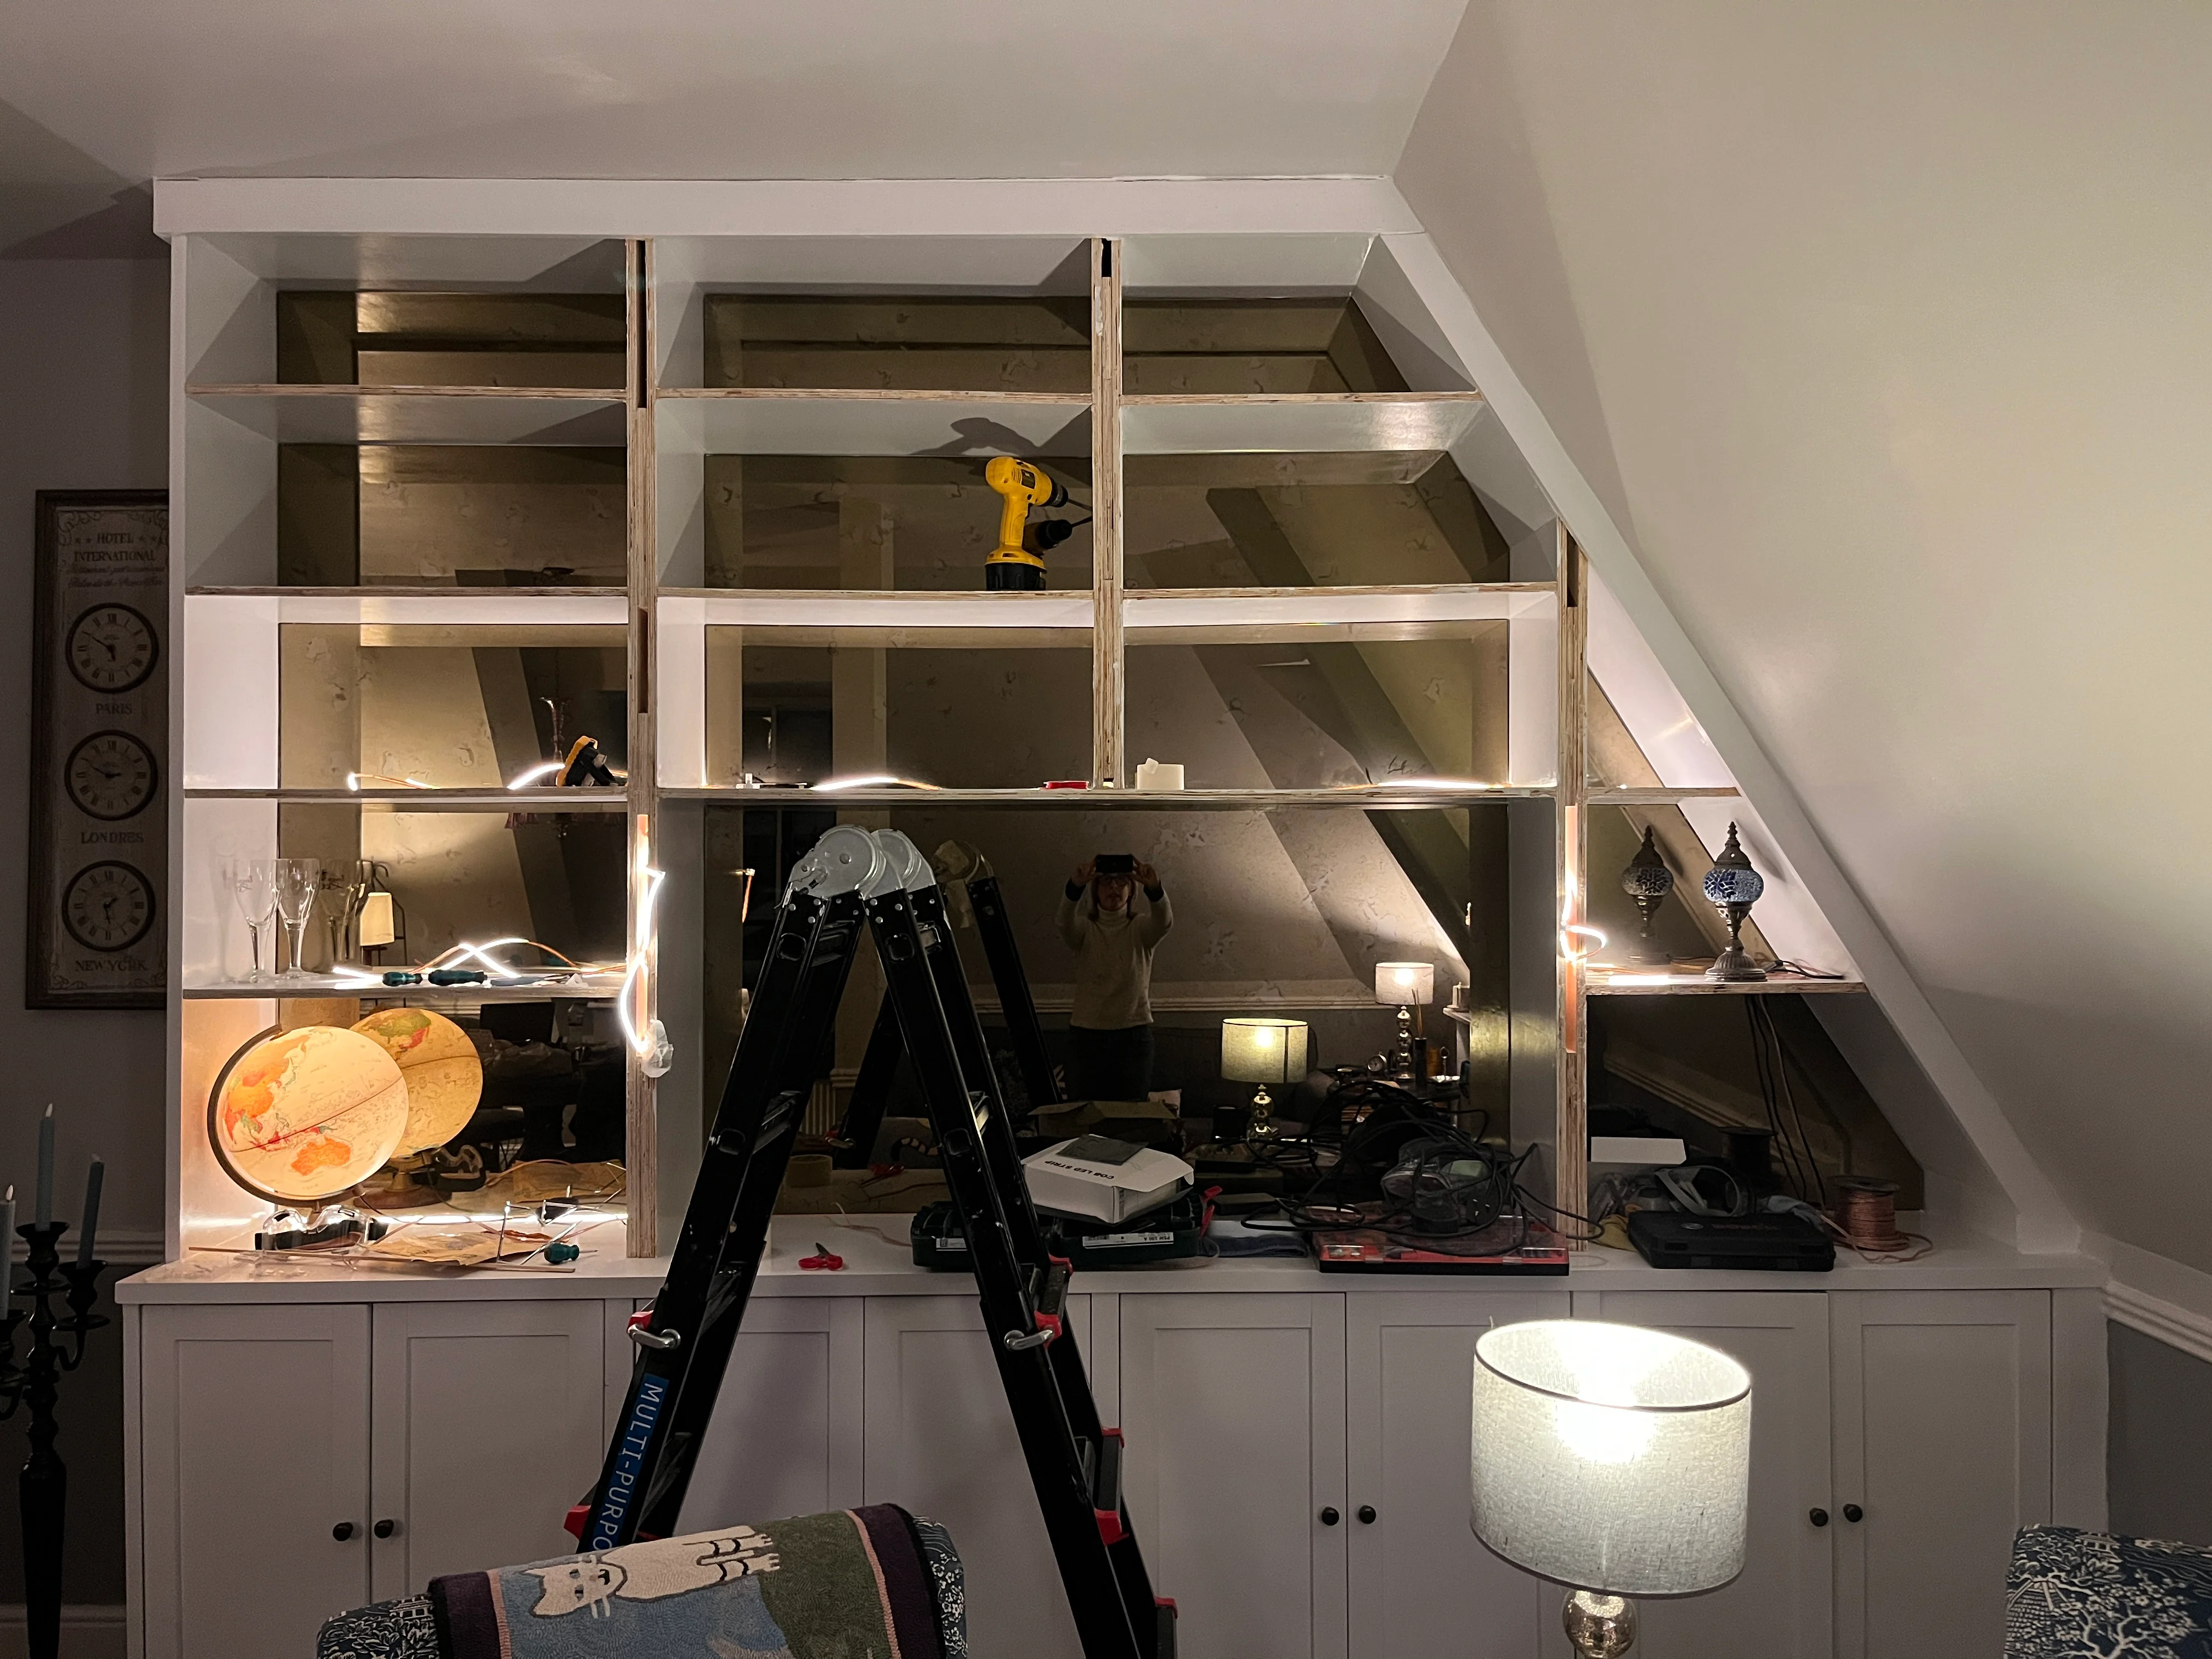
In my case, I am adding lighting to a large wall of bespoke shelves that are already built, painted and with antiqued mirrors added to the back. Adding accent lighting to these shelves will bring an improved ambiance to the room.
In an ideal world, you would plan for this type of lighting during the original install. In my case, and because I seem to like to do things the difficult way, I am adding accent lighting after the shelves are complete.
The project will require some light demolition, and it has not been as easy as if I had planned ahead.
Choose the Lighting
I did a lot of research and found these LED strip lights had great reviews and are easy to install.

In choosing lights, you want to be able to easily cut them and re-connect them, depending on the layout needed.
You can cut these lights with scissors, at clearly marked connection points. You do not need to do any soldering to connect the wires. (If you have soldering skills, you can always do so, but I am looking for easy connections without soldering.)
While the idea of cutting and connecting seems easy, this is where things started to fall apart for me. There are a variety of different connectors, which in theory slot onto the end of the strip and make the connection to a second strip quite easily. This is important if you want a single connection across multiple shelves or if you want break points in the lights. I’ll share more on this when we get to the install.

Test Lighting Placement
Once I had picked out the lights, I needed to decide where to place them.
You can choose up-lighting, with the lights installed along the bottom, or floor, of each shelf.
Or you can choose down-lighting, with the strips installed on the top, or ceiling of each shelf.
Beyond that, you can install the lights either at the back or at the front of the shelf. The front of the shelf creates more of a task light, letting you clearly see exactly what is on the shelf rather than accenting it. If you install at the front, you might need some extra trim to cover the light.
Light placement really depends on the look you want. There is no right or wrong answer, only what you prefer. I suggest doing some browsing on Pinterest or other visual sites, to help decide what you prefer.
Because we have mirrors for the back of each shelf, the reflection of the lighting will be magnified. We also have angled shelves, so placing strips on the angle could look odd.
To decide, I tested each of the different options, to get a sense of what would look best. This is a big decision, so it is always a good idea to do a test run.


In the end, we decided to go with up-lighting from the back of the shelves. I will place the lights on the shelf base. I also considered adding a piece of trim in front to help diffuse the light but decided this was not needed. We can always add it later if needed.
There are also aluminum channels you can buy to encase and diffuse the lights as well. Because these lights have such a low profile and can be dimmed, we placed them directly on the shelf base. Again, we might add a small piece of trim in front of the lights later if needed.
Remove Any Trim and Expose All Channels to Run the Lighting Connections
Since I already had trim on the shelves, I needed to remove it to install the lights. You may not need to do this if you did a better job pre-planning how to add accent lighting.

When I installed the trim originally, I used glue and nails, so removal was more challenging. There are two trim pieces along the top and angled side that are glued, nailed and caulked in place, which I do not want to remove for a variety of reasons. But the rest of the trim will come down, and this should provide ample hidden space for running the lights and connectors.
It took a few hours one evening after work to remove the trim. Some of it came away quite easily, once I got it started. Other pieces were glued quite firmly and took some effort. I got into a good rhythm, using several chisels in varying sizes to chip away a starting point. Once I got the chisel underneath the trim, I used two chisels pulling it away as I walked them down the length of the wood.

Many of the pieces came off in whole strips, but some splintered and required further chiseling to release the glue from the shelf. Again, learn from me: this project would be much easier if you plan ahead rather than after the fact.
I also pulled away the horizontal trim pieces, although this was not necessary for the lighting. But as I want to replace all the trim with something more substantial, these pieces came off too.
The shelves look a bit less impressive without the trim, but it is only temporary!

Do a Dry Run for Lighting Placement
Next up, before the actual install, it is important to do a dry run for all the lighting strips. I would recommend drawing this out on paper first. Find the most efficient way for how to add accent lighting and ensure all the connection points. You want the least amount of connections, with no twists in the strips.

For my layout, I cannot run a strip end to end, as there is no where to hide the connection. So, I will need to make the connections in the cavities in the middle of the shelves. This will mean a few more connections than a straight path. I will use the cavity to the right of the first column of shelves. Based on the limited space between the shelves and the ability to reach between them, it will be a bit challenging to get the wires in place in the cavity and make the proper connections.
Here is how I laid out the strips for my shelves:
- Starting in the bottom left corner, I laid out a strip and cut it a bit long to allow for the connection point. I marked a spot on the right-side wall of the shelf to drill a hole for the strip to pass into the wall cavity for the connection.
- Then, I cut a single strip for the other two shelves on the bottom, including the long shelf where the television sites. I will connect this strip to the left-side shelf with a T-connector. I plan to run the right strip straight through the second and third shelf walls without a connector needed. For this, I left enough extra lighting strip to make the connection on the left side,. And I marked where I’ll need to drill a pass-through for the strip.
- The third arm of the T-connector will hold the light strip to connect the row of shelves above. I had planned to use spacers here, so I did not waste light strips behind the trim. But the spacers I ordered did not work, despite being the right size. (More on this later, when I discuss my connection problems.)
- I moved to the second row up, which is actually a single shelf, due to the large television space. I cut a single piece of light strip, marked where the hole should be drilled, and left extra space for connecting inside the cavity. This strip will connect to the T-connector attached to the strip below.
- I will come back to the same shelf on the right side a bit later, coming down from the lights on the third row up.
- Moving up to the third row, I added a light strip to the T-connector below. I then added an X-connector about 10cm above. This X-connector will connect the left and right shelves of the third row and lead to the shelf above.
- I cut a strip for the left shelf, as well as a long long strip that will pass through the next two shelves on this row, for which I will drill through the walls and run a single strip with no connections needed. This strip is also attached to the X-connector.
- However, for the final shelf on this row, we need to make a connection to be able to add lights to the shelf below. Here, I will add a T-connector, with one arm connecting to a light strip for the shelf below and one arm connecting to a light strip for the last shelf on the row, which is the tiny angled shelf.
- The fourth row up is quite simple. A light strip runs from the fourth arm of the X-connector below, then a light strip is connected for the left shelf. A longer light strip is connected to the third arm of the connector and runs through the two shelves on the right. Another light strip is added to the fourth arm of the connector to connect with the top row of shelves, which is the same as the fourth row.
This might have been a bit confusing to read. There are quite a few different connection points for this particular shelf, since I cannot just make straight connections all the way across. If you can hide the connecting points on the ends of your shelf, the map would be a lot simpler. But I am not able to do that. This is why mapping the lights out on paper is so valuable, unless it is a really simple install.
With everything mapped and cut, that’s a wrap for the dry run. I have cut the strips and put them roughly in place with the connectors mapped out. I have also marked the places where I need to drill the pass-throughs.
Reminder: Make sure you leave a generous amount on each strip you cut, in case of mistakes and so there is room to make the necessary connections. When deciding how to add accent lighting in your plans, it is better to cut a strip longer than needed, rather than too short, even if it feels a little wasteful.
Make Any Pass-Through Cuts
Before the actual install, you need to cut the pass-throughs on each shelf. I considered using the multi-tool and cutting straight cuts in the bottom of the shelves, but in the end, I decided to just drill a simple hole, choosing a bit that would allow the strip to pass through. I tried several drill bits but all were too small, so I finally decided to use my smallest spade bit, which is the same width as the light strip. The strips are very durable and do not really fold or bend in their width, so the hole needs to be as wide as the strip.

I drilled the actual holes one at a time, always from the exposed shelf side, to restrict any splintering to the inner, unseen cavity. Where I planned to run a strip through two walls with no connector, I needed the holes to line up, so I drilled one hole from one side of the shelf, passing the spade bit through to the second wall until the tip peaked through the second wall. I then moved around to the second wall and drilled the rest of the hole from there, again to prevent splintering on the outer walls.
The only place I could not do this was in the small angled shelf, because the drill will not fit. So, I drilled straight through and sure enough, there was some splintering. You cannot see it because the shelf is so small, so it is okay. I did think afterwards that I should have held a block of wood against the shelf wall, which can help minimize the breakthrough splintering. But as is the theme with this project, I thought of it too late!

Install the Lighting … and Here the Trouble Begins
To install the lights, I threaded the strips through the pass-throughs first, then made the connections using the connectors. I plugged the lights in to make sure they worked and the connections were connecting.
It sounds really simple, and it should have been, but I ran into some significant problems for the actual install.
First, it was really challenging at the first shelf to get the light strip through the hole into the cavity and up where I could reach it to make the connection. I had hoped just pushing the light strip through the hole that it would eventually find its way out of the cavity, but it took a lot of fishing around with a coat hanger and a strip of wood before I was able to pull it out. I must have spent 30 minutes trying to get the wire and had to call in reinforcements to help. Then, I had to do the same for the shelf next door. UGH!

Fortunately, these first ones were the hardest, as I had to push the wire up and out. Gravity helped all the others, as the wire fell down and out, so I could retrieve them fairly easy from the cavity.
The next and more troubling challenge was the connection. I found some of the connections to the T- and X-connectors were not that good. They flickered on and off, and some were challenging to even get to connect. This is worrisome, because I will hid the connectors behind trim work, and they will not be not easily accessible if they do go out. And as everything runs off the strip before it, if one goes out, everything after it goes out too. Not to mention, it does not seem so safe to have flickering electricity, even though these are very low voltage.

After faffing around a bit and getting very frustrated, I walked away and went back the next day. Things moved along okay for awhile, but I was still facing uncertain connections. Several of the T- and X-connectors would work in a few arms but not in one or two arms. I do not have the luxury of having an arm not in use, given my connection plan.

After way too long and a lot of frustration, I decided to see if maybe there were some better connectors than what I had. I had bought the connectors on Amazon, but they no longer stock them. Perhaps there is a reason.
I searched all over Amazon and the Interwebs, but most of the connectors are straight or elbow shapes. There are very few T- and X-shape connectors, which is what I need given my complex layout. And they all look like what I already have, which are plastic and not the most secure looking connections.

I visited a few nearby electrical supply shops and brought my supplies with me, to get an expert opinion on how to add accent lighting using connectors, but no one had much to offer me, other than to say the ones I have should work.
So frustrating!!! Is it me? I do not think it is. My husband, who knows a bit more about electrical wiring, also looked my work over and agreed that I am doing everything correctly.
I finally found some T-shape connectors on-line that use screws to secure the connection, which feels a bit more solid, so I ordered them. And now I wait for them to arrive. The shelves are ripped apart and there are tools and decor strewn about the house. Some shelves have lights that work, some have lights that do not work. And some do not yet have lights.

What’s a girl to do? While I wait for the new connectors, I decided to finally paint the lounge ceiling. I’ve needed to do it for awhile, and since things are a mess anyway, what’s a bit more chaos? At least I can tick that off the to-do list!


as well as covering patched spots where we removed some lights.
Stay tuned, I’ll be back with an update and hopefully a successful close to this project once the new connectors arrive.
Happy DIY-ing! (I sure could use some happy results after this one!)


Leave a Reply