
The kitchen mini renovation is well under way, working on a budget and addressing those items that can make a difference before a full renovation in a few years. Today, I am painting kitchen cabinets to refresh an old and dated space.

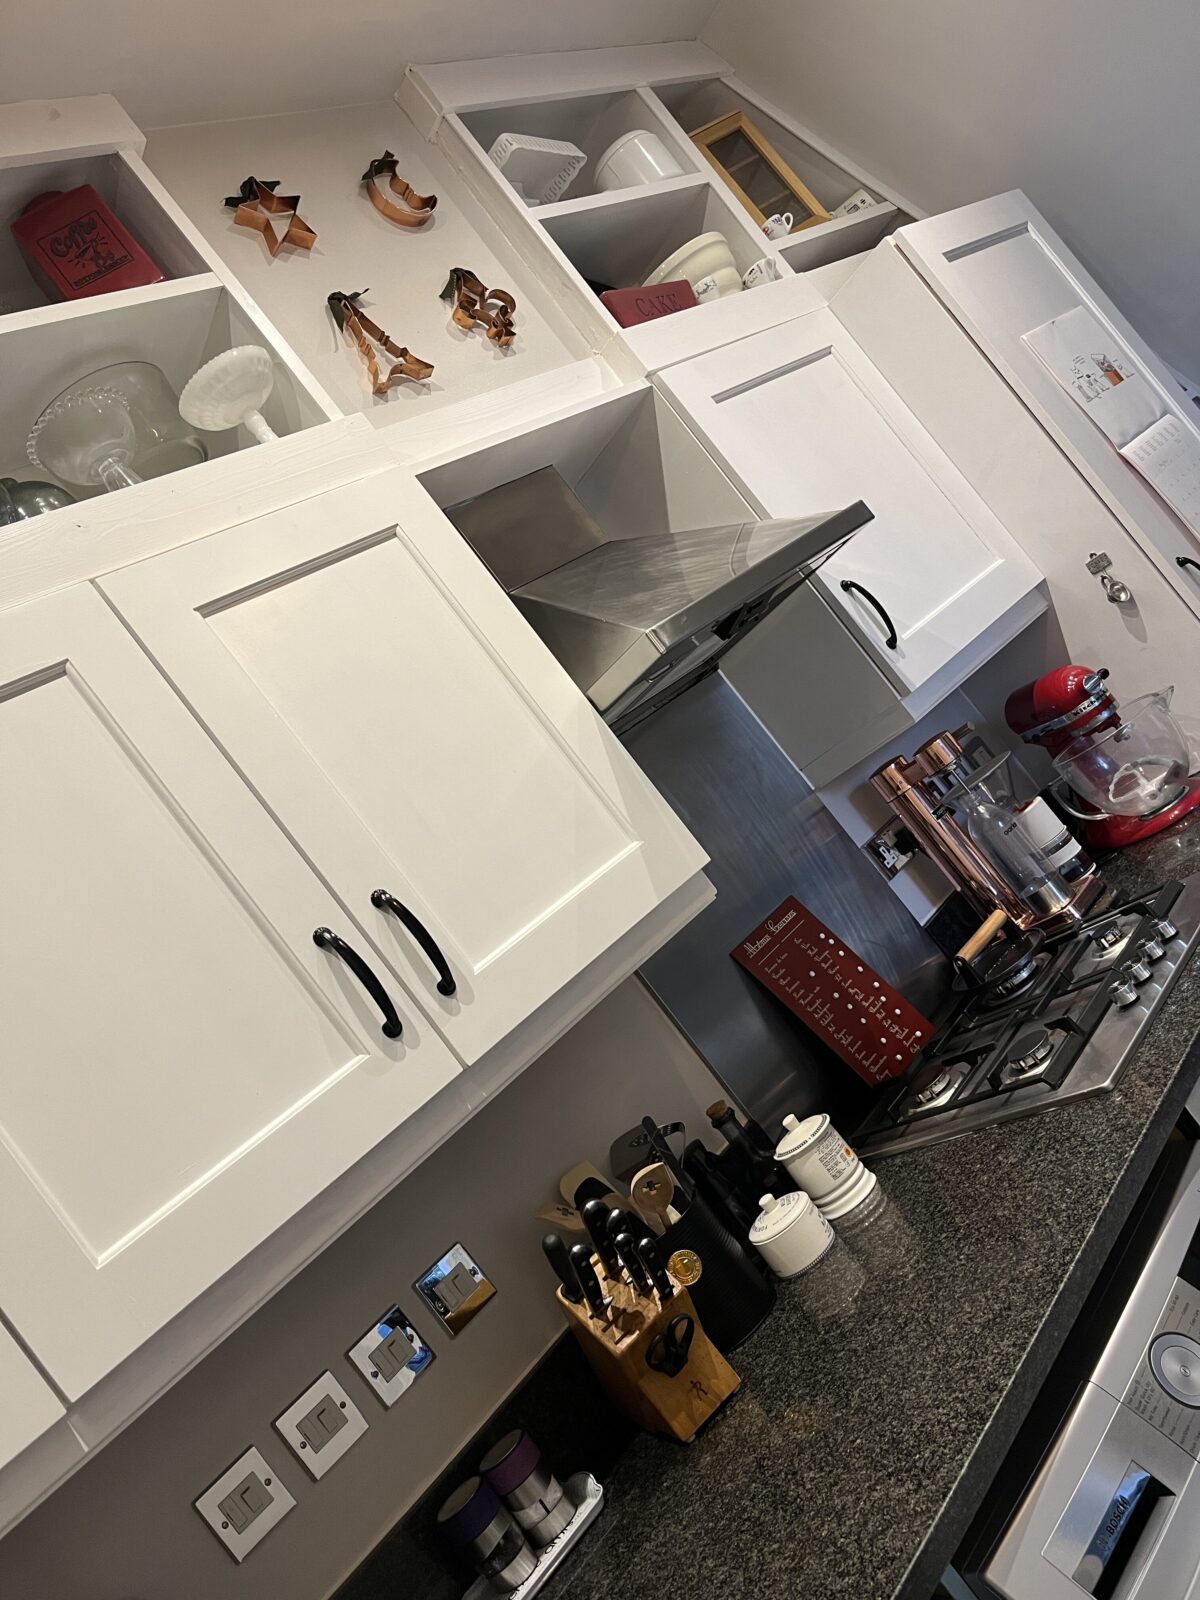
Last week, I shared how we added shelves to the dead space above the cabinets and on either side, under the angled ceilings. The shelves bring a warmth and of course, more storage to the small kitchen.
New appliances also help update the space, including a full-sized fridge, washer/dryer, and dish washer.

These changes already make a massive difference to the kitchen, which was dark and lonely when we first moved in.

Next up: Painting the Cabinets to Refresh the Space
Our kitchen cabinets are, in many ways, a very good quality. The carcasses are in good shape and well built, and the doors are a shaker style with an extra routed detail on the inner edge. They seem a little shallow, as a few of my dishes do not fit, so I will look for deeper ones when the time comes.
My issue with the cabinets is the colour. They are stained wood, in a light pine colour but with a bit more orange than I would like. (It could be the reflection of the orange floor on the cabinets! 😊) I typically prefer painted wood, especially in a smaller kitchen. It looks more modern and clean, IMO. It also helps bring in a bit more light in a dark space with no windows.
I also really like the trend of painting kitchen cabinets two different colours. We decided to paint the kitchen cabinets on the bottom a slightly bolder colour, while painting the cabinets across the top, including the newly built shelves, in F&B Wevet, the same white colour as our lounge shelves and the trim throughout the house.

For painting the kitchen cabinets, I lightly sanded the cabinets and primed both the cabinets and the newly built shelves. Two coats of Wevet, a soft white, covered the upper cabinets and brought light and and airiness to the kitchen. I painted the walls F&B Cornforth White, which is a light grey that I used in the lounge and hallways.


Below is my original inspiration for painting the cabinets on the bottom: a sea / sky blue with a touch of green in it. I would love to go with dark blue, like my dream kitchen vision, but given how dark and small the space is, I think this colour can be a good option to transition from the lounge, which has a lot of blue and grey right now.

Sadly, I did not do a great job with colour matching. I probably should have painted a swatch and lived with it first, but in typical fashion, I just went with it. I was pretty sure I would like it.
Spoiler alert: It is a little too bright. It works, but it feels a bit too bright compared to my inspiration photo. Of course, it could be the orange floor next to it that impacts the colour. (Can you tell how much I hate orange as an interior design choice?)

The Process for Painting Cabinets
The process we followed is well documented across the interwebs, but to shortly recap:
- Clean the cabinets really well. I used sugar soap and really scrubbed all surfaces. I also used the opportunity to clean the inside of the cabinets for a bit of a refresh.
- Remove all hardware, and remove the doors. Label each door so you know where they go once painted. I wrote the number in a pen in the hinge hole and then made a corresponding chart in my trusty design notebook.
- Lightly sand the cabinets and doors, to help the paint adhere. I used a 120 grit and my orbital sander, with a bit of hand sanding in the harder to reach areas.
- Wipe down the doors and cabinet boxes, ensuring they are free of dust.
- Paint with a primer. I used Zinsser, as I had read good things. This seems to be the go-to primer for difficult surfaces including IKEA furniture, veneer, etc. I did one coat and felt this was sufficient.
- Lightly sand the surfaces again and ensure they are clean and dust-free. I used a 180-grit here too, all by hand.
- Paint with the top coat. Again, it is really important to ensure all dust is removed. I have a few bits that I missed and have marred the surface a bit. You can potentially sand this off, but better to avoid it completely. To paint, I used a foam roller, and the coverage is quite good with no real marks. I have since read some great reviews of the different types of rollers, so some good tips to consider. I would be keen to try a sprayer, but the pre-work to cover everything does not seem like it would save a lot of time.
- A second coat, with light sanding in between, and you are done. I left everything to dry for 2 days, just to be sure, before re-hanging the doors and attaching the handles.
Cabinet Handles That Make a Statement
Never under-estimate the power of hardware to elevate a cabinet or piece of furniture. I searched for new cabinet hardware after painting the kitchen cabinets, but I did not want to have to fill and re-drill the holes if I chose a different shape or size, so this left fewer options. I also did not want to spend money on something I may not keep in the new kitchen when we do the full renovation.
So, I decided to try painting the current handles, another way of using paint to refresh a space. They were rather plain silver handles, a clean palette for painting. I spray painted them with a black gloss paint, and I have to say, this really made the difference in the end. (Note: the spray paint wore off in some places, so I repainted them with a brush and the finish has been much stronger. It was the same paint, just in different formats, so perhaps my spray coverage was too light.)


What do you think? I think they really pop! We might actually like the handles more than anything else we have done so far …
Addressing the Orange Tiled Floor
We plan to replace the tile with the wood flooring we’ve installed throughout the rest of the house, but only once we remove the wall and are ready to replace the cabinets. Until then, I just cannot live with the orange tile. Especially against the blue cabinets.
I’ve read about painting tiles, and while I had low expectations of the durability, I decided to give it a try anyway. Could paint refresh the tile floor?
I cleaned the surface and then painted two coats of Zinssar, before using a paint especially made for painting tiles.

Colour choices at my B&Q were limited so I chose the light grey. Honestly, they are overselling the grey in this paint; it looks white on the floor unless you hold something white next to it. Then, it looks slightly less white!

At first, I was really happy with the outcome. The blue cabinets against the grey (?) floor is a vast improvement.

Sadly, I’ve been shocked at how poorly it has held up, despite following all the guides on-line. A week after completion, we set some wet towels on the floor next to the washing machine, and the paint came right up, leaving a nice large orange spot.

Since then, several other spots have chipped away, leaving a rather unsightly floor in our new kitchen. It seems I am not yet rid of the orange tile!
Perhaps I should have sanded the tiles? Or maybe the paint is just not very good? I am not sure what I will do next, but I will have to do something to address the large orange chunks of tiles!!! Suggestions welcome!
Note that I also painted the orange tile in our small guest bath since I had a bit of paint left over, and this has held up well, although we do not use the shower very often in here and wear and tear is quite light.
Any suggestions for addressing the flooring situation?
What do you think of painting the kitchen cabinets? Has the effort been well-spent so far? Would you paint your kitchen cabinets? Let me know in the comments.
Overall, I am really happy with the result, with the exception of the floor.
Let’s take one last look at some before and after photos:


Next week: Building an appliance garage of sorts, replacing the space where the fridge sat, and a custom spice rack. See you soon.


Thank you for your post. I really enjoyed reading it, especially because it addressed my issue. It helped me a…