
While I continue to creep toward the finish line with the closet expansion, I’m taking time in February for some simple organisation ideas around the house. The beginning of the year is a great time for cleaning, purging and organising, and I am always looking for ways to clear some of the clutter.
Besides, I need a break from the closets, and a chance to refresh my mind and creativity. Projects like last week’s kitchen flooring update, and a few others I have up my sleeve. Not to worry, I will get back to the closets. But confession time: I have some learning to do to start building the doors, including mastering the router. My attempts so far have been far from a success! I need to boost my confidence to tackle this new tool so I can bring the closet expansion to a successful close.
Today and for the next few weeks, I am revisiting the lounge shelves with some simple organisation ideas that can improve the function of the shelves and improve the overall look.
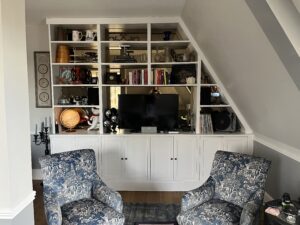
Building the bespoke built-in shelves in our lounge was my first really big DIY project. It taught me that I can do so much more than I ever thought possible.

I am still super proud of these shelves, even after completing several other significant projects since then. The shelves will always be a pivotal turning point for me in my own DIY journey.
While I am proud of the shelves, that does not mean they cannot be improved upon. In fact, I’ve learned so much since finishing them, things I wish I would have known back then. I also did not do a few things I really wanted to, in part because I did not plan well and in part because I was not sure how.

So over the next few weeks, I will be tackling a few improvements to the shelves, including:
- Bringing some simple organisation ideas to the hidden cupboard storage
- Adding accent lighting to the shelves to create more presence
- Updates to the trim, crown molding and paint to improve the overall look. (I also hope to finally get the living room ceiling painted while I am at it!)
A Bit More Hidden Cupboard Organisation
Today, I am starting simple, with some much needed organisation of the base cabinets of the shelves. These hidden storage areas have been a crucial addition to our ongoing quest for a clutter-free home. But they have never been well organised, and there is some significant wasted space.
Half of the four cupboards hold kitchenware, glassware and bar ware. Since we do not have enough space in the kitchen, this is a perfect spot. But sadly, our beautiful pieces are crammed in to the cupboards, precariously perched on the shelves. When we want to use a certain piece, half of the cabinet needs to be unloaded, and we’ve even broken a few pieces that fell as we tried to move things around in search of something.

I needed some simple organisation ideas to address the mess, and I’m pleased to say, I’ve found some good solutions. I ordered a few good pieces on Amazon and built a few pieces, to help bring some order. The impact has been amazing.
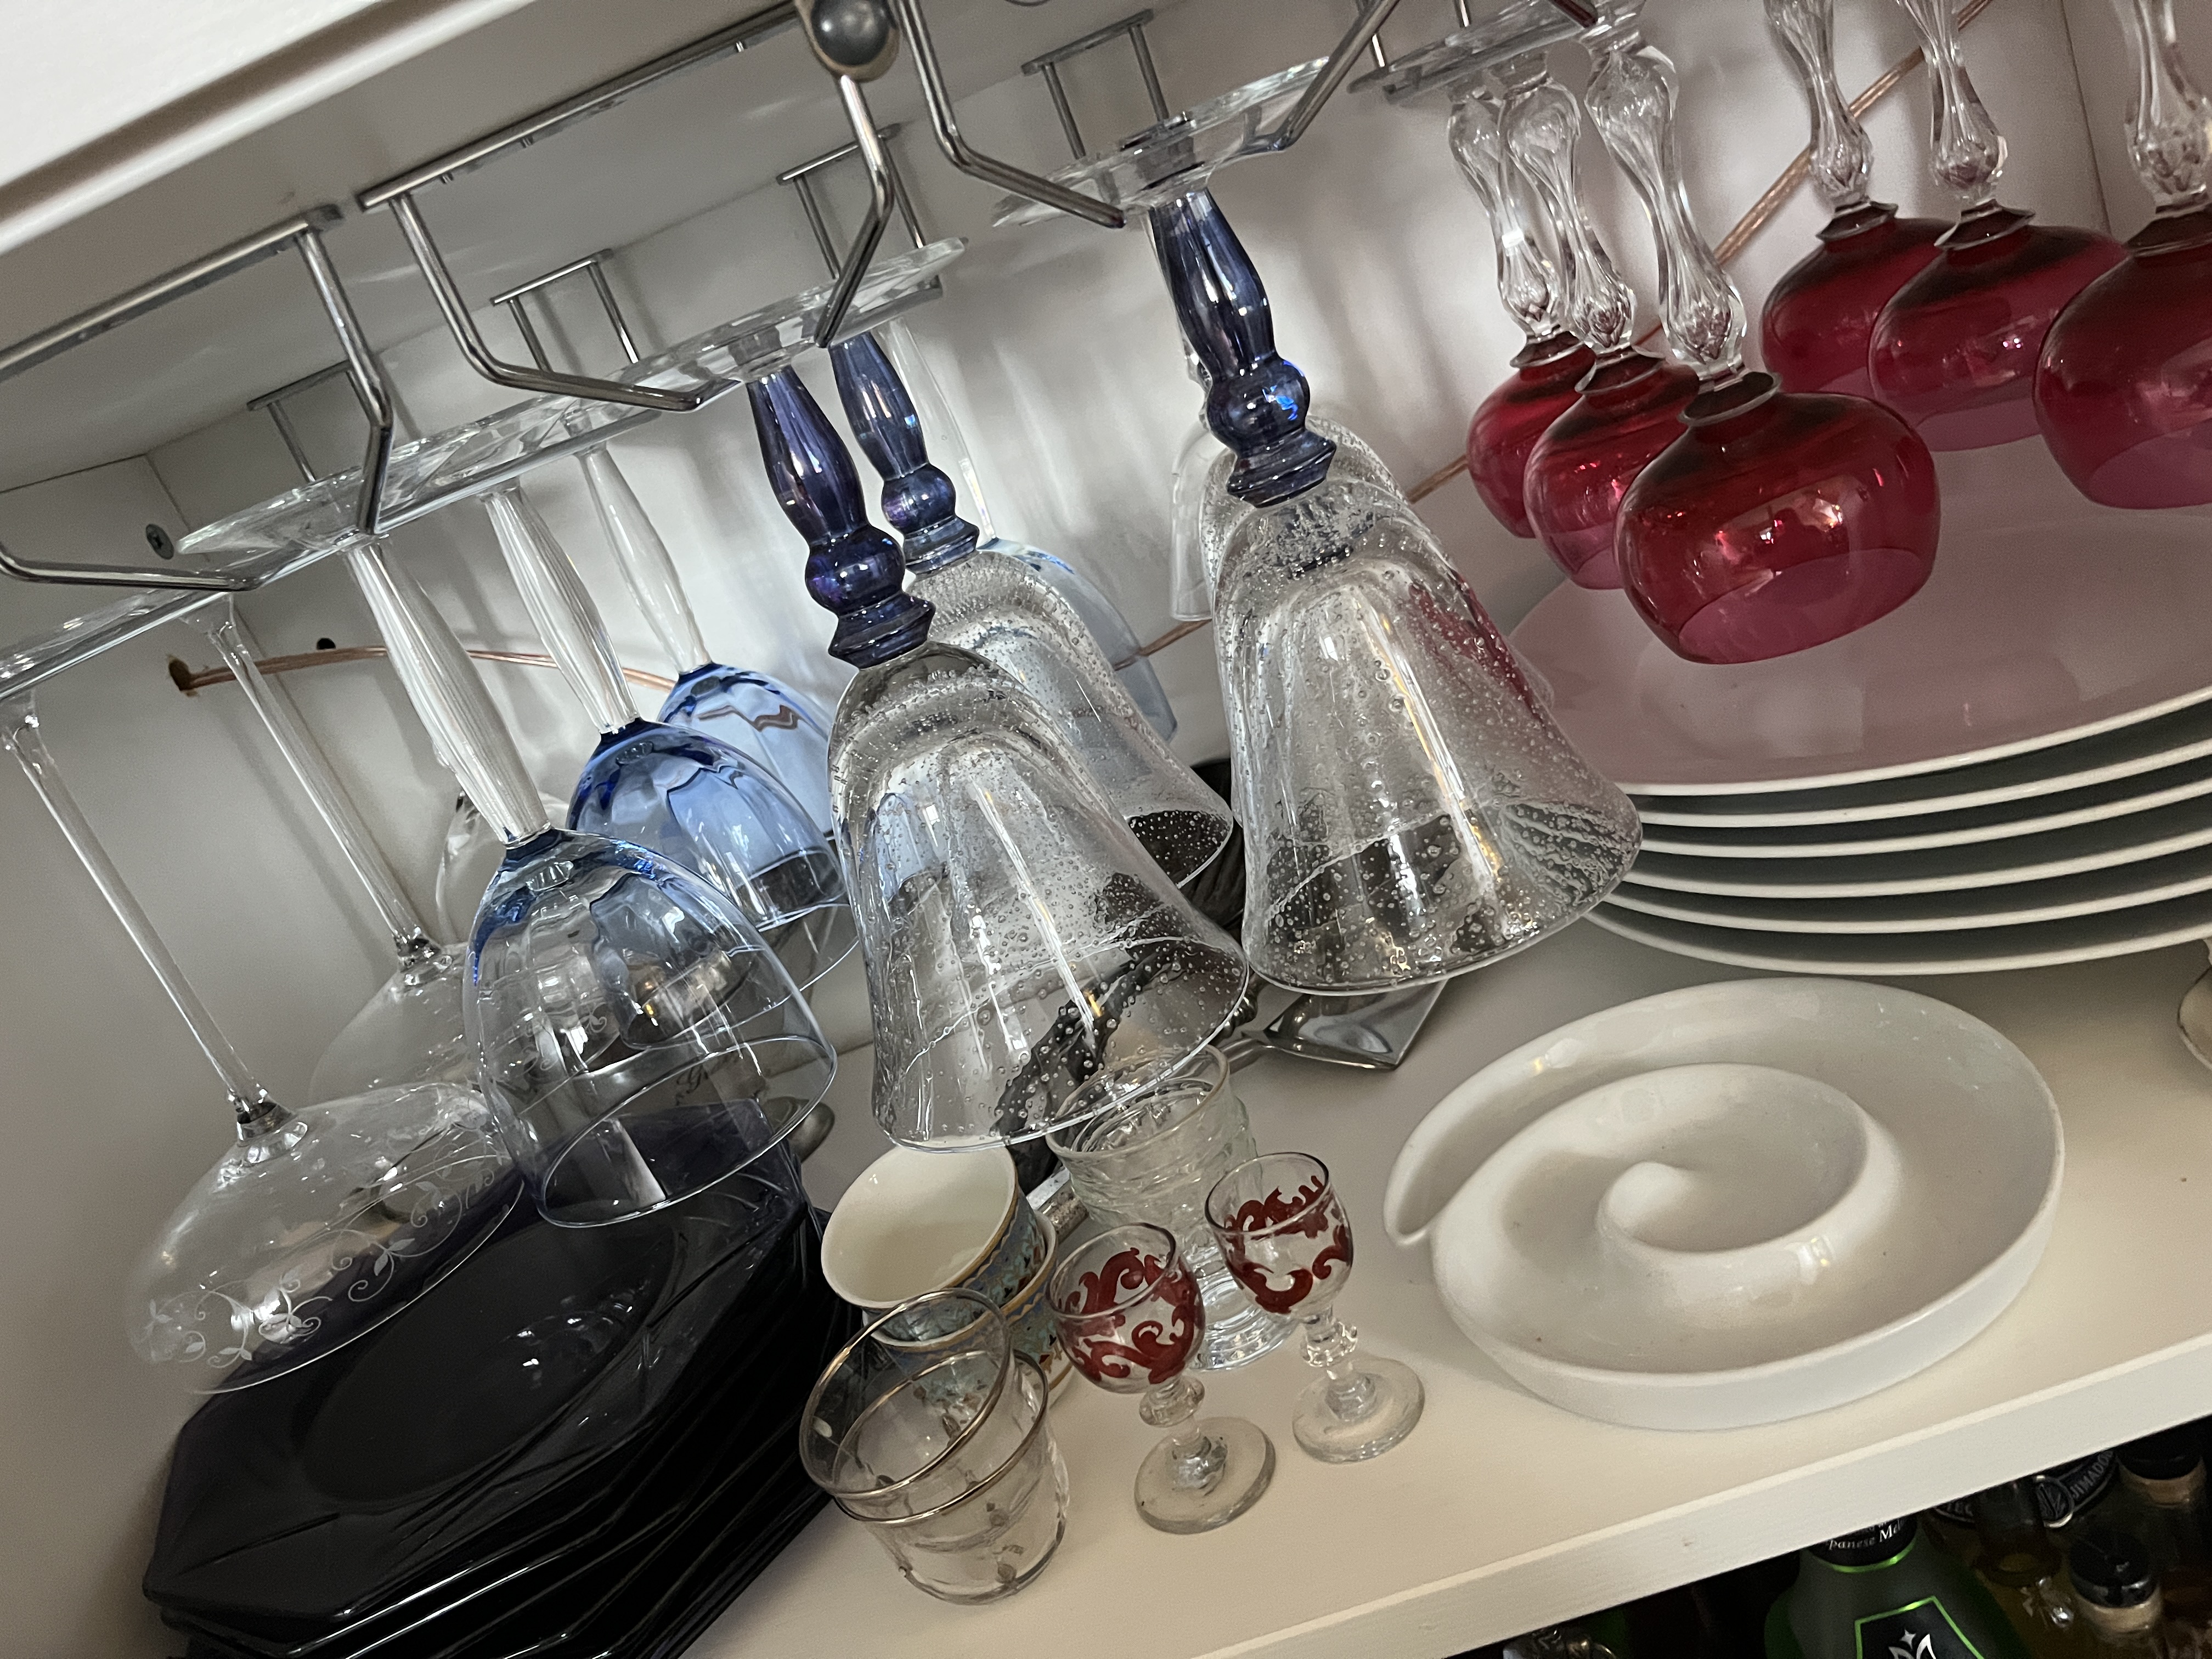
Installing Hanging Glassware Racks
First up in my simple organisation ideas, hanging glassware. We have such lovely wine glasses, as well as quite a few beer glasses with stems. By hanging these glasses from the ceiling of the cupboard, we will be able to see and reach everything easily. And the glasses will be much safer.
There will also space underneath the glasses where I can stack plates and serving pieces. The space under the glasses is small enough that we are not in danger of over-stacking, and we can reach everything quite easily.

I debated building my own glass storage racks, but this seemed a bit unnecessary. There are very good options out there at a reasonable price. Better to spend my time on more needed projects.
How to Install Hanging Glassware Racks
The install of these glass racks is super simple. I measured the width and depth of the shelf and accounted for a bit of space for the different glass sizes, like these beautiful but wide champagne glasses.

In the end, I decided to order five single arm racks, rather than a single rack with multiple arms, so I could space them as I wanted. The racks were such a success that I ordered another pack and ended up installing nine in total.
These are the racks I ordered, which are basic but perfect for the job at hand and quite reasonably priced. They come in multiple sizes depending on your needs. While they are marked as a four-pack, I received five arms both times (as the picture indicates).

The racks install with a simple screw, although they come with an anchor if needed. As I was screwing into the wooden ceiling of the cupboard, I only used the screw which was more than sufficient. The directions say you can just screw them in, but I needed to drill a hole first.
The process included holding the rack in place against the ceiling of the cabinet, marking the two screw holes with a pencil, drilling the front hole, and installing the screw. I then drilled the second hole with the rack in place and screwed it in. Super simple and very quick install.
Of course, it helps if you hang them the right way! Learn from me and pay attention that the open end is facing in the direction you want to load and unload the glasses from. Oooops!

Once I corrected the first rack so it was facing forward, the rest was quick work. Within a short time, I had six racks hanging across the top of one of the cabinets, with 18 of our glasses hanging safely.

Such a simple organisation idea, so clean and accessible! And the space underneath is perfect for dinner and dessert plates and some small serving pieces.
I then moved on to do the same for our beer glasses in a second cupboard. We had fewer beer glasses to hang, so I only hung three racks, for the nine stemmed glasses. Other glasses were stacked under and beside the racks, neatly and easy to access.

This cabinet is still a little messier than I would like, but overall, it is a vast improvement.

Organising the Other Cabinets
With all of the dishes and glasses organised, it was time to move on to the other two cupboards. These spaces hold more utilitarian supplies, like our printer, candles, stationery, and a gifting/gift wrap station.
First up, the printer. I’ve always wanted the luxury of having a hidden place to hide away the printer. The cupboards are the perfect place, but the printer is a bit too big to easily use when stored away. To use it, we have to pull it out of the cupboard , and the power cable lives outside the cupboard, which I do not love.
A simple organisation idea: A rolling shelf for the printer. I’ve followed the same process as the luxurious appliance garage in the kitchen, with some adaptations.

When I searched the stash of plywood (of which I have a lot!), I did not have a piece long enough to span the length of the cabinet and wide enough to hold the printer securely.
I did not want to buy more wood, so I decided to try a different approach: gliders on the bottom of the cabinet instead of the sides. This way, I could use a piece of 18mm plywood that was shorter than the cabinet but still sufficient for the size of the printer. An added benefit is that part of the shelf would remain stationery and could be used for printer paper, mailing envelopes, and the like.

Before installing it, I added edge binding to all four edges, so it looks nice. I painted it to blend in with the cabinet as well. Next, I added the sliders to the bottom of the plywood. Installation is very simple: you just align the front of the slider with the front of the board and use the screws provided, drilled into the corresponding holes on the slider. Be careful not to go through the entire board with the screws.
Once I had slides attached to the board, I carefully marked the placement of the base of the sliders on the floor of the shelf. I do not have a good tip for how to measure this; I just placed the board on the floor of the cabinet with the attached slides pulled out and marked along both edges of the sliders. Make sure to mark not only the sides but also the front of the slider/board, so you know where the slider should start.

I needed to avoid the door stops, and I also needed to add a small piece of wood under the gliders to ensure the board would pass over the top of the door stops. Pay attention to any potential obstacles if you are installing a gliding shelf, by putting the slides in place to test that they can open fully.
Typically, sliders detatch so you can install the two pieces separately. For this version, there is a little latch on the slider, and you slide it to the opposite side to separate the two pieces. I highly recommend these sliders, they are strong and stable, with the ability to hold quite a lot. These are the sliders I used them for the rolling spice rack, which is really heavy, and they work great! I hope they will work as well for the printer.

I put the printer in place and plugged it in inside the cupboard, and voila, a usable printer that we do not need to continually pull out to use. Such a simple organisation idea that has loads of value!
Building Half Shelves for the Final Cupboard
Sticking with the paper theme, I also took the time to reorganize my vast collection of stationery, note cards, gift bags, gifts and candles. I like to keep a few gifts on hand for hostess gifts, dinner parties, or forgotten birthdays, and I seem to receive a lot of candles as gifts (which I love!).
While I do not really have much space for a proper gifting section, a bit of organisation here has really helped, including adding a half shelf to both the top and bottom shelves in this cupboard.
I cut some leftover plywood the length of the cabinet, and half the width. (I had plenty of thin pieces of leftover plywood that were too skinny for the printer but worked perfectly here. YAY for using up the wood stash!). Make sure you ensure a good fit for the shelf; it took me a few cuts to get it to fit securely.
As with the printer shelf, I added edge banding, but to the front only, and I painted the shelves to match the cabinet. I then cut a few small pieces of trim to use as braces for the shelves and nailed them in place. The shelves fit very securely without the braces, this is just an extra step to make sure. These shelves will not hold much that is too heavy.

The half shelf allows some taller items to still live in the cupboard but expands the storage space for smaller items significantly. Although I do need some simple organisation ideas for cable storage!

What do you think? Improvements that are worth the time? Overall, I worked on this for a few evenings after work and part of a Saturday. Not too time intensive, and really rather simple projects. Yet it has made such a significant difference to the utility of these shelves. I am just so pleased!
Next up, join me as I share the second improvement to the bespoke shelves: accent lighting using LED strip lighting to improve the presence of thisbuilt-in piece of furniture.
Happy DIY-ing!


Leave a Reply