
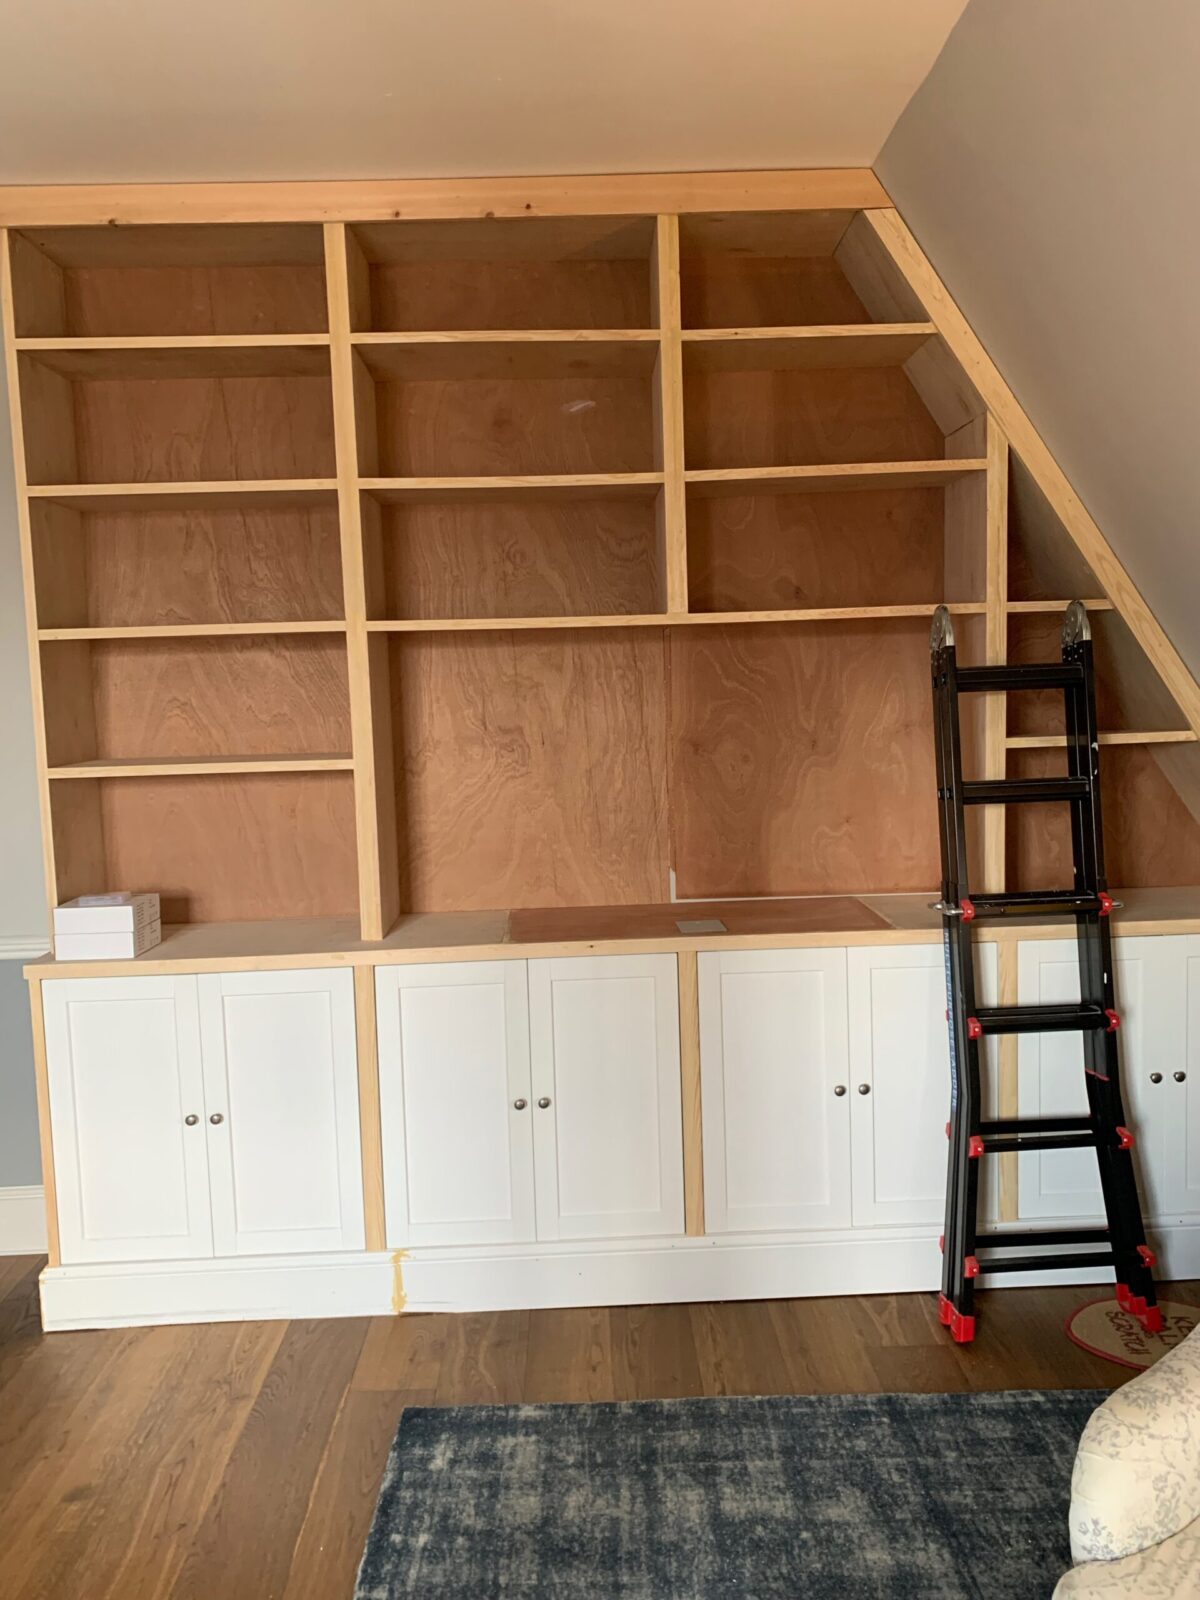
Progress continues on the custom shelves, and I can start to see the end of this project. The time has come for installing decorative trim to create a built-in look. This is the step that can elevate an otherwise plain piece of furniture.
We put the shelves in place, with wood dividers between each one to allow space for decorative trim. I screwed the shelves to one another, through the dividers, in 3 places along the height of the shelves. For additional security, I screwed them to the base cabinets, again coming up through the base cabinets and the countertop. This was a bit tricky as you need to be extra precise.

Installing Decorative Trim
Now for trim. This is the part that can hide all the imperfections and really make the shelves look like built-ins. First, the top and outer edges against the wall, which have a thicker board. I screwed 2x4s onto the tops of the shelves to attach the trim. These are flush with the shelf front, so the trim sits in front of the shelf and gives some depth. I installed a basic decorative trim, made from 1x6s and 1x4s along the outer edges, clean and simple.
I cut the top trim piece first, including the miter angle at the corner and against the angled ceiling. Then a thinner board for the angled wall down to a small straight straight piece at the counter top. There was a gap between the trim and the wall, due to the dado rail which I did not remove. I filled this in with a small piece of wood, then I’ll putty the seam and it won’t be noticeable. I used nails throughout but accidentally used nails with a head, which will not countersink or be easily covered. Rookie mistake. Fortunately, I realised pretty quickly and changed to countersink nails before too many were in.

I installed a thinner decorative trim for the edges of the shelves and between the base cabinets. I used a slightly wider version for the verticals and a thinner version for the horizontals. It fits perfectly and is simple and classic. And, it was quite easy to install with glue and finishing nails.
Most of the cuts were straight cuts and precision was required, but it was simple. EXCEPT! The trim boards are thin and somewhere fragile, and they frequently snapped with the miter saw. It was nerve-racking, because even though I wore goggles, you never knew if the wood was going to snap and fly off at me.
Adjusting My Miter Saw with a Zero Clearance Insert
A quick google search and I found that a block of wood under the trim can help. This gives a thick enough base for the thinner wood. This article from Saws on Skates gives a great explanation and longer term solution with a DIY zero-clearance insert. This insert fills the gap on the saw bed and helps reduce tear-out, resulting in cleaner cuts. I’ll be making one of these for my saw in the near future, but for now, the extra block of wood works.
Once I’d solved the tear-out issue, work installing all the decorative trim went quickly. I had all the trim on the face of the shelves, between the base cabinets and across the top.
Installing Decorative Trim for the Counter Top
Next, installing wider trim over the edge of the plywood countertop. I used the same trim as on the verticals, mitered at the corner, and it was easily installed. You could absolutely use edge binding on all these edges, which is purchased in rolls and applied with an iron (to melt the glue adhesive). But I wanted something a bit more substantial in this case.
The shelves look amazing, much more finished with the trim. I am really pleased!

Challenges with the Base Trim and an Uneven Floor
The final piece is the base trim. I knew this would be tricky because of the box I built for the base. If you remember, the wood was not straight, so I evened it out along the front with small pieces of wood. This was actually not that hard, but what proved to be nearly impossible was adjusting for the very uneven floor.
I purchased a wood baseboard that matches what is used in our house but it is slightly shorter (we have rather large baseboards which I love, but they felt too high for the shelves). Using the same baseboard, although slightly shorter, across the front of the shelves results in a more built-in look.
The boards I purchased had a curve on the backside. I chose the ones with the least curve, but they all had some curve to them. I measured the pieces for the front, cut an angle where they meet up and an angle to go around the corner. On their own, everything matched up, but when I put it in place, it was a mess. To make the corner match up, it was not level, due to the uneven floor. And the curve at the back made it impossible to nail on straight to the base box.
I tried everything, and eventually, I had cut the boards beyond repair with no way to use them. Off to the store to buy more boards, and more of the same. I could not figure this out. I was starting to worry, how would I fix this. The last piece, and I just could not do it, after making it this far.
A bit of searching, and I discovered scribing tools, to help trace the uneven floor onto the board. I ordered one on Amazon, while I kept trying to find a solution. I eventually ruined the second board too. The curve in the back was a big part of my problem. The wood is just so imperfect, and with my imperfect base box and floor and my limited experience, it created the perfect storm.
Back to the store for a third try. I had decided to choose a simpler and smaller baseboard to see if it could work. But then I found MDF baseboards. They had one that matches the style in my home, so I purchased 2, feeling optimistic by their perfect shape and squareness. No curves, and already primed.
When the scribing tool arrived, I assembled the baseboard, with miter cuts at the corner and the seam at the front. Holding it up to the shelves, I used the scribing tool to outline the shape of the floor along the bottom. I then worked to cut along this very uneven line. Next, I used my sander, but in hindsight, the jig saw might have been faster. I worried about cutting too much and ruining another board. These baseboards are expensive, I need two of them each time, and I was on my third try. Neither my budget — nor my sanity — could do this a fourth time. So I went slowly, diligently, trying hard not to over sand.
I finally got to a good place. Phew! The seam in the front was not perfect, but I will address it with putty. It is not the most visible in the room, and I just do not think I can do any better. So this is it.

I nailed everything in place and stepped back. It looks pretty amazing, if I do say so myself!
I had hoped to complete the caulk, wood filler and sanding by now, but the base board saga set me back. Stay tuned next week when I share my progress with the final bit of this project that will not end.
If you missed the previous steps of my Custom DIY Shelves, catch up here:


Thank you for your post. I really enjoyed reading it, especially because it addressed my issue. It helped me a…