
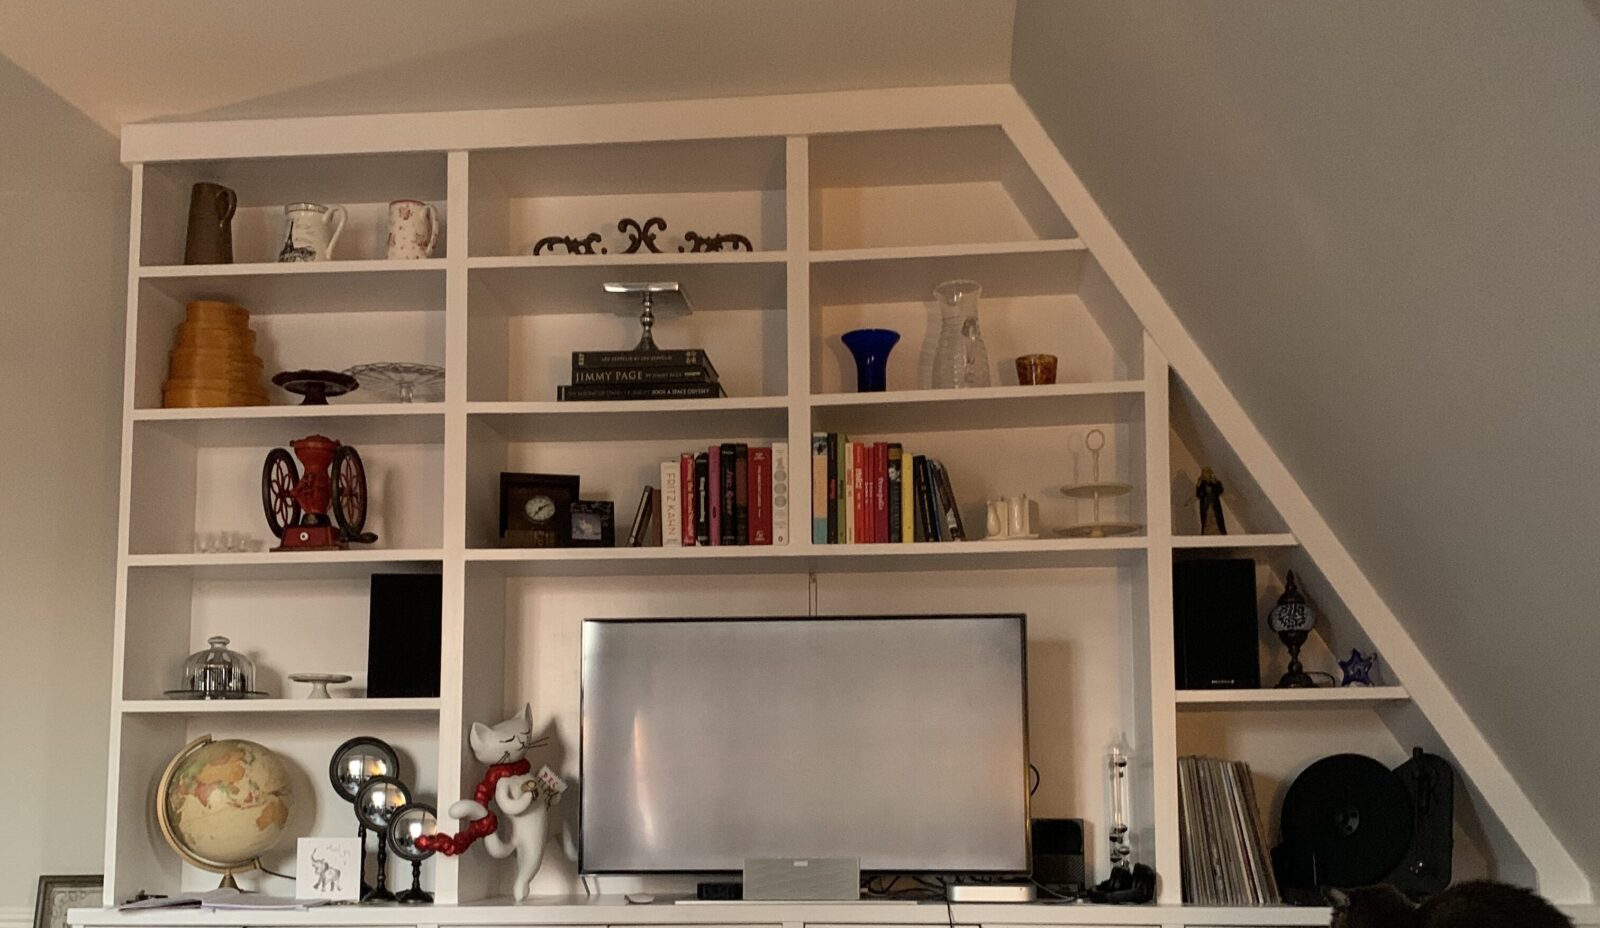
As we come into the home stretch on my project to build DIY custom shelves in my lounge, I will not spend a lot of time on sanding, caulk and paint. If you are like me, you are tired of this beast of a project and just ready for the final reveal. Next week, I promise! But here is a taster of where we have gotten to.

Regarding finishing, there are many great posts on caulking, sanding, and painting, covered in detail on other blogs, but of course, if you have specific questions about my experience, let me know in the comments.
But let me share a few tips from my DIY custom shelves experience that might help you if you are tackling a similar project.
Wood filler
I struggled with the first batch of wood filler I bought. I needed to mix two different substances, which created a chemical reaction and then had to be used within minutes. The first few batches, I lost a bit of filler as it hardened before I could use it all. I made smaller batches, but then, progress was so slow, and the result was not very smooth. I knew there had to be a better way, so off to the store, where I found a wood filler that did not need mixing. After this, things progressed at a faster rate.
Pocket hole filler plugs
I needed to fill the holes made by the pocket holes in my DIY custom shelves. To do so, I purchased the Kreg plugs and applied glue and inserted them, but they stuck above the holes quite a bit. I read that you could put them in the freezer for a few minutes to help reduce the swelling, and this helped a little.
But I needed to do a lot of sawing to level them out. I purchased this amazing Japanese pull saw, and once I got the hang of it, it went a bit faster. This is an amazing little tool, highly recommended. Once you get used to only pulling the saw, it cuts brilliantly through wood with little physical effort. (If interested, I might do a series on my favourite tools as I build up my woodworking progress. Tell me if that would be of interest. The Japanese pull saw would be top of the list!)

For the pocket holes, though, next time I might just use putty. The holes are not overly visible, but I find the plugs a bit fiddly and more work than probably worth. Or next time, I might try a chisel to even them out. Any experiences that work for you? Please share!
Sanding the Shelves
Once I had filled the holes, I sanded everything with 120 to 220 grit. (I’ve since learned that you should not go up so dramatically between grits, sticking with no more than half the grit, so I should have thrown in a 180.) To be honest, I was not totally sure what I was doing. In some areas, it was clear what rough patches needed sanding, but I just did the best I could. I read a tip that you could make pencil marks all over the wood and then sand. The marks left would show the low points in the wood. I did this, but mostly I checked for level and just ensured it felt smooth to the touch.
Caulking the Shelves
I was the most worried and the most excited about this step for my custom shelves. I had read horror stories about how difficult it is to get caulking right and how messy it is, but also how much caulk can hide any imperfections. Honestly, I really enjoyed this process. I had read a lot and managed my expectations, so maybe that was the key. But I found it very rewarding to see the impact of the caulk closing up visible seams and covering areas of imperfection. They are right, caulk can solve many woes!
It is messy, that is sure, and it takes awhile, but overall, it went fairly quickly. Have lots of towels to help clean up your mess. This is the caulk I used, which I found worked really well. Make sure you choose a paintable caulk if painting your piece.
Painting
First, primer specifically for wood, then two coats of a satin white. I used Wevet from Farrow and Ball. On paint brands, I have used a lot of Farrow and Ball over the last 5+ years. I painted our Paris Flat in Cornforth White, a light grey, and Hague Blue, a rich deep blue. In London, I painted our living room and hall in Cornforth White above the dado rail and Manor House Grey below. I used Brascia, a lovely aubergine, in the bedroom, with Amonite, another light grey with a bit of silver. And I have an entire bin of little sample F&B tins.
While I love the colours, I do not love the quality of the paint. I do not find the coverage or durability to be that great, and whenever I’ve gone back to an open tin after a few months to do touch-ups, the paint has thickened significantly and has a very odd smell. I do not know what it is, but I always have to thin it with a bit of water, which they say not to do. Then it does not match perfectly when I do touch-ups, which seem to be needed quite a lot. But I cannot waste a tin given the steep price.
Recently, I threw a tin out because the smell of the paint was so bad. Does anyone else have this experience with Farrow and Ball paints? This is a cult British brand; what am I missing? Am I doing something wrong?
Quite honestly, after a lot of painting, I am pleased with Dulux. Colours, coverage and smell are all good, and they do a brilliant job of colour matching at my local Leylands.
Otherwise, painting went well, with two coats and a light sanding in between each coat.
And with that, I am done!
I am thrilled. My DIY custom shelves are not perfect, but they are really good. I saved money, and more important, I built something amazing that we will enjoy for years to come. I’ve added valuable storage and display space, and the living room looks better with the addition of shelves. Most important, I feel invincible. If I can do this, what else can I do? The sky is the limit!

Next up, I’ll share a bit more on the living room, several ways of styling the shelves, and one more update that will really finish them off. Would you be interested in seeing how the shelves fit into the rest of the room and help create the room’s style and feel? Tell me in the comments.
Thanks for staying with me through what has been a very long process. Hopefully you learned a few things, and importantly, you are ready to try your own shelves or other transformation, emboldened by my experiences. Go on, give it a try, I know you can do it!
If you missed the previous steps of my Custom DIY Shelves, catch up here:


Thank you for your post. I really enjoyed reading it, especially because it addressed my issue. It helped me a…