
The idea of cutting into a wall is terrifying. But it is the first and most critical step of my latest DIY: expanding the space above our closets. The goal is to gain more previously unusable closet space.
I keep reminding myself, as I get my tools ready to make the first cut, it is only drywall. It is easily replaced if needed. But of course, I do not know what is behind the wall, and having never done this before, it feels big!
Am I taking on something too advanced for my skills?
Let me reassure you, if you are apprehensive about such a project. This is do-able, and in many ways, it is liberating to cut into a wall. Once you take those first steps, you realise that you’ve got this. And once again, you start to realise that you are a force to be reckoned with.
Let me share my experience in this first and most daunting of steps, in hopes of encouraging and empowering you!
Cutting into a Wall: The Tools
For cutting into drywall, I’ve found two possible approaches, and I’ve tried both.
First, a multi-tool with a plunge cut blade for drywall is fast and efficient, albeit very messy.
Alternatively, a jab-saw is another option. A bit more manual and therefore slower, but less messy and in my view, a bit more precise.
If you are going to invest in a tool for this work, I suggest starting with the jab-saw. It is cheaper, and again, it works really well for this type of project.
You also need a pencil, spirit level and tape measure to draw out the lines on the wall for cutting. Once we get to cutting out studs and framing, other tools will be needed, including saws and metal snips, but that is for another day.
The Process
I have four possible places to expand my closets, above the built-in closets in our bedroom and in the office/guest bedroom. Each one is a different size and shape, so four different approaches.

I began in the office with one of the square closets. This is the simplest closet, as it is square and not too large. And, I will not be staring at it from my bed, in case I make a horrible mess of it.
Because these openings sit above existing closets, precision will be critical. I must ensure the new openings line up vertically with the closets below and horizontally with each other.
To ensure the measurements are precise, first, I drew out the shape of the closet openings. I started with the lines for the architrave, lining up to the closet below.

The first outline shows where the edge of the architrave will be, to line up with the architrave below.
The architrave is 70mm wide, so next, I drew a line 70mm inside the outer lines and confirmed that this lined up with the cupboard openings below.
I allowed a 70mm gap between the lower closets, to match the width of the architrave. I drew a line 70mm down from the ceiling and one 70mm up from the top of the bottom closet. These form the outer edge of where the architrave edge will sit. I then drew the inner line 70mm in from that, for the opening of the closet.
Once I had drawn this out, I stood back to check the proportions lined up and it was aligned.
I did the same on the second closet in the room, ensuring it was even with the closet below and with the first opening I had drawn. You want everything to be level and plumb and in alignment with the other closets.
Again, a check by standing back, and everything looks good.
The First Cut into the Wall
The first cut is the most difficult, because you are not sure what you will find behind the drywall. Using a stud finder can help ensure you are not hitting something.
I started in the lower left corner, which was easy to reach. We also have some old closet lights installed that do not work but are live, so I wanted to stay away from where the wires entered the wall. NOTE: I did turn off the electricity to this room, just in case I accidentally hit the wires. This is strongly recommended if you do not know what is in the wall. And honestly, it is good practice anyway.
I began inside the drawn outline, just to get a feel for how it felt to cut into the drywall, and in case I made any mistakes.
I used my multi-tool at first, as that is what I had seen other DIYers using. It cut right in, like cutting through butter,. It was not long before I had cut a small square of drywall out and could see inside the wall.

My confidence growing, I moved on to the outline and started cutting along the line. A multi-tool vibrates as it cuts, so I found my cuts a bit jagged and rough, but not too bad. This will be smoothed out later before framing.
What was bad was the dust! Wow! Drywall dust everywhere, so eye protection and a mask over the nose and mouth are critical.
I came to a metal stud in the middle of the closet opening, running vertically. Not surprising, but the sound of hitting the stud did scare me just a bit. I worked around this, cutting one half of the square to the left of the stud, then doing the same on the right.

Once I had the front completely cut, I began with the inner drywall, or the wall on the inside of the closet. There was a 64mm space between the two drywall portions, so it was a little harder to cut the inner wall as precisely as I had cut the outer wall.

I cut the inner wall in less time than the outer wall, because I could see what I was doing. (Note that I had moved the electrical wires out of the way so they would not be cut, and the power remained off throughout.)
Next, I pulled the drywall away from the metal stud, which required a bit of force but came away fairly easily.
Now, I have a proper hole in the wall and can see into the closet from here. There is no going back now!

Learning From Experience
After my first try at cutting into the wall, I realised that I had made a huge mess in our office. There was dust everywhere in the room, on everything! I knew I was generating a lot of dust, but I had assumed it stayed in the general area I was working.
After a good clean, I decided to try the jab saw for my next closet, to see how it compared. I really like the ease and speed of the multi-tool, but the precision is not great. And quite honestly, I found the speed a bit concerning, since I was not sure what I might encounter in the wall.
And the dust was significant too. Since I am usually working in the evenings and while we live around my DIYs, putting plastic over everything for several days (errrr, … weeks) is a bit difficult to do.
Spoiler alert: I prefer the jab saw for cutting into walls. Sure, it is manual, and it requires a bit of effort. But it is precise, and it creates a lot less dust than the multi-tool. Actually, there is just as much dust, but it stays fairly contained to the area where you are working, which is a bit easier to clean.
To use the jab saw when cutting into the wall, I have seen people just push it and start sawing. I found it a bit easier to use the tip of the blade to scrape a line in the drywall along the pencil line. I used the spirit level as a straight edge to ensure precision. This step created a clear channel for the saw to follow. I did this a few times along the line, making it deeper and deeper, until finally I was able to jab it through the drywall and start sawing. I worked in small sections, as I knew I would probably reach a stud or two.

Also, since I cut three large openings with the jab saw, I gained quite a bit of experience and started to develop a bit of a technique. I found that holding the saw at a 45-degree angle in the wall, instead of straight into the wall, seemed to work better. Holding the saw perpendicular to the wall and sawing back and forth in a straight manner seemed a bit harder than taking an angled approach. I do not know the science, it just felt faster and more efficient.
Certainly, I ran into a few studs, mostly down the center of the openings. I worked around them as before.
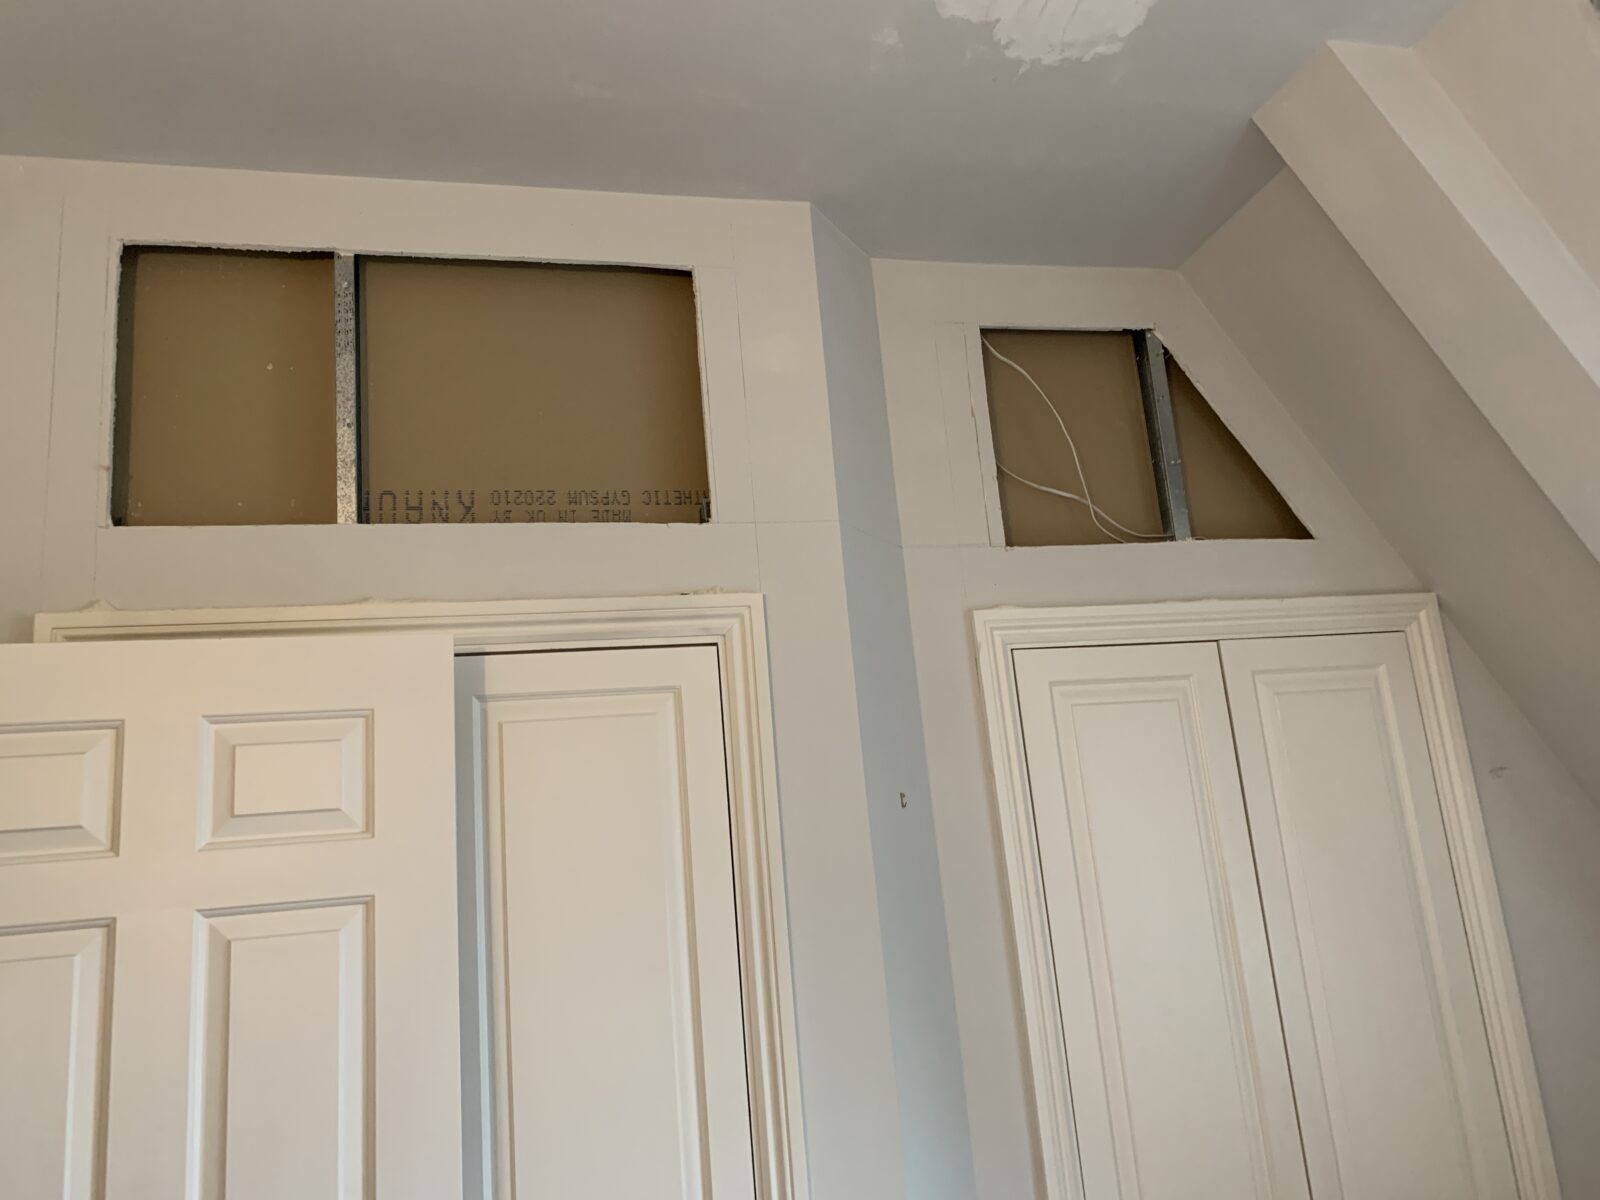
Also, on this round, I focused on only cutting the outer drywall. I left the inner drywall in place, as I wanted to find a way to be more precise with the cuts.

After a few days and evenings, working in small chunks of time, I had the outer layer of drywall cut from all four closets.


As you can see, three of the four openings have a stud in the centre, which needs to be removed. None are load bearing and are only there to hold up the drywall.


After Cutting into the Wall, What is Next?
I’m pleased with the first step of this effort. I had thought that cutting the drywall would be the hardest step. But now that it is done, actually, the next step is causing me some challenges. How to remove the metal studs, all of which are in different places, before I can frame out the closet.
Besides the vertical studs, the first closet that I cut into also has a horizontal stud that prevents the exact sizing I want to have. I need to figure out if I can remove it or find another way to work around it.
The next week will be spent doing more research and trying different approaches for the studs and the framing. I also have the electrician coming to remove the wiring for the closet lights as we will not use these.
Stay tuned for the next steps in this important effort to expand our closets and increase storage in our small London flat by extending into the space above our existing closets. See you next time!
Save for later, in case you want to try the same in your home.


Leave a Reply