
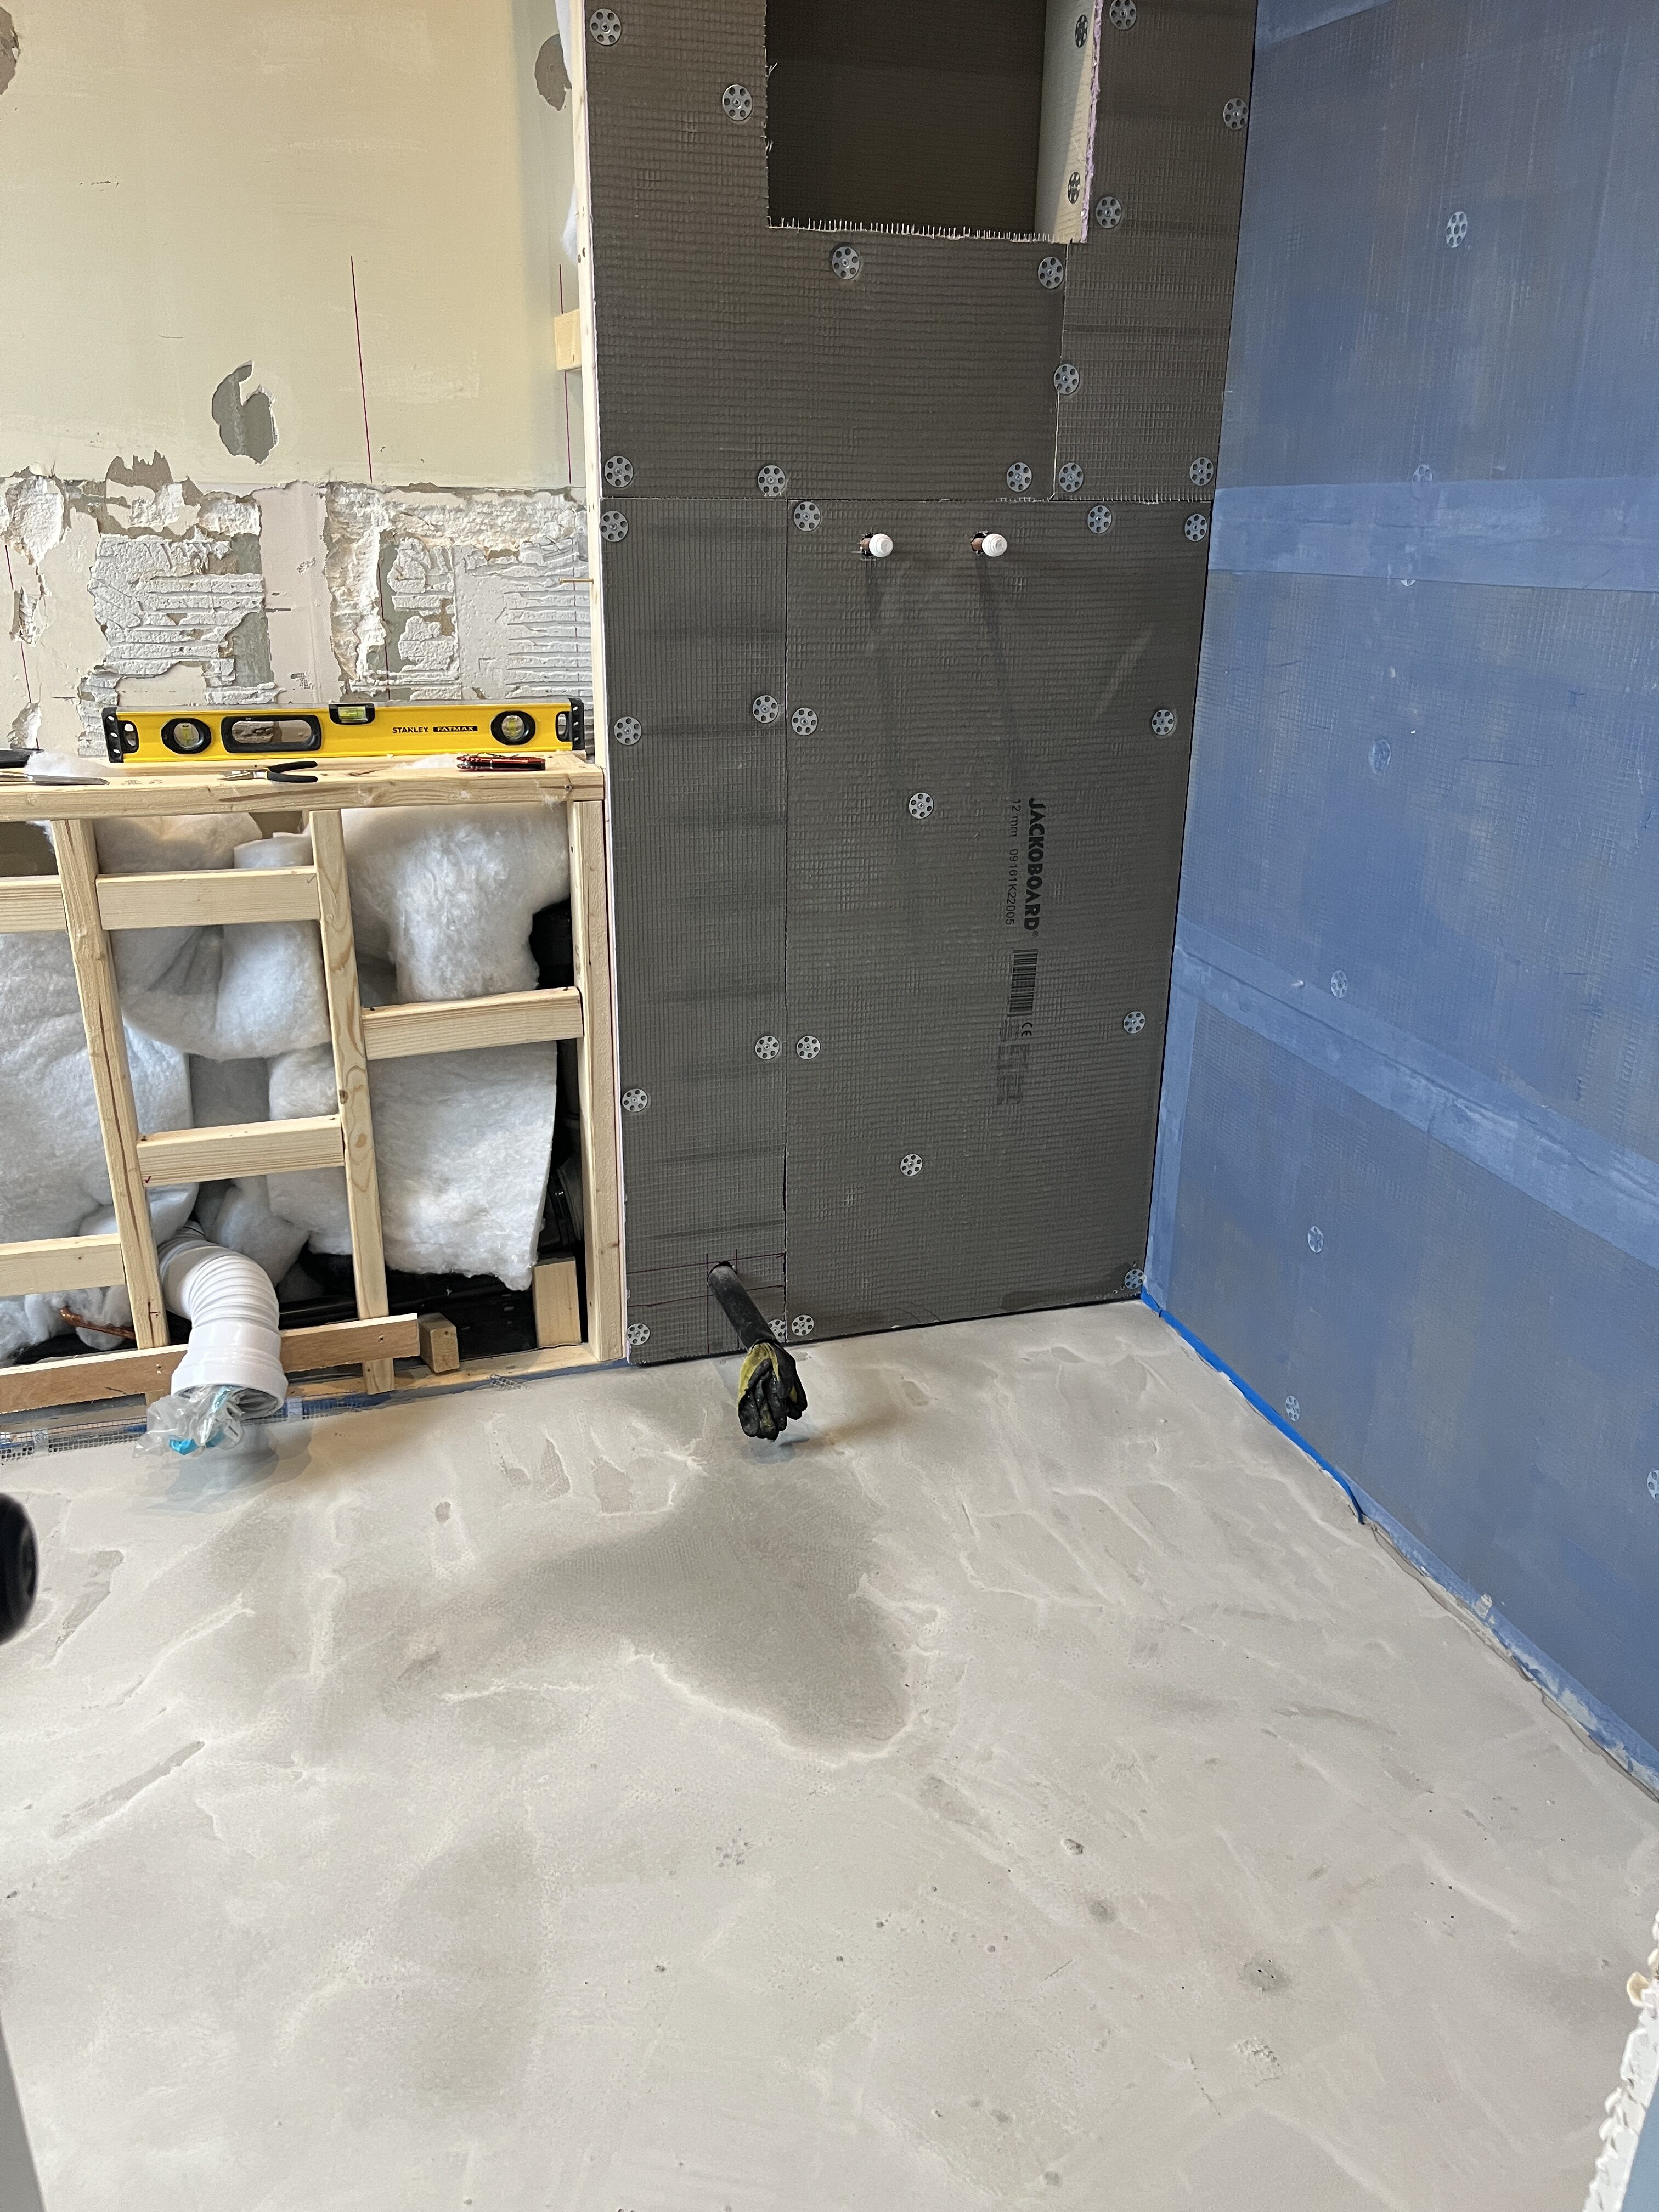
I’ve learned the hard way how to lay self-leveling challenges, and today, I am here to share all about what I’ve learned, how to avoid issues, and what to do and not to do when you are laying self-leveling compound yourself.
I do not know what it is about my second bathroom renovation, but it is just giving me all kinds of issues. It has many of the same aspects that my first bathroom had, but somehow, I just keep running into challenges. The self-leveling compound challenges have been quite frustrating, and honestly, I am not sure if I will face an epic failure later on as a result. Only time will tell. So learn from me.
When I last updated you on my progress, I had boarded, de-boarded, and re-boarded the shower wall. That was a whole other issue, with not being able to get the mechanical fixings into the metal studs. I ended up ripping the entire wall down and re-doing it. Fortunately, I had an excess of supplies on hand. But it was still frustrating.
I then laid the underfloor heating, which went down without issue. Phew! But my relief was short-lived, because I faced some significant self-leveling challenges that were hard to overcome.

What is self-leveling compound and why use it?
Self-leveling compound is a type of cement that pours on to the floor in a very liquidy format and works to do as the name says, self level itself. Because of the liquid nature, it runs along the floor and goes into the low spots, helping to offset any issues with the flooring.
It is used to level of course, but it also plays a role when adding underfloor heating, which was my main reason for using it. You can pour it over the heating elements to help protect them, before you trowel on the mortar and start laying tiles.
Bottom line: self-leveling compound creates a stable, level floor that helps ensure your tiling is also level and secure.
My Challenges Using Self-Leveling Compound
The First Issue: The Wrong Product
As with the guest bath, I planned to lay the self-leveling compound (SLC) to further protect the underfloor heating element and to ensure a level floor for tiling. For this bathroom, I had purchased a different type of SLC from last time: Larsen’s self-leveling screed. I had used Larsen’s for the tile mortar and really liked it. It is a respected brand in tiling, and it had mixed up easily and was easy to use.
Well, my choice for SLC was a mistake. I poured out the first batch, and it was like wet sand. It just sat there, not running along the floor to self-level itself. It was thick and gritty, not smooth and liquidy like the type I had used in my guest bath reno. I had poured a good amount, so I tried to smooth it out, but I could only do so much, it just was not moving much.
After a bit of research, I realised I had bought a self-leveling screed, which is more of a sandy cement mixture. It is not very liquidy, it requires a lot more hands-on effort to apply, and it is meant for thicker applications. I only needed a few millimetres of self-leveling, and I wanted something to level itself. More liquid, less sand. Because the screed was also labeled self-leveling, I missed out on the difference when I purchased it. Learn from me on this!
I decided to stop and go back to what I had used before. Blue Circle Masterlay floor leveling compound from B&Q. This had worked brilliantly in the guest bath, and I had faced no self-leveling compound challenges.

Of course, I needed to work around a large patch of screed in the room. I thinned it out as much as possible before it dried, so I could lay the SLC over it.
The Second Issue: Burning Out My Drill
The next day, I picked up a few bags of the SLC I had used previously and got to work, mixing it up with my drill and a mixing paddle. I worked with a quarter of a bag at a time, because that was all that would fit in my bucket and what seemed reasonable for my drill and paddle attachment to handle. After I had gone through one bag, I noticed my drill smoking. There was a burning smell, and I thought I might have overworked the motor, so I stopped. Not great when you are in the middle of laying self-leveling compound. And please note: Because I was doing it a quarter of a bag at a time, it was taking ages, as the master bath is 2 x 3 metres. The self-leveling compound challenges just continue!

After a bit of time thinking (my go-to move in times of failure), I ended up ordering a paddle mixer from Screwfix, especially for mixing mortars, cement, etc. It is a bit overkill; do I really need this? And besides, where on earth am I going to store this thing? It is huge! But, given how much tiling I have ahead of me, as well as more SLC, it just seemed to make the most sense. And the price was right for the peace of mind.
The Third Issue: Uneven Results
Because of the wrong SLC, and then the drill overheating, I had to pour the self-leveling in several sessions. And then I ran out and had to go buy more SLC. So there were edges where it stopped, leaving several uneven spots in the floor. This was not ideal, and as much as I tried to feather it out and blend the different batches in, it was not perfect.

So I had an uneven floor with spotty patches of self-leveling compound. What to do?
The Fourth and Final Issue: De-Laminating
At this stage, I was feeling quite defeated by all the self-leveling compound challenges. But wait, it gets worse.
I decided to ask AI for some tips, and that is when it really went wrong. AI informed me that I should not be laying SLC on top of SLC without having primed the surfaces first. I had no idea! According to AI, there is a big risk of the top layer of SLC de-laminating and coming unattached from the lower layer. And creating instability in what needs to be very very stable. EEEEK!
To address it would mean somehow scraping the top layer off and priming before laying more compound. The idea of that happening without damaging the underfloor heating seemed remote, so in my mind, I was already ripping everything up and starting over, down to the sub-flooring. Taking me back to the recent nightmare of boarding, de-boarding, and re-boarding the shower wall.

I won’t lie, I also considered just giving up and calling in the professionals. And there were some tears involved, I’m not ashamed to admit. I just cannot catch a break on this bathroom.
AI advised waiting 48 hours before checking the condition of the SLC. It advised tapping the floor and seeing if it sounded hollow. If yes, that was a sure sign of de-lamination. If no, I might be good to carry on. It also advised scraping a bit at the top layer to see if it came up easily. Perhaps it would be okay.
After the required 48 hours, I checked the floor and it all seemed okay. It did not sound hollow, nothing shifted or moved, and I could not easily scrape any of the layer off. I discussed with my dad, an expert in all things DIY, and he thought I should be fine. AI advised in this case to prime and then apply a final thin layer of SLC, which should hopefully create a nice solid top layer and “glue” everything together for a solid base.
So, I said a little prayer and rolled on a layer of the primer recommended to go with the SLC. I left it to dry overnight.
The next day, I mixed up one last batch of SLC, using an entire bag and my new paddle mixer, which works brilliantly. As expected with such a piece of kit, I had no issues mixing all the compound. To make sure I had plenty of capacity, I also splashed out on a big new bucket. 75 litres! Carrying it from where I mixed it to the bathroom was hilarious, because I could hardly lift it, but I managed in the end. (Where I will store it is a problem for another day!)
I poured the SLC all out, into a very thin layer over the floor. Then, I spread it out carefully, making sure to push it all over the floor and into the dips. Honestly, I really wasn’t sure if this was going to work, but I did not know what else to do.

I left it to dry, and when I went back the next morning, it was a lot better. Most of the dips and ridges were gone. It is not perfect, there are still a few bits that are slightly low, and there are a few places where the underfloor heating mesh is sticking above the SLC and has hardened from the cement. But overall, it is fairly level.

I don’t know if there will be issues in the future. While I tend to think it will be okay, you never know. I might do all this work only to have to re-do it in the near future, sooner than I would like.
Many Issues, No Regrets
But that’s the thing. I am a DIY-er, and one without a load of experience. I have huge ambition, and I am not afraid to try. And, I am doing this on my own, and I am learning as I go, figuring things out. Making mistakes, lots of them. And finding my way through. So far, with every setback, I’ve been able to find a way. And honestly, if this does not work out, I still do not regret for one minute that I tried.
And that, my friends, is the DIY life we’ve all signed up to. That is what being an Intrepid DIY-er is all about. How about you? Any regrets? Any epic failures that you could not rescue? And if so, what was the big learning for you? Please share in the comments, to remind us all that DIY is as much about learning as it is about succeeding.
For me, I’ve learned a few important things from my self-leveling compound challenges:
- Always prime your SLC between layers.
- If you have a lot of mortar and SLC mixing to do, buy the mixer paddle. Figure out the storage challenge later.
- Invest in a huge bucket. I was using these small buckets and working in batches, but with the mixer paddle, I’m mixing entire bags now, and it is much more efficient and enjoyable! Not to mention, easy to measure and mix the right ratios.
- I already knew that failure is inevitable in DIY, but even when faced with what seems like an epic failure, just keep going. You never know how things will turn out. And often times, it will all be fine in the end! Even if reaching the end is a bit harder than you hoped it would be.
Happy DIY-ing!








Leave a Reply