
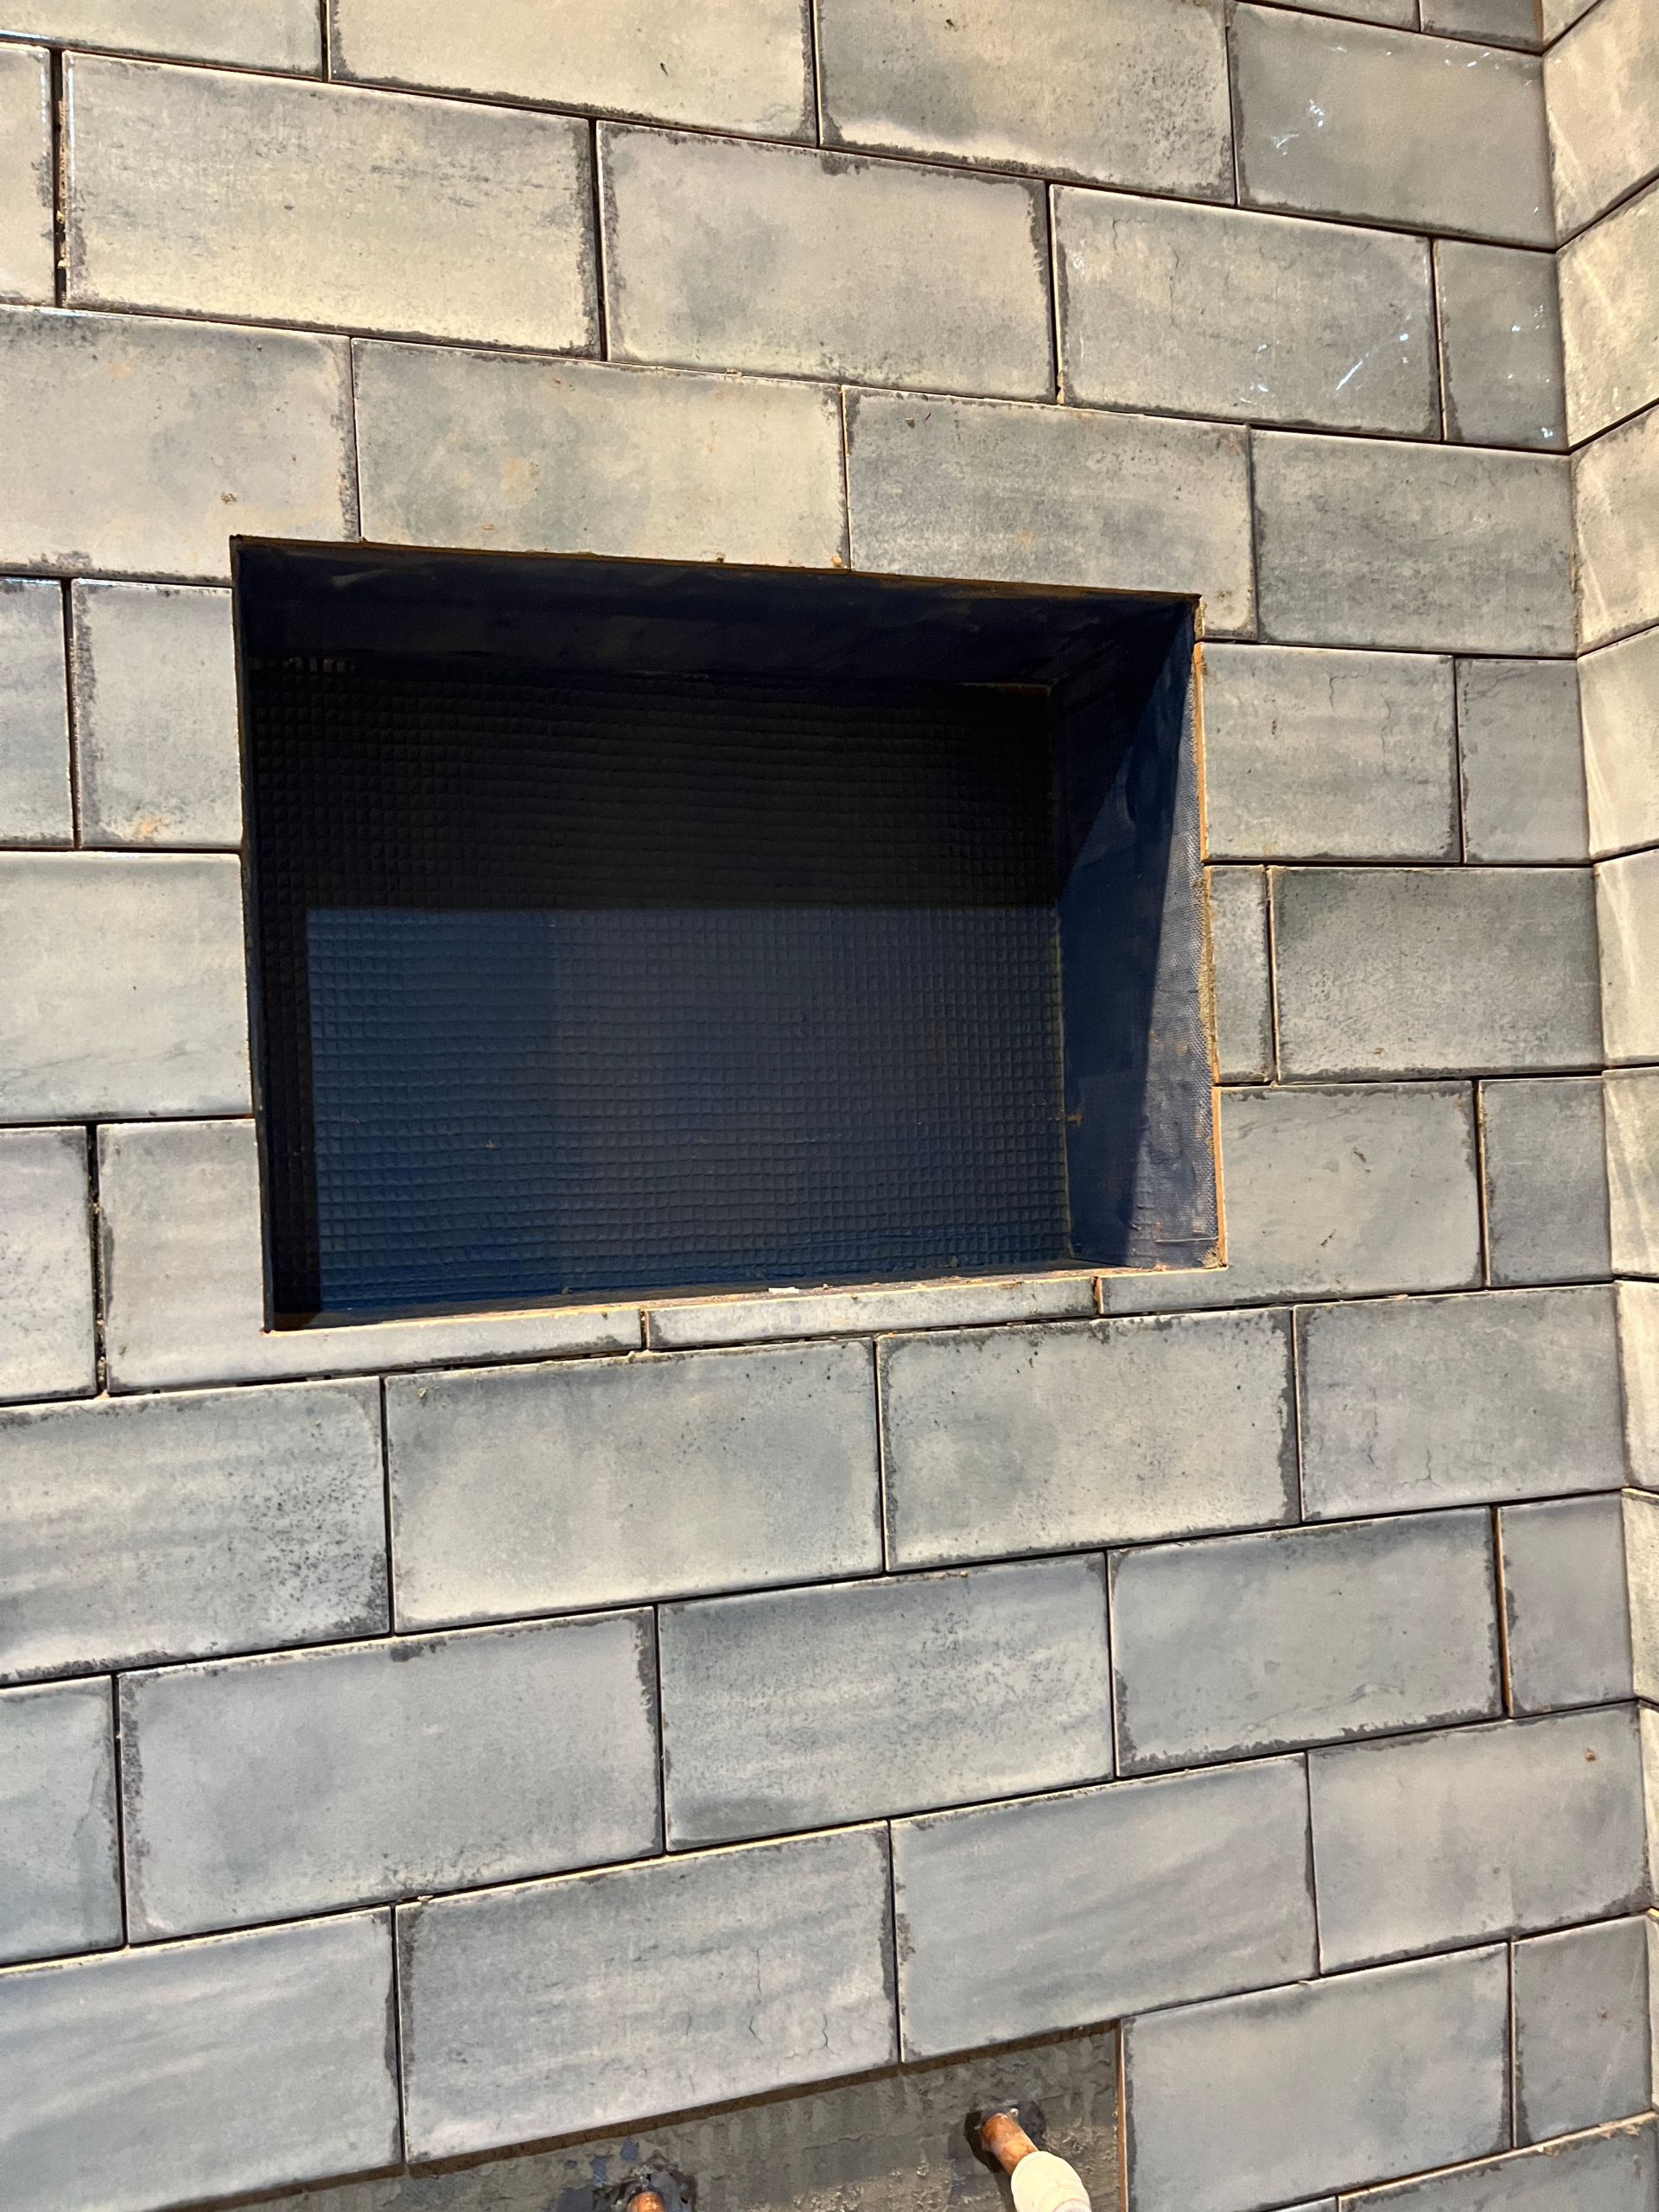
A shower niche can be a luxury, giving you a place to store all your bath supplies and reduce clutter. In fact, I would argue that a shower niche is actually a necessity. Without it, you are left stacking bottles all along the edge of the shower, which is not a good look. But, as a DIY-er, adding a niche may feel a little overwhelming to tile. It is a three-dimensional area, requiring precise cuts and alignment. Today, I am sharing my approach to precisely cut tiles for a shower niche, with exacting cuts that match up along the opening. I also am sharing an update on my own master bath progress.
When I last left you, I was dealing with a measuring error for my shower niche. I had gotten off by approximately 1mm in my tile layout measurements. It doesn’t sound like much, but 12 rows of tiles adds up. By the time my tiles reached the niche, I was almost 1.5cm off my plan. Resulting in a small sliver of tile at the base of the niche, rather than the half a tile I had intended.
Learn from me: Be extra precise in your tile layout measurements. Even 1mm counts and can make a huge difference.

How to Handle a Measuring Error
Last week, I shared my four options for dealing with the measuring error when tiling my shower niche. Re-do the entire wall (my least favourite option); build up the floor of the niche to give more space for the tile; leave it as is; or cover over the niche and not have one (also not ideal).
In the end, I decided to leave it as is and see how the sliver of tiles looked. I cut the tiles and added them with adhesive, with a plan to make a quick decision and remove them if it did not work.
The good news: I really like it! While this is not the ideal look I would have chosen had I gotten my measurements right, I actually do not think it looks bad. Because it is at the bottom of the niche, and the taps and shower head will run up the wall and cover part of the niche, I do not think it stands out too much. So I decided to go with it.

Again, this is not my ideal, but in the scheme of things, I can absolutely live with it. In fact, it really does not look bad at all. What do you think? Did I make the right decision?
I have run into a lot of issues in this bathroom and have had to re-do a lot of things. This probably impacted my decision a bit. Without the other issues, I might have made a different choice. But maybe not … I am actually much happier with the look than I thought I would be.
And, I also keep reminding myself that I am not an expert. I am a DIY-er. This is only my second time tiling a shower, and while it is not perfect, it looks really good. Almost perfect to me, in fact. It makes me happy whenever I look at the overall shower, and importantly, it does not look like some homemade effort by someone who does not know what she is doing. It looks really quite impressive. Especially given how many tiles there are, with the high ceilings!

How to Cut Subway Tiles For the Niche
Now that I have dealt with the measuring issue, let’s take a look at the process for tiling a niche precisely, specifically with subway tiles. I have done this once before, in the guest bath renovation. There, using beveled subway tiles in a lovely grey, I added a small niche measuring 35x35cm.

I detailed the niche tiling process at the time, so check that out for a step-by-step process. Today, as I progress on the master bath, I am using a different type of metro or subway tile: the Vita Natura tile in a lovely blue. I am sharing some additional insights, specifically around how to precisely cut tiles for a shower niche to ensure a clean, professional finish. In the master bath, I made some improvements to my approach that can help you too.
Making a Niche Tile Layout Plan
First, as with any tiling project, you need a plan for your layout. For a shower niche, the shower wall and the tiles that surround the niche dictate the layout. You will have considered the niche when you decided your shower tiling layout, and the actual niche tiling will follow the wall that surrounds it.
You want the niche tiles to look like they flow seamlessly from the wall around it. Almost like you tiled the wall and then pushed the niche in from the wall of tiles, so the tiles expanded to follow the dimensional box. That is of course not physically possible outside of cartoons, but that is the look you are going for.
That means you will carry the tile cuts that surround the niche over to the inside of the niche. For example, if your tiles surrounding the bottom of the niche are cut at about a third of the tile horizontally, you want the top two-thirds to sit inside the niche on the back and side walls, so it creates continuity.
In my case, the bottom tiles inside the niche are almost full tiles, because of the small length of tile sitting outside the niche. In the picture below, the tiles inside the niche should align with the top of the tile on the bottom left of the niche. So I need to cut that bottom sliver off of them.

Confusing? I know, it requires some mental gymnastics, but I’ve got a system to help here. And, it ensures the most precise and replicated cuts across the entire niche.
A Precise and Methodical Approach to Cutting Shower Niche Tiles
Check out this layout of a shower niche using subway tiles. It can also work with other sized tiles, but today, we’re focused on subway tiles. We will use this diagram to precisely cut tiles for the shower niche, all around the opening.

Using this layout as a guide, you will make the same cut multiple times, using the same guide and resulting in tile cuts that are repeatable, precise and match one another. It does not matter if your tiles are not in the same placement as the diagram; the approach is still the same, working with the four corners.
Let’s put the plan into practice, shall we?
Batch Cutting Tiles for Precision
My best tip is to batch cut your tiles in and around the shower niche. At least as many as possible. You want clean, precise edges around the opening, and the best way to do this is by setting the guide and making all the relevant cuts before changing the guide and making the next batch of cuts.
This may seem tricky, but just take it step by step for the most precise cuts. We will start on the outside of the niche, then go to the inside. We’ll begin at the bottom and work our way up, cutting nearly all the tiles for around the niche and then some of the tiles for the inside, including the back, sides, bottom, and top. A few will require measuring once all the other tiles are in place.
Start with the Bottom Row
In the diagram, let’s begin with the Bottom Left corner, marked as 1. This is the tile sitting outside the niche but with a cut around the niche opening. Hold the tile in place on the wall and mark the edges of the niche. Be precise, so the wall behind does not show and so the tile does not exceed the wall.

If your tile placement is like the diagram above, you will have a vertical mark and a horizontal mark. Use a straight edge to draw the full cut lines, and mark an X in the section you will cut away.

Go to the tile saw, and set the saw to cut only the horizontal cut. Use the guide on the saw to ensure a precise cut, and only cut as far as the vertical mark. Set the tile aside, do not make the vertical cut. You will come back to it in a minute.
Without changing the guide, cut the middle tile (or tiles, depending on the size of your niche) straight across horizontally, labeled 1a in the diagram. By using the same guide placement, you ensure a precise line across the bottom of the niche. At this time, you should also consider how many tiles you need for the back and side walls of the bottom row inside the niche. These will use the same guide but you will use the opposite side of the tile. For example, if your outer edge of the niche was one-third of the tile, the inside of the niche will be two-thirds of a tile, to make a complete tile. Make sense?

Do not move the guide yet. You still have one more cut: the Bottom Right, labeled 2 in the diagram. Measure the tile against the niche as you did for the Bottom Left, and cut the horizontal line up to where it meets the vertical. This should be the same cut, using the same guide as before. Set the tile aside without making the vertical cut, we will come back to it.
You have now cut the bottom row around the niche (except the vertical cuts), as well as the tiles for the bottom row inside inside the niche.
Precisely Cutting the Middle Rows Around the Niche
Next, we will move to the next row up and all the rows within the niche (any row that is not the top or bottom). In the diagram above, you have a full tile, then a half tile, then a full tile running up the left side. The half tile on the left outside is labeled 1b.
Here is where we get to the left side vertical cuts. The bottom row tile, along with the middle cut tile should have the same vertical cut. Measure the 1b tile, and compare it to your Bottom Left vertical cut. They should be the same. Set the guide on the tile cutter, and cut the vertical cut on these two tiles.
Before you move the guide, you also should make the vertical cut for the top left corner, labeled 3. TL in the diagram. Again, this should be the same measure. Like with the bottom corners, set the tile aside; we will come back and make the the horizontal cut later.

Repeat the process on the right side of the niche, following the same approach. Measure the right side cuts, labeled 2a in the diagram. In this case, there is 1 full tile and 2 cut tiles. The cut should match the vertical cut for the bottom right tile. Set the guide and make the side and bottom vertical cuts. As with the left side, also measure and cut the vertical cut for the top right tile.
For the inside of the niche, these are all full height tiles, so they only require vertical cuts. You can cut these now or later, but it is less important to batch cut here since it is just like tiling the wall.
Precisely Cutting the Top Row of the Shower Niche
The final step for the outside of the niche is the top row. You already have the vertical cuts for the two top corners; now measure the horizontal cut and set the guide on the tile cutter. Make the horizontal cuts for both corners and make the full horizontal cut for the middle of the top row, labeled 3a in the diagram. This is the exact same process as with the bottom of the niche.
At this time, just as you also did with the bottom inside of the niche, you want to also cut the top row of tiles on the back wall and inside walls of the niche. It should be the opposite of the cut made for the outer edge, so cut as many tiles as you need for the back wall and side walls, using the guide for the horizontal cut, but taking the opposite side of the tile from the outside cut.
A Precise Set of Tiles Ready for Tiling
You now have all the tiles for the surrounding wall around the niche. You can go ahead and tile the outside, as I have done here. Just look at that precison! Just go slow and steady, making sure you cut every tile needed before moving the guide. Follow the diagram and be methodical, and you will be fine.

Next week, I’ll share more on how to tile the inside, including the order of tiling and how to add trim to the niche where the sides meet the outer wall. This is already quite a long post, and full disclosure, I ran into a few (easily) solvable challenges with the trim and did not get the full niche completed. So more on this next week.
Make sure you don’t miss anything by signing up for the updates to come straight to your in-box. Until then …
Happy DIY-ing!








Leave a Reply