
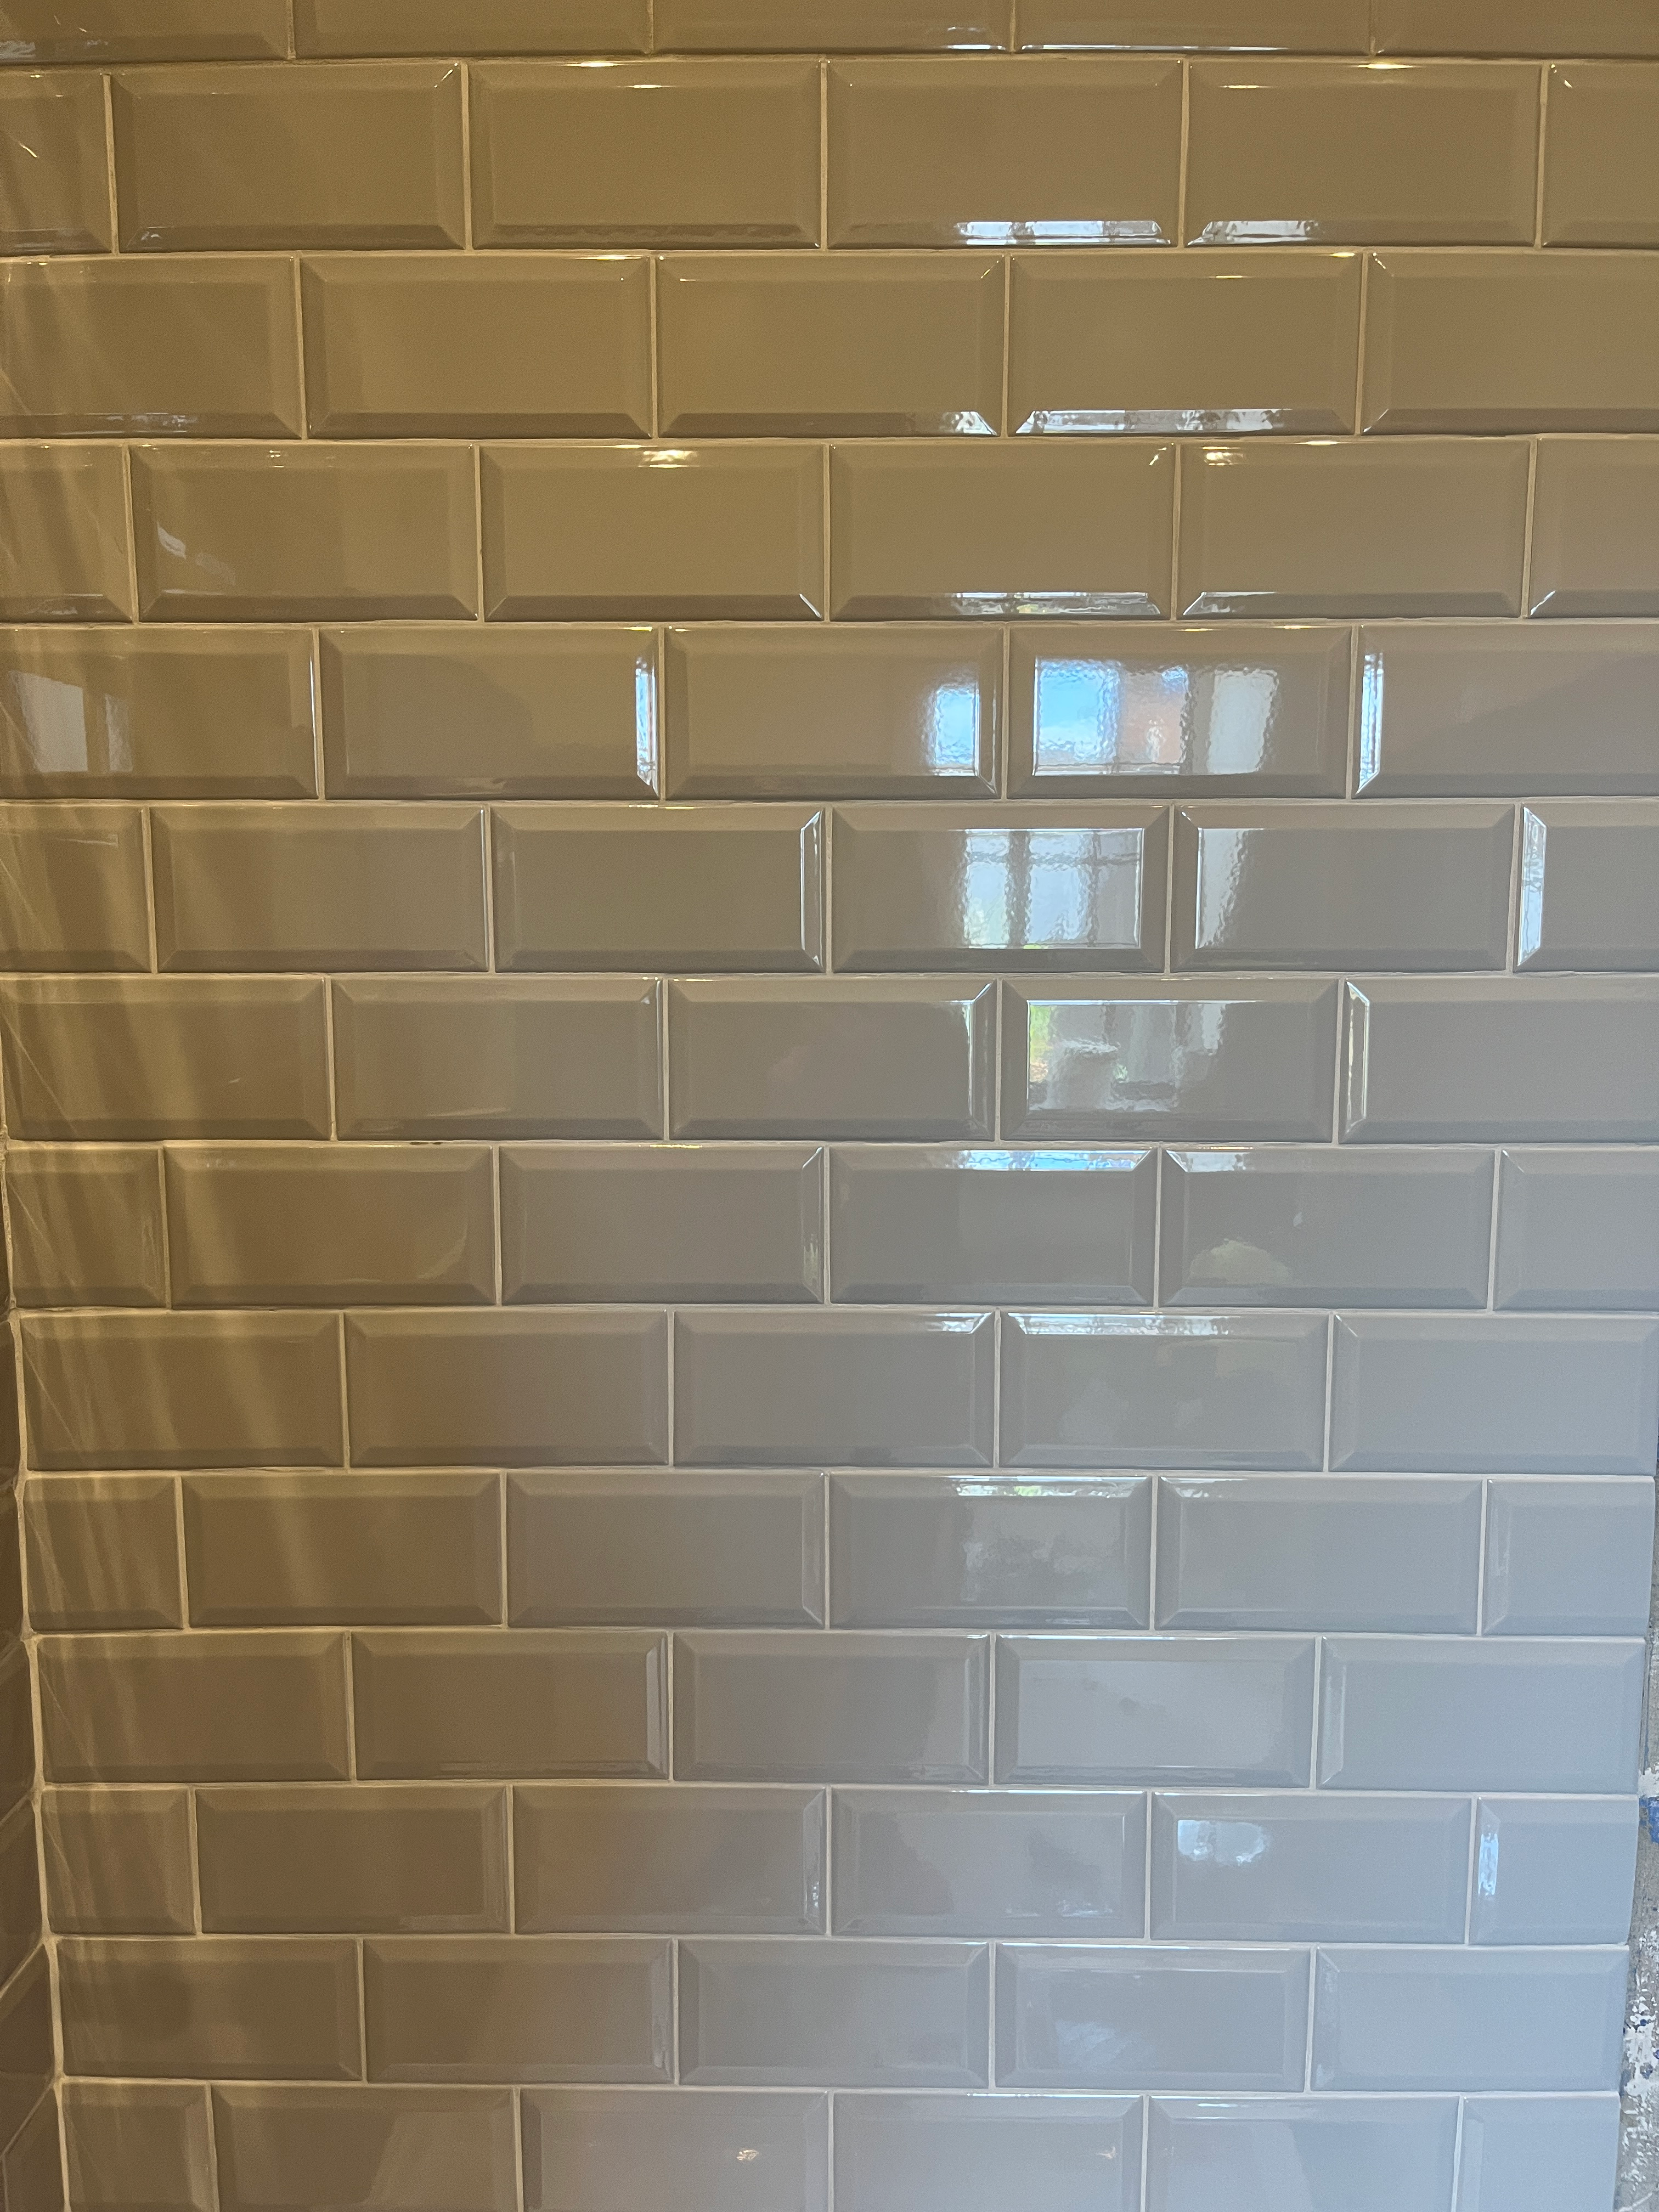
I’ve been promising for weeks to share the steps for grouting wall and floor tiles. I have not been holding out on you, I just have not been able to finish this step until now.
You see, I had a few set-backs on laying wall tiles. So, I ended up spending two weeks tiling a small 80 x 100 cm area for the shower. The floor has been ready for grouting for almost a month, but I had a hope of grouting wall and floor tiles all at one time. I am using the same colour grout on both spaces, to tie them together. I want to avoid colour variations in the mix if at all possible.
Well, today is the day. I’ve finished grouting wall and floor tiles in the bathroom renovation, and I am here to share the how-to, and as always, some tips and tricks I’ve learned along the way.

The Importance of Grout
Do not under-estimate the importance of grout. Not only does it give a tiled surface a finished look, but it also is a critical final step in a water-proofed area. Which is necessary in a bathroom, of course.
When grouting wall and floor tiles, chose a grout specifically for bathrooms. You want a grout that can withstand and even repel water. If you are not familiar with what grout is, it is a cement-like paste, similar in texture to adhesive. It gets pushed into the spaces between the tiles and hardens into a connector between the tiles Grout ensures that no water can get under the tiles and onto the walls behind. Even though we tanked the room, we still need to ensure water does not reach even the tanking, as this could damage the integrity of the wall and therefore the tiles.
My friendly neighbourhood DIY shop cautioned me when I was buying supplies: Go slowly and carefully. You need to make sure every crevice is covered in grout. With these words ringing in my ears, I followed my same approach as in tiling the walls: slow and steady.
I am happy to share that after the challenges I faced in tiling, the task of grouting wall and floor tiles felt like a walk in the park. That’s not to say that grouting doesn’t require effort, but it is quite a straight-forward process. And it is amazing how finished the grouting makes a tiled area look. It really brings things to a whole new level! Which is quite rewarding.
Let’s get started.
Are You Considering a Bathroom Upgrade?
Get a step-by-step guide and tons of tips and tricks from my own experience renovating my bathroom. From demolition, to water-proofing, tiling, and installing fixtures, this is your ultimate guide through the process.

Step 1: Clean and Prepare Your Tiles For Grouting
If you have not already, remove the spacers and wipe any adhesive off your tiles. Check the space between the tiles and remove any blobs of dried adhesive. You want the grout lines as clean and open as possible, for the grout.

Ideally, you would have removed the tile adhesive from between the tiles as you went along, but if you are like me, you missed some. Tiling can be a messy job and there is a lot to pay attention to. And once you add spacers, it can be hard to see or even reach any bits of tile adhesive that may be squished into the grout lines.
To help clear the grout lines, I used a small flat-head screwdriver that fit perfectly into the 2mm space. I used a chisel and the utility knife a few times on some bigger blobs on the floor. But, you need to be careful not to scratch the tiles. It is all too easy to lose control of the knife or chisel and scrape it across the tile.
Once you clean the grout lines, run a vacuum over the tiles to clear out any debris, dust, and tile adhesive.

Step 2: Prepare Your Tools For Grouting Wall and Floor Tiles
You need a few specific tools for grouting. Fortunately, they are not too expensive, although they are really only good for grouting, so it is hard to make a strong case for value beyond the job at hand.
First up, you need grout of course. Choose a grout that comes in powder form, that you mix with water. Just as with tile adhesive, the pre-mixed grouts are not quite as good as the ones you mix yourself. You can use the same grout for grouting wall and floor tiles; there is no difference in the type of grout needed.
I chose Mapei’s grout because they had a great selection of colours. I wanted something in a light grey, to use on both the shower and floor tiles, to tie the room together. Also, I did not want strong grout lines, but something more subtle, that blended in. Grout colour is very much a matter of preference, so choose what you like. But do consider, for your first grouting job, a contrasting colour will show more, so any small imperfections will be more visible.
I made a small mistake in choosing the grout. I did not notice that it was quick-setting grout. It clearly says this in the headline descriptor on the web site, but I somehow missed it. Once I read through the instructions, I noted that the grout’s pot time (how long you can apply it / work with it) was 15-20 minutes, and I realised my mistake. 15-20 minutes is not a lot of time.
To account for this, I mixed up small batches and worked on small portions of the walls and floors, rather than the entire space. Ideally, a longer pot life would be better, so you can mix up a good-sized batch and cover a good portion of tile without it hardening before you’ve had time for the washing stage.

In addition to the grout, you also need a tiling float, which is a long flat tool that allows you to push the grout into the crevices. It has a hard surface, but with a non-abrasive covering, almost like a hard piece of foam. You need a grout sponge, which is large and fairly firm. I bought two, and I am glad I did, because it gets quite dirty with washing the grout, so having a clean one for the final wash was helpful. And, you need at least two buckets and a small mixing paddle specifically for grout. I ended up needing three buckets, as I accidentally let some of the grout dry in a bucket, and it was impossible to remove afterwards.
Note: You do not want to use the same tools you used for the tile adhesive. Grout is very visible, and you do not want to get anything mixed into it that could mar its colour or its abilities. Unless you have kept your tools pristine (which is hard to do with tile adhesive), I suggest fresh buckets and tools for grouting, where possible.
One final note for grouting: It is recommended to use bottled water for mixing and washing the walls. Especially in hard-water areas, you could get a hazy film on your grout if you use tap water. I used bottled water to mix the grout and for the final wash, but I used filtered tap water for the steps in between.
Step 3: Mix the Grout
Following the instructions on the bag of grout, add the right amount of grout powder to bottled water in a clean bucket. Mix with the paddle until it is smooth and well-combined. You want a smooth, creamy paste. Not too thick that you cannot get it into the crevices. Not too thin that it drips everywhere. Add more water or grout powder until you achieve the right consistency.
For tiling the floor, my grout was a little too thick, but as the crevices were fairly large at 3mm, it worked fine.
On the wall tiles, my first batch was a little thin. I dripped a lot of grout. It was easy to push it into the small 2mm crevices, and it dried fine, but it was a bit messy. My second batch, for the second wall, was just about perfect. Not too thick, not too thin.
Pay attention to the pot time, which is how long you have to use the grout. The instructions on the bag will tell you this. Again, mine was a short 15-20 minutes, so I needed to work in smaller batches. I only realised after reading the instructions that it was a rapid set grout. Totally my fault for ordering it and not noticing it was rapid-set.
One consideration I have for companies making these large bags of tile adhesive, self-leveling compound, grout, etc., is that they consider the DIY market. It would be near impossible for most DIY-ers to use the entire bag in the time given for the mix to be workable. (Seriously, can professionals even use an entire bag of grout in 15-20 minutes?) But the manufacturers also give you no way to measure smaller amounts. Professionals can probably do this in their sleep, but for those of us who are only tiling once a year or maybe slightly more frequently, it is not so intuitive.
A note to all you manufacturers: There is a DIY market out here that could use some help with measuring smaller amounts of your products. Consider us, please. Even just some metric measurements on the bag for mixing smaller portions would help.
Step 4: Apply the Grout to the Tiled Wall or Floor
This is where the magic happens. Using the float, get a little grout on the flat part toward the top. Press it against the wall or floor at a crevice, leaving some of the grout on the tiles. Then, using the float, press it in place and wipe away the excess.


It takes a little time to get the technique right, but essentially, you want to just cover the crevices with grout and wipe away as much as possible on the surface of the tile. Warning: it is messy. There will be tile grout everywhere!

I am a bit heavy-handed on the grout, which means a bit more work at the washing stage. But better too much than not enough, in my opinion.
But, I got into a pretty good groove as I went along. I would grab a good bit of grout on the float and press it in a few places along a long line of tile. Then, I went back and worked it into the crevice, wiping away the excess as I went.

Pay attention to the pot time so you do not go too long and the grout starts to set before you can do the washing stages.
But do not rush. Take the time needed, even if that means wasting some of the grout if it goes off while you are working. Or mixing smaller batches. This is the place where you want to be precise and make sure that every grout line is filled with grout. In fact, think about it as over-filling. You can remove any excess during the washing stages. You can also add more later, but this starts the entire process over. So I prefer too much grout over too little as the starting point.
Step 5: First Wash After GRouting
Once you have completed the grout application, let the grout rest for the time specified on the package. With my rapid-set grout, it said I could wash in 30 minutes from application. Given that my pot time was 15-20 minutes, and I pushed it to 25 minutes, I needed to start the first wash almost as soon as I finished applying the grout.
For regular-set grout, it is more likely around 40 minutes or longer. Check the packaging for the set time.
When ready, get your sponge and a bucket of clean water. You can use bottled water here, although I used filtered tap water which worked just fine. Get the sponge wet, but wring it out really good, so it is damp but not dripping.
Wipe down the tiles and remove any excess tile grout on the tiles. Do not spend too much time on the grout lines themselves, but do wipe away significant excess grout. You will work the grout lines a bit more at second wash.

As needed, rinse out the sponge and refresh the water. Again, there may be a good amount of excess grout, so it is fine if you have a lot of cloudy water and need to change it out a few times. Note: For washing, make sure you do not let the used water go down the sink. It could create significant clogs. I kept a bucket to empty the water into and then dumped it in an appropriate place at the end of the day.
When you have gone over the entire area, there should be a bit less grout on the tiles, but the grout lines will still be a bit rough. Also, you will see a hazy film over the tiles. That is fine, it is just the mixture of water and grout. We’ll deal with this in subsequent washings.
Step 6: Second Wash After GRouting
Wait the recommended time after finishing first wash. This is the same amount of time you waited for first wash. In my case, it was 30 minutes, so by the time I finished first wash, I did not have long to wait to begin second wash. Things move quickly with rapid-set adhesive, there is no time to rest in between!
Starting with a fresh bucket of water and having rinsed your sponge out a bit, you are going to do the same as first wash. But this time, pay a bit more attention to the grout lines. You want to remove any excess on the grout lines, which may mean wiping with a bit more force.
Honestly, it might feel like you are being too strong, but because you pushed the grout into the crevice at the start and it has had some time to cure, think of this step as removing anything that is raised above the tile.
Because I was rather heavy-handed with the grout, I removed a lot of excess during first and second wash. But no matter how much I removed, the grout lines were in tact. I had a few small places where I needed to touch up, but overall, the grout filled in the crevices, and my washing and wiping simply cleaned them up and made them more even and aligned with the actual space between the tiles.

At this stage, you should repair any areas where the grout does not fully fill the crevices. Simply add more grout using the float and wipe away any excess. Come back after second wash is completed and check that any holes or gaps are filled and wipe off any excess here too.
Step 7: A Special Little Step: Cleaning the Grout Lines

I learned a great little step in my tiling course last summer, which I have not seen in any of the videos I’ve watched on grouting. This step helps ensure uniform grout lines that have a slight dip in the centre. Before taking this step, the grout lines already look really good. This step gives them that extra oomph.
Using a grout tool, which you can purchase at any DIY shop for a few pounds / dollars, you run the round end of the tool along all the grout lines at the end of second wash. The grout is still slightly soft, but not so much that you risk damaging it.
The ball end of the tool will run perfectly between the grout lines, no matter the size, and create a very slight indentation. Small specs of grout will be pushed out; wipe away the excess with the sponge. Do this on every grout line, running the length of the line where possible.
Step 8: Third Wash(es)
At this stage, you have removed all the excess grout. Third wash is all about washing the tiles and removing the haze that continues to settle over the tiles. Using a clean damp sponge, wash the tiles again. You can run the sponge over the grout lines too, but at this stage, there should not be much or any excess grout to remove.
While this is called third wash, you might actually need to wash the tiles more than once in this step. Do as many washes as needed to remove the haze. It will come off, it just might take a few washes. It depends in part on the tiles and their texture and colour. With my floor tiles, it is hard to tell if there is a haze. I did two washes during this stage. With the wall tiles, I did three washes during this stage, as there was still a slight film after two washes.

Make sure your sponge is clean and fresh, so you are not just wiping the excess tile grout back onto the tiles. This is where that second sponge comes in handy.

Step 9: Polishing and Sealing Wall and Floor Tiles
This is the final step in what might feel like a long process but is actually fairly quick. Once you’ve managed to remove the haze on the tiles, you want to polish them up so they shine. For this, use either some blue roll or a microfibre cloth. Simply rub the tiles, polishing them to make them shine. Again, depending on the type and colour of the tile, this may make more difference. With my glossy metro tiles, it really brought them to life. With my limestone-effect floor tiles, it was a bit less noticeable because they have a more rustic, sandstone look and feel.

You also need to silicone any areas that could allow water in. Where the tile meets the shower pan or tub, or where the wall meets the floor. Don’t forget around the pipes as well. I chose a clear silicone for around the pipes. For the wall tiles, I purchased a silicone in the same colour as the grout and used this in the corner. I had grouted the corner where the two tiled walls meet, but I wanted a bit of extra protection here. I also grouted along the shower pan, all around the shower niche, and along the top and edges of the tile where it will meet the paneling.

Sit Back and Bask In Your Newly Grouted Wall and Floor Tiles
And that is your tiles done. I don’t know about you, but I was glad to see the end of this project. I actually really like tiling, but I struggled a bit with my wall tiles and took a hit to my confidence. It all ended fine, but two weeks is much too long for a project of this size. Fortunately, I was able to completely grout wall and floor tiles in two half days, so that helped.

A few final thoughts on grouting wall and floor tiles:
- While I found laying the floor tiles to be a bit easier than the wall tiles, it was the opposite with grouting. The wall tiles were really easy to grout, due to consistent and clearly defined grout lines. It was quite methodical to get the grout pushed into the cavity and then wipe it way. For the more rustic floor tiles, the rough texture of the tiles meant that the grout lines were a bit less precise. I needed to work quite hard at removing grout that got lodged in the nooks and crannies all around the grout line. Fortunately, a bit of grout outside the proper lines just adds to the rustic feel of these tiles.
- I would again encourage you to avoid a rapid-set grout if you can. It was a bit stressful to race against the clock to meet the setting times for the grout. I found that I was working straight on for a few hours with no breaks, just to keep up. And, I was constantly worried about the grout hardening before I could get it wiped off. This did not happen, and the pot time is a guide that I could push out a bit. But only a bit.
- And finally, do a final check of the grout and ensure there are no holes or open spots. The grout needs to fully cover all the spaces. If it does not, go back and fill it in. You will need to repeat the entire process on a smaller scale, but it will be worth it.

Well, that’s a wrap on grouting wall and floor tiles. I do owe you, my dear readers, a post on how to tile a shower niche. I will share that soon, but for now, I am ready to leave tiling behind and move on to something new in the bathroom renovation. Next up: wall paneling. I am adding bead board to the walls, covering three-quarters of the wall in a traditional wide-groove style. And I’m painting it a gorgeous aubergine colour. Stay tuned!
Until them, happy DIY-ing!








Leave a Reply