
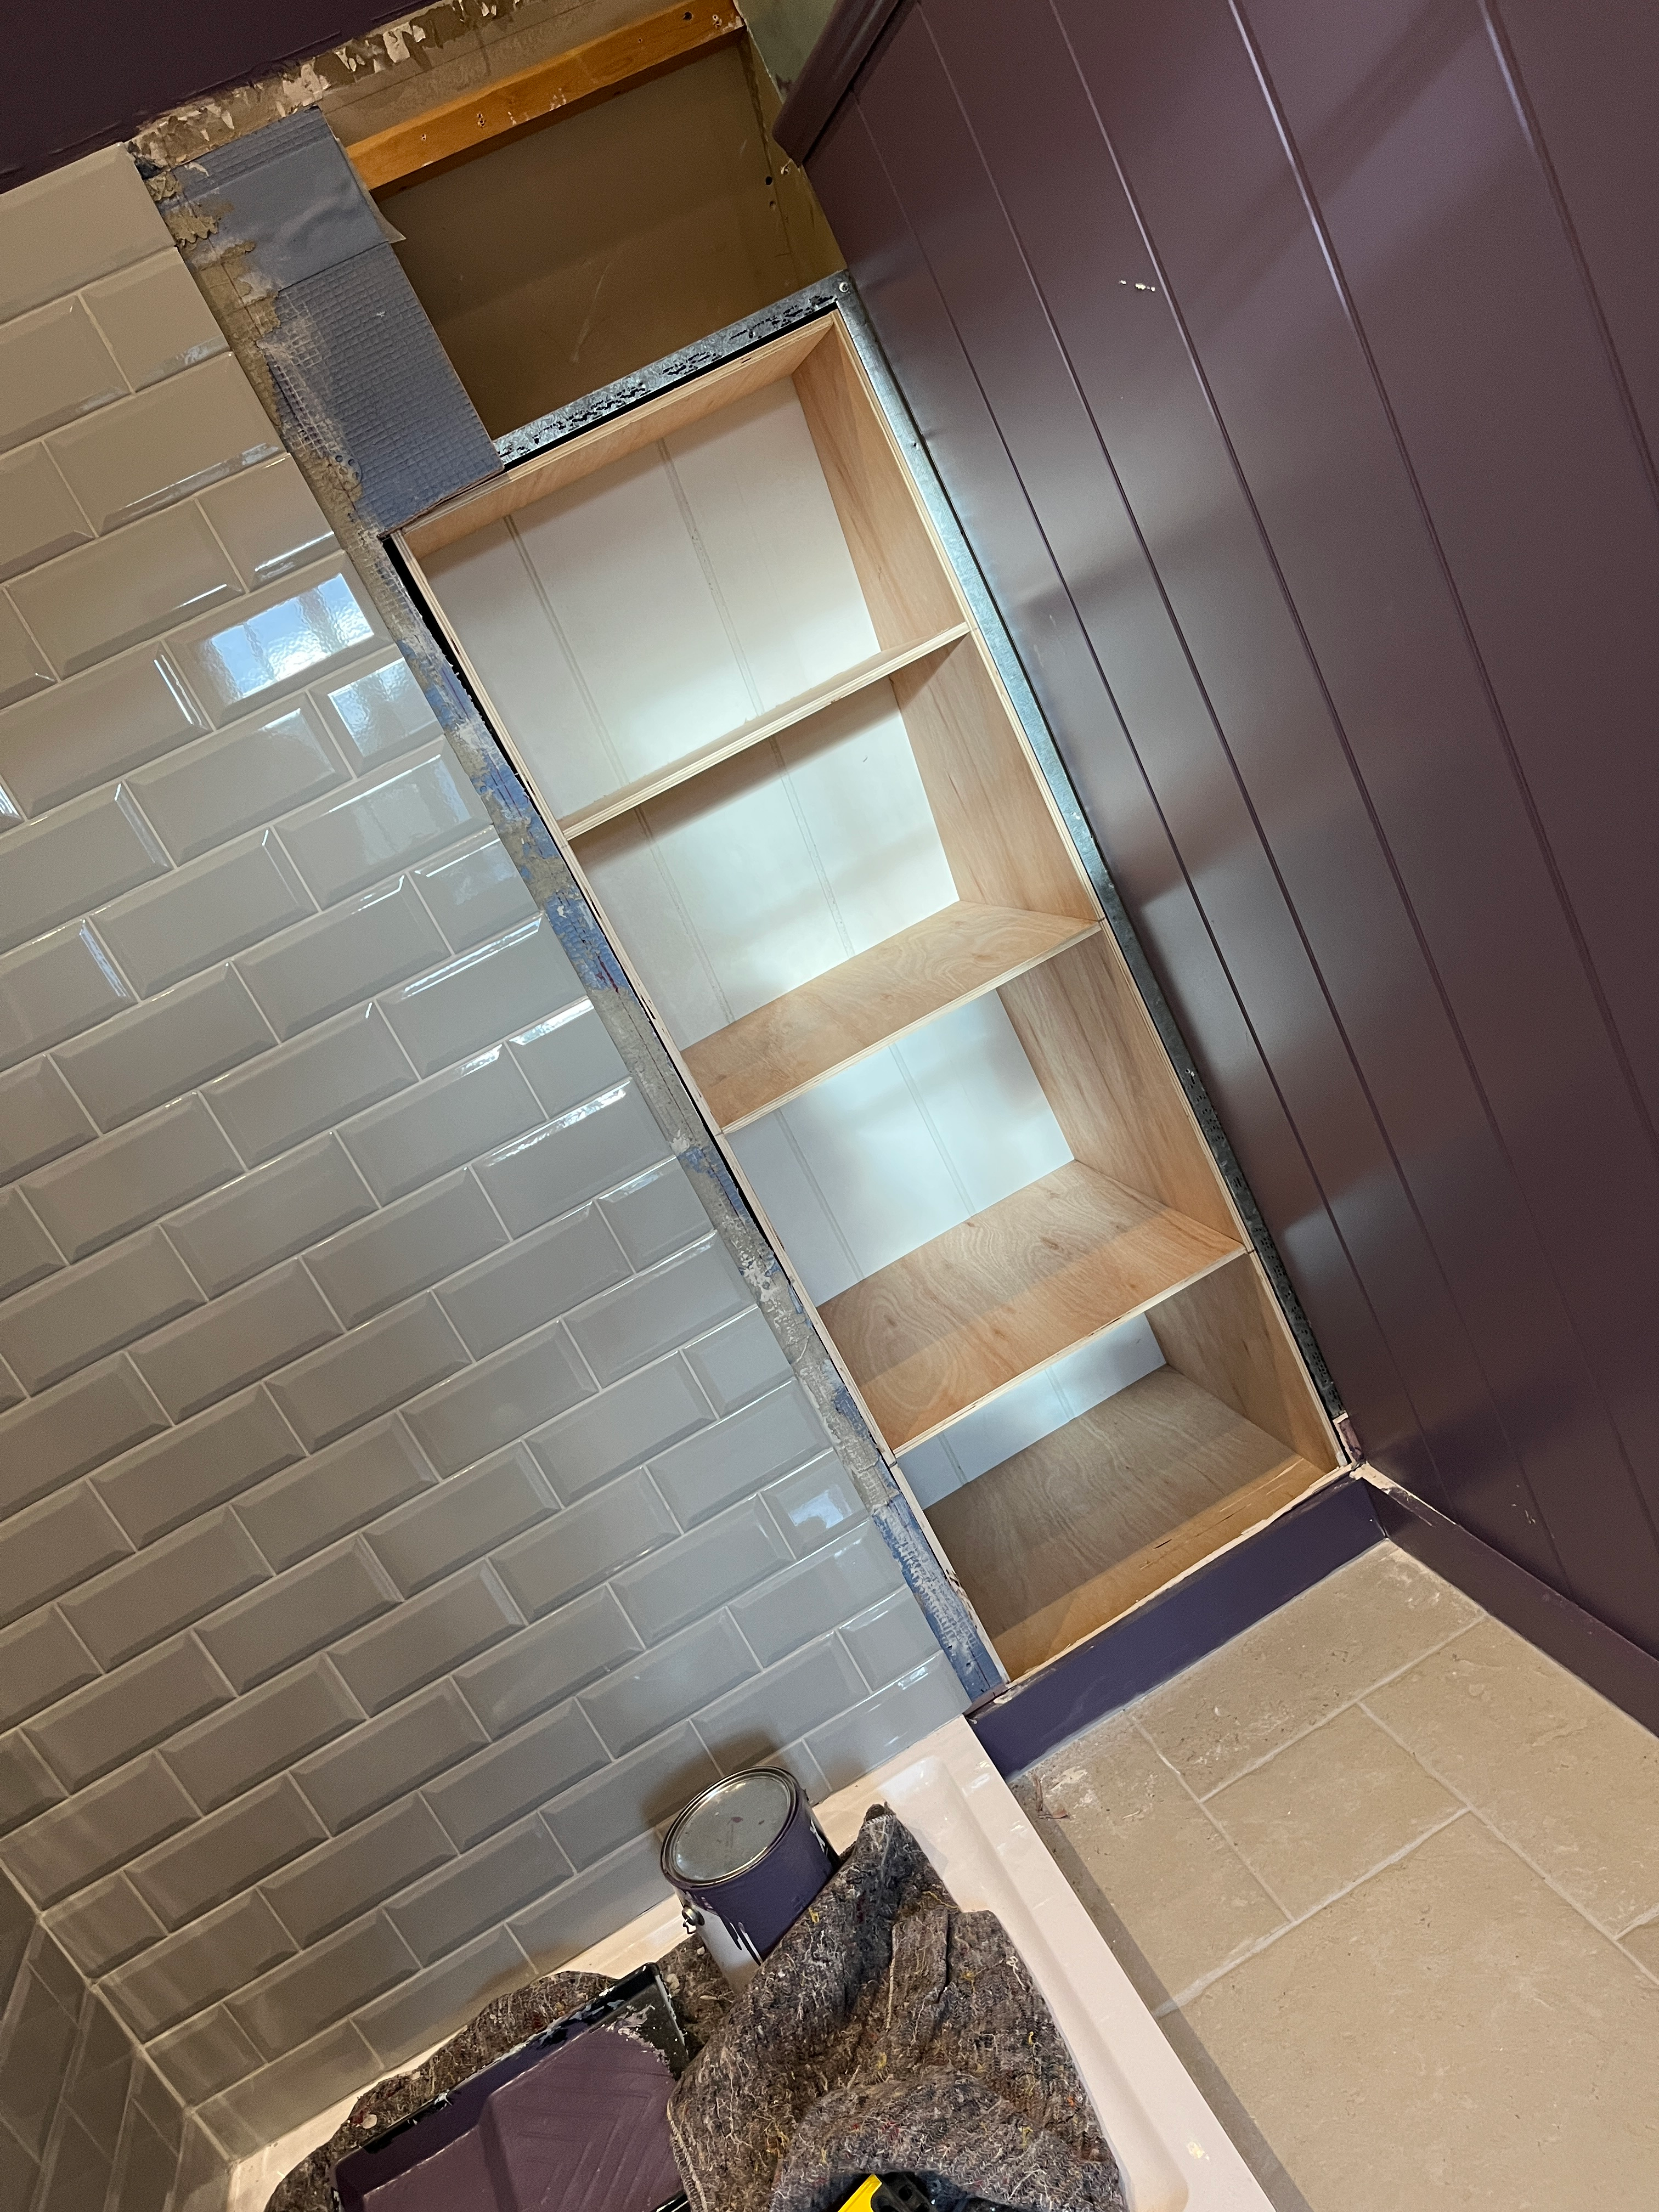
A few weeks ago, I shared how I’ve added more storage as part of the bathroom renovation. Finding storage is a recurring theme in my life. I always need more space. Today, let me share how I’m adding a closet to my tiny bathroom, by building into the dead space in the eaves. Perhaps this is something you can do too, if you need more space.
When I did the demolition on the guest bath, I discovered some dead space behind the back walls. This space goes into the eaves of the building. There are pipes and cables running through, but there is enough space for adding a closet alongside the shower. As I took measurements and made plans for the full bathroom renovation, I worked around this space in the hopes it could be used for storage.

Let’s jump into how I added a much-needed closet to the bathroom, with tips for how you might be able to do the same in your space.
Locate the Space for Adding A Closet
If you are keen to add some extra storage, you first need to find a space you might be able to build into. That might sound daunting, but chances are good that you can find something. A small recessed cupboard into a wall between the studs. Some dead space under an angled ceiling. Or, like my original closet expansion in the bedroom, above the closets where there was previously inaccessible space.

In my bathroom, I could see the space behind the wall due to big holes that had been cut into the plasterboard when I removed the bathtub. I designed the shower to allow for a closet to sit to the right of it and take advantage of the dead space behind, without impacting the existing floor space in what is already a very small bathroom.

Design the Space
I took careful measurements, wanting to build the cupboard between the metal studs. I did not want to try and remove any of the studs, even though it would be possible as they are not load-bearing. They are there to give the plasterboard a structure to secure on to. If you are doing the same, make sure your studs are not load-bearing if you plan to remove them.
For my closet, I had a width of 55cm to work with. The depth was almost the same, at 50cm. There was a good amount of height, at 180cm. But as with much of my flat, there was an angled ceiling to work with. The closet would need to have an angle along the back, so the top shelves would be more shallow than the bottom shelves. Angles everywhere!

The Supplies Needed
Once I had the measurements, I gathered all the supplies. I had planned to order the plywood from my favourite supplier, Hitchcock and King. Sadly, they have gone out of business. I am so disappointed. They were a family-owned business who were great to work with. They cut my wood as needed and even loaded it into my small car. Service and products were excellent. I will miss them.
I struggled to find anyone who could cut plywood in my area. While I am very capable of cutting, the plywood sheets are so large, and they are challenging to get up to our top-floor flat. Cutting them down on the pavement outside our building, which I have done, is not ideal. And is probably not very popular with the city council!
In the end, I purchased plywood sheets from Leylands, just down the street. I love this new offering of timber, although they do charge a premium for the convenience. Fortunately, they offered a sheet at 180x75cm, so I was able to cut off a small portion along the length to get to my needed sizing. I purchased three sheets which cost nearly £100. This is a significant increase over a single uncut sheet, but again, I am paying for the convenience. A better solution long-term will be needed, but it works for today.
I decided to go with 12mm plywood, as these shelves will be strong enough for what they will hold. If you are adding a closet that needs to hold heavier items, I recommend 19mm ply. That is what I used for the bespoke bookshelves in my lounge, which hold books and decorations.

And finally, you’ll need a pocket hole jig and screws, with a drill and circular saw. Or the method of your choice for securing the shelves to the walls of the closet.
Cut Out Sides and Shelves
Using a circular saw and a track guide, cut out your sides, top and bottom, as well as any shelves.
I cut my two sides to be 180x50cm. First, I cut everything as if it were a perfectly square closet, without the angled back. Then, I went back and cut the angle off the top back of the two sides, before cutting the top, bottom and shelves.

To cut the angle, I drew horizontal lines on the walls marking where the angle began at the top and where it ended about halfway down the shelf. I then measured the height of these lines, so I could mark them on the side wall board of the closet build.
The top of the side board of the closet needed to be 35cm deep, before it reached the angle on the wall. I marked this measurement on one of the side boards.
The angle ran down to 70cm as measured on the height from the top of the shelf. I marked this on the side board, at the back edge. I then used a straight edge to draw a line between the two marks, which gave me an angle to cut off the back of the side wall. Because I knew I wanted to add a backing to the shelf as well, using the 9mm MDF wall paneling I used on the walls, I removed another 1cm off the depth of the angle to account for this addition. (I could have made the depth of the entire wall board 1cm less to account for the backing. But I forgot until I was cutting the angle.)
Making sense? I hope so!
Are You Considering a Bathroom Upgrade?
Get a step-by-step guide and tons of tips and tricks from my own experience renovating my bathroom. From demolition, to water-proofing, tiling, and installing fixtures, this is your ultimate guide through the process.

To cut a smooth and perfect angle, I used my AccuCut track guide. I clamped the track guide onto the line and used my circular saw to cut it down. Once I had tested the fit with one wall, I replicated the cut on the other side. To do this, I placed the cut board on top of the other board and traced the line. This way, I knew it would be a match.
Cutting the Shelves
For the selves, including the top and bottom, I marked on the side boards where I wanted them to go, making sure the marks were level on both boards. I then measured the depth needed for each shelf at that mark. For my top board, I cut it at a depth of 35cm, to match the top of the angle. In my design, I added one more shelf along the angle, and then one shelf plus the bottom shelf / floor along the straight back at the bottom of the closet.
You could absolutely cut the shelves to have an angle on the back, so the shelf sits tightly against the back wall. I did not do this. It is not a steep angle, so the gap is small and can be easily covered with caulk. And since it is at the back and in what will be a closet filled with stuff, it did not seem necessary. If you want to do this, you will need to mimic the angle you cut on the side walls onto the back of each shelf, along the thickness of the plywood.

When cutting the shelves, you want them to sit within the two walls. This means accounting for the thickness of the plywood sides. To do this, take the original width and depth (in my case, 55x50cm) and subtract twice the thickness of the plywood (for me, 1.2cm x 2 = 2.4cm) off the width of the boards, to account for the closet walls. So my shelves, top and bottom were 52.6cm across, to account for the side panels and ensure the final assembled shelf would fit into the space. This is a very easy step to miss off, so do not forget it!
Assemble the Shelf
Once the plywood is cut, it is time to assemble. Here, I used pocket holes. I drilled all the pocket holes in one go, making sure to mark them so I got them in the right place. Then, I assembled the top and two sides first. I used the marks I made to measure the depth of the shelves to then add each shelf, working my way down the closet to the bottom.
After installing each shelf, I stood the frame up and made sure the shelf was perfectly square and level front to back and side to side. You want to ensure the edges of the shelves line up to the front and back of of the sides too. If your cuts are precise they will. In my case, with the angled back, it was important to place the shelves according to the measurements I had taken. Corner clamps were very helpful, although they were tricky to use along the angled back.

Add the Back Panel
Once everything is assembled and you are happy with it, test the fit in the space. In my case, it was a tight squeeze but worked perfectly. It was a bit of a pain to carry it into the room, get it in place, and then have to pull it back out and take it back to my work area. It is quite large! Which is good for the storage it will bring. But, I wanted to make sure it worked before adding the back panel.
For the back, I am using some of the wall paneling, which I had left over. It makes a nice tie-in to the room, and it uses up extra supplies. Win-win.
To measure the back panel, I laid the MDF paneling flat on the ground. I laid the shelf on top of the panel, making sure the grooved lines were running straight and parallel to the side walls. I traced the edge of the shelf, to mark where to cut.
Because of the angled back, I needed to cut two separate pieces, which will just meet up at where the angle ends. I traced the non-angled piece first, then propped the shelf on its angle on the paneling to trace the top part of the backing.

I cut both pieces with my jig saw and sanded any rough edges. I cut onto the cutting line, to make sure none of the backing would stick out beyond the shelves. While it would not show if it did stick out a bit, my fit into the space is too tight to have any extra width from the backing.
I nailed the backing on using 30mm nails and my nail gun.
Absolute perfection! I love it. So much space, and a perfect fit. I also love having the paneling as the back of the closet, to mimic the walls. And good use of left-over supplies, rather than purchasing more plywood for the backing.

Trim and Finishing
Once the shelf is in place, you need to ensure it is secured to the surrounding studs. In my case, I placed a CLS stud (left over from the stud wall I built in the bathroom) into the metal stud on either side, to secure the shelf in place. There was already a wood stud running along the top which I also used. I screwed the shelf into these boards, ensuring it was level and well seated into the space.
I need to finish the shelf but am waiting for the final fix of the basin, which will have a pipe running behind the shelf. Once this is done, I’ll add plasterboard over the top of the shelf, cutting out the opening. This will ensure the plywood edges are covered and the wall is even with the shower tiles. Just as I did with the wall niche.
I will then add the wall paneling over the top of the plasterboard, for a finished look. Some shoe molding around the edges will ensure a nice, neat edge and match the wall niches over the toilet.
Sanding, caulk and paint will finish the look. I’ll share the completed project as soon as I can.
I also will need to add a door to cover the closet, since it will serve as proper storage and everything needs to be hidden. But what a wonderful addition. I am so, so pleased. If you need storage and are willing to give it a try, look around your home for some hidden places. Adding a closet into some dead space might be just the answer.
Happy DIY-ing!








Leave a Reply