
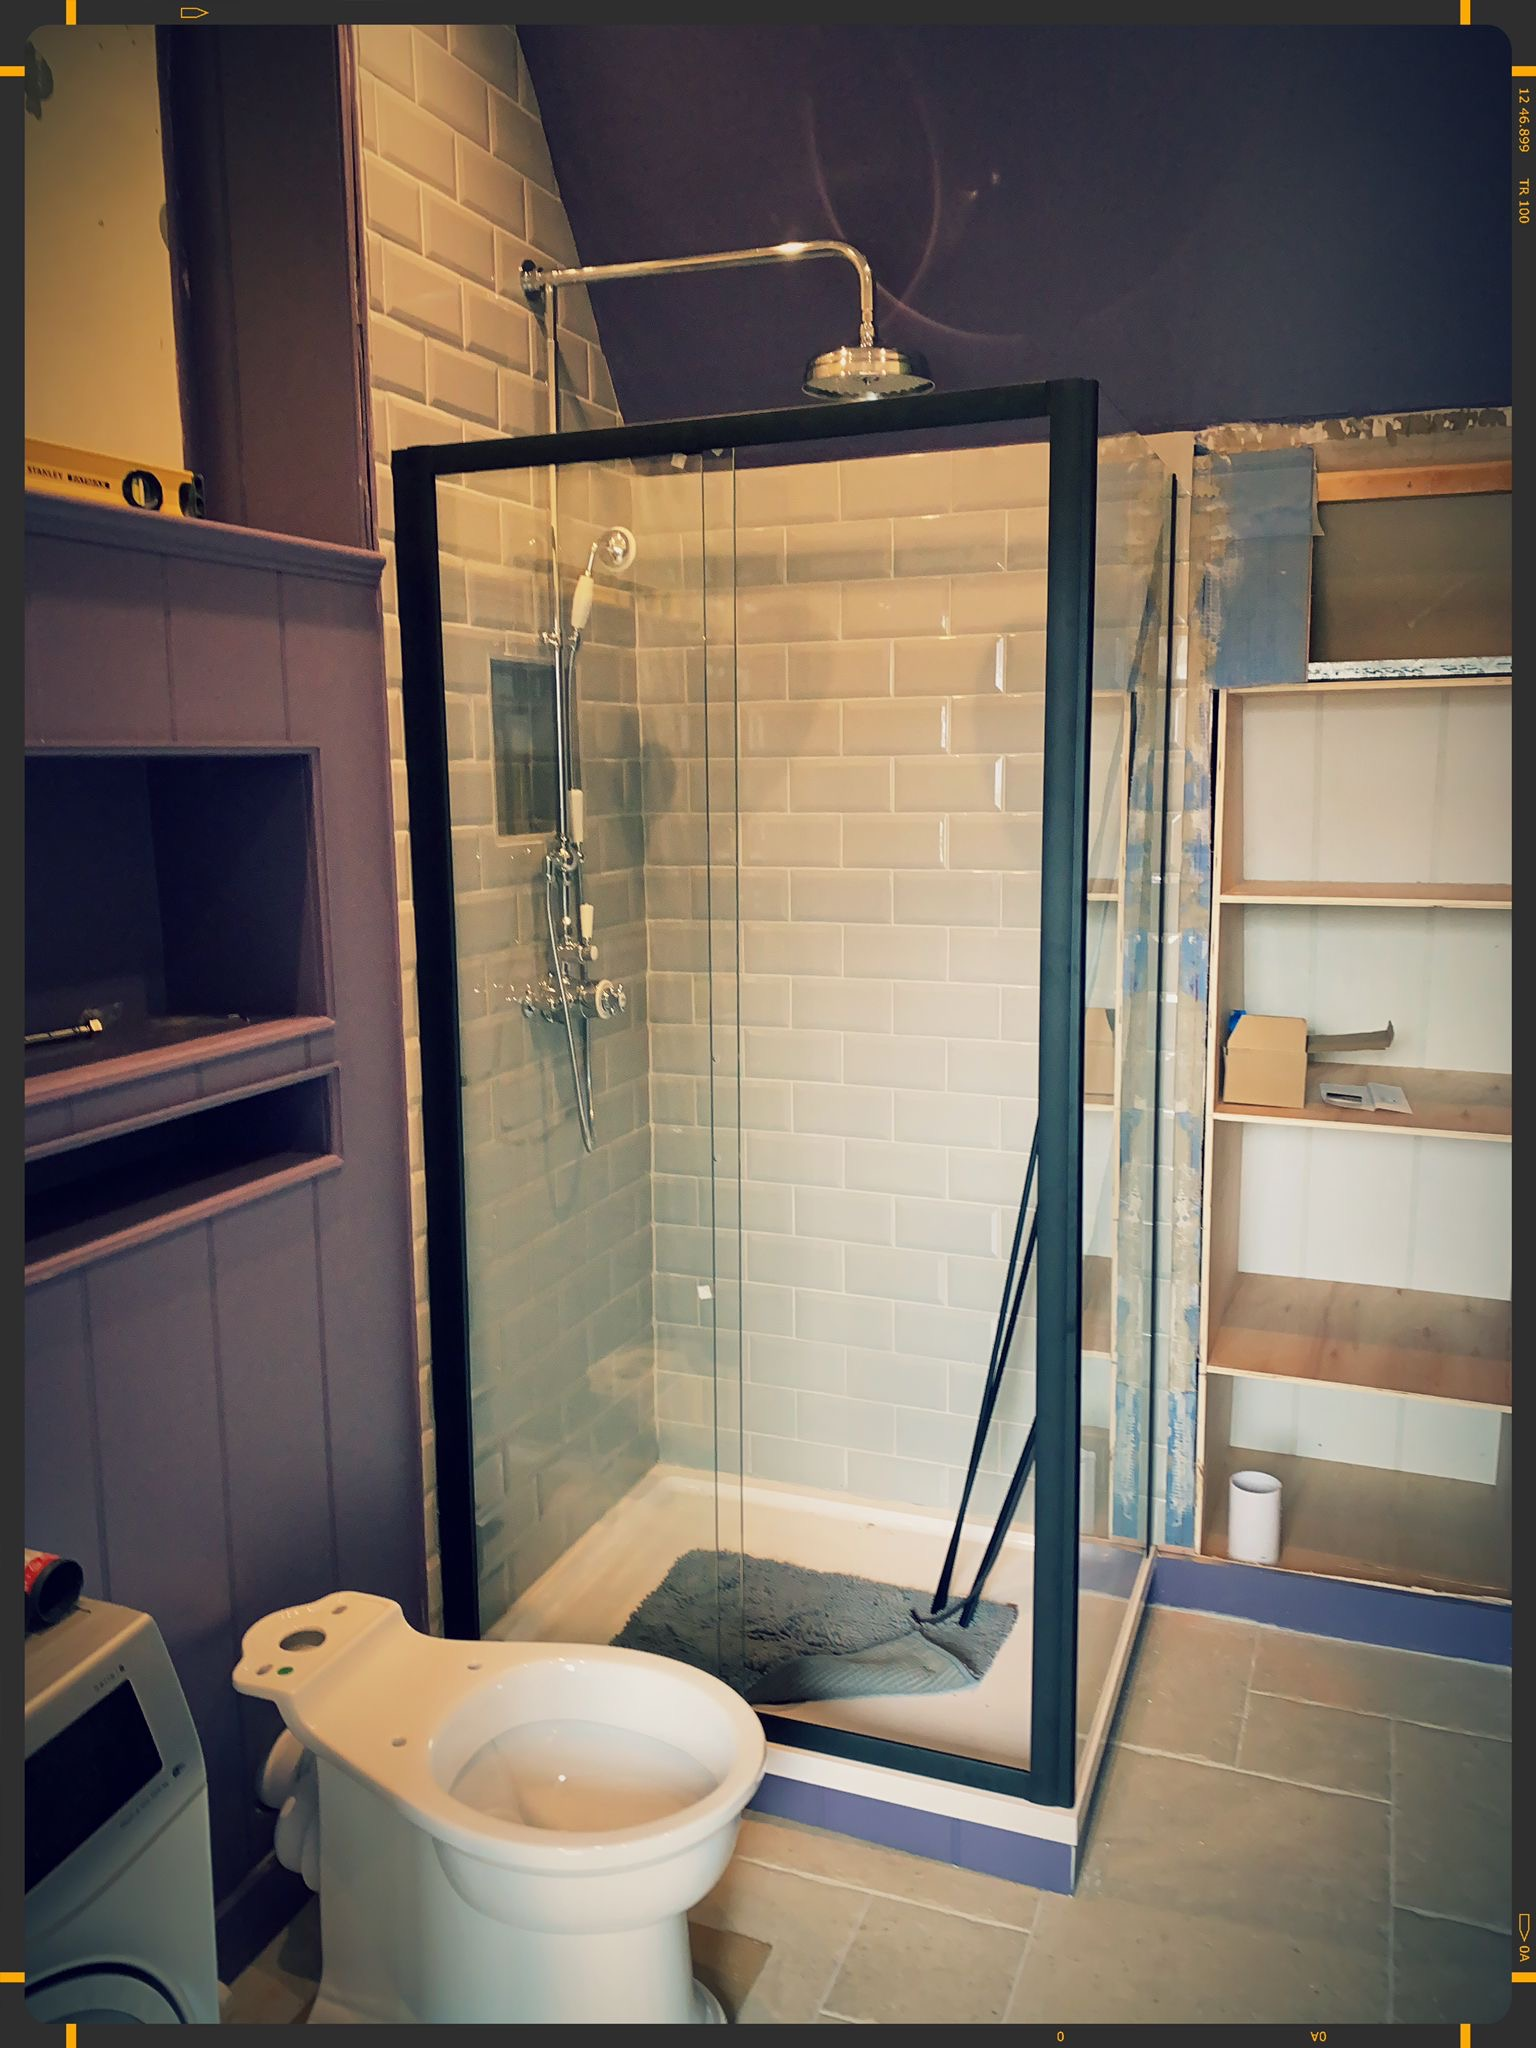
When I planned the bathroom renovation, I thought I was giving myself a very generous timeline at four months. Seems I once again under-estimated things, as I have just hit the four-month mark, and I still do not have a working toilet. We are stalled with installing bathroom fixtures, which might be the most important aspect of any bathroom renovation.
Today, I am sharing some learnings and tips for installing bathroom fixtures if you are going through your own bathroom renovation. I am feeling very discouraged, but as with all DIY projects, there will be ups and downs. I just happen to be on a downward slope right now. But I know we will get there in the end. Isn’t it true that what goes down must come up!?
For my renovation, I have the support of a plumber. While I took a plumbing course last spring, I am in no way qualified to be installing bathroom fixtures. There are just too many things that can go wrong with plumbing. And since I live on the top floor of a building of flats, any mistakes could have very serious consequences.
That is not to say the plumbing course was not useful. It gave me such a good understanding of how plumbing works, how to plumb a room, and the considerations for preventing leaks. All this knowledge gives me confidence with removing fixtures and helps me to know what might be possible with any changes I want to make. The support of my plumber in working through the details and implementation is invaluable.
The Challenges
There have been quite a few issues with second fix, which is when the plumber comes for the main purpose of installing bathroom fixtures. First fix was done just after demolition and involved getting all the pipe work into position, to be ready for install after tiling, boarding, paneling, etc.
Issue 1: Missing Parts
When the plumber arrived for second fix, he spotted an issue within 10 minutes. The toilet, which had arrived well over one month ago, was missing a crucial part. It seems someone at the company “borrowed” a flush valve from the box and never replaced it. In hindsight, I should have opened the box on arrival and checked for all the parts. However, because I am not an expert, I am not sure if I would have been able to identify this issue myself. That was the first challenge with installing bathroom fixtures. But it was not the last.
I got on the phone immediately, but there was no way to get the part on the day. It arrived the next day, but it was a week before the plumber could return. At which time, he opened the package with the missing part, only to find it was not the right one! GRRRRRRRRRRRR! Again, I should have checked. Another call and the right part arrived a few days later. This time, we opened the package and sent a photo to the plumber to confirm everything.
Are You Considering a Bathroom Upgrade?
Get a step-by-step guide and tons of tips and tricks from my own experience renovating my bathroom. From demolition, to water-proofing, tiling, and installing fixtures, this is your ultimate guide through the process.

Issue 2: Incorrect Measurements
I shared previously about the mistake I made in building the wall for the shower. I had built the wall to a certain height, wanting to accent a beam in the ceiling above the shower. While I had measured the shower riser to ensure the height of the wall was sufficient, I had missed an extra piece on the riser that made the wall too short by about 15cm. UGHHHHHHHHH!
So, I had to build up the stud wall to the ceiling, after I had already boarded and tiled the rest of the wall. This is not easy and certainly not ideal. But, I was able to do it and get a very good result. However, it added a few weeks to the project and set us back a bit.


Issue 3: Layout Challenges
While I carefully measured everything to ensure all my fixtures would work in the planned configuration, once we started installation, I could see there would be challenges. First up, I am spatially challenged anyway. I struggle with sizes and dimensions, and what I think will work sometimes will not.
While I did tape everything out on the floor, I knew it would be tight. It is a very small bath and I am adding a lot of elements, like the washer/dryer. Once we got the pieces in place, it became evident that the basin is too big and sits too close to the toilet and the shower. This really became evident once the glass walls of the shower were installed, because what was once an imagined boundary became real.

I already reduced the size of the shower pan when I first did the dry layout, going from 1200mm to 1000mm. I am still trying to decide what to do about the basin. More on that shortly.
Issue 4: Plumber’s Availability
With all of the issues, I’ve run into challenges with the plumber’s availability. He has already been twice and unable to complete second fix. The first time due to missing toilet parts, and the second time, he was able to get some of the shower done, but the wrong parts of the toilet and the challenges with placement of the basin prevented completion. I keep telling myself, third time’s a charm!
Lessons Learned
These issues have been quite discouraging, and it is easy to question myself and my abilities when hitting challenges like these. However, this is simply par for the course when doing a renovation. Better to embrace the challenges and learn from them.
In that spirit, today I am offering a few tips to my intrepid readers who are embarking on any type of renovation, bathroom or otherwise. I hope these tips, gained from my own experiences, can help you.
Check Everything
It may seem obvious. It is not always easy. But learn from me. You want to check everything as soon as it arrives. Or at least before the plumber arrives.
For the fixtures, open up the packaging and find the instructions. Check the list of supplies and compare to what is in the box. More often than not, everything will be there. But occasionally, something will be missing. In our case, it was the flush valve for the toilet. A critical part that the company got wrong. Twice.
If in doubt about anything, it is a good idea to send pictures to your plumber. Lay the parts out and take photos. Also take a photo of the supply list provided, so your plumber can see what is supposed to be there.
Besides the issues with the toilet, I wish I had removed everything from the shower riser box. Then, I would have seen the extra part and been able to build the correct height on the shower wall on the first try. Which would have saved a lot of time and frustration. Valuable lesson learned.
A Brief Interlude: Working with Fired Earth
Let me take a moment for some complaints and some praise. We ordered our toilet and basin from Fired Earth here in the UK. The style and look is so unique, and we could not find anything we liked nearly as much. They have some truly beautiful products. Which is a funny thing to say about a toilet. But it is true.


Sadly, working with them has been a challenge from the start. Getting info and seeing the fixtures in person was nearly impossible, despite having numerous showrooms. Customer service was spotty at best, until I finally found someone who really wanted to help. We went ahead and ordered, despite the challenges and high price point.
The toilet arrived quickly, but as previously noted, missing a key part that proved quite difficult to get. The basin was on back-order and in the end, we insisted they send it from the manufacturer, because after three months, they could not figure how to get the Fired Earth brand put on the basin. The basin was ready but unbranded. I really do not understand that, I am sure we were not the first to purchase a basin from them.
When we discovered the missing parts for the toilet, I requested that they pay for the plumber’s time for coming and being unable to complete the work. To their credit, they agreed and did so. They also worked quite hard to get the missing parts to me quickly, although it took two different times and should not have happened in the first place.
My overall verdict: I am not sure I will work with Fired Earth again. It is just too hard. For the high costs, they just do not really seem able to deliver on their products. Twice, I found someone in the company who really seemed to care and wanted to help me, and this helped move things along. But once, the person left the company, so I had to start anew. Overall, it was entirely too hard for the money spent. I do appreciate that they owned the mistakes and paid my plumber, and I love the look of the products. But I am still not sure it was worth it.
Measure. Re-Measure. And Measure Again.
Again, it is obvious. In carpentry, the saying is apt: Measure twice, cut once. In the case of a bathroom renovation, it is good to remember to check your work continually. Stop and think. Take fixtures out of the box and put them in place. Check how things are fitting. Slow down and just work through everything in your mind as you go.
In my case, I had measured things out and assumed all would work, so I just plowed ahead. When the shower riser did not fit, I could immediately see my mistake in not taking the full riser out of the box and making sure my measurements were accurate.
With the basin, I always knew there could be issues. It is a tight space, and the addition of the washer and a closet to a small room is already tight. What I missed was how the addition of the shower walls would affect the space. Without the walls, it was tight but manageable. With the shower walls, it was just a bit too tight without any wiggle room.

One solution if you are unsure would be to simulate the addition of fixtures at the outset, before you order them. You could approximate the fixtures by creating simple blocks to size out of cardboard and put them in place. In my case, the shower walls with the basin, which I always knew might be tight, might have given me advance notice of problems to come. Three-dimensional versions can help a bit more than just taped layouts on the floor.
Another option would be an on-line planning tool, but I have yet to find one I can easily get to work for me. without paying for a subscription.
Planning For Challenges
Another consideration is the return of items that do not work or are missing parts. In any renovation, it is a fine balance between having everything on hand to be ready and managing orders to match timelines. For my first bathroom renovation, I erred on the side of having everything early because I was worried about items going out of stock. This resulted in a hallway filled with items and a long lead time between ordering and any possible returns.
Almost everything worked for me, with two exceptions, both of which I saved for use in our second bathroom. Whenever I get to it. But if something had not been right, I am not sure I could have returned it, with months between ordering. I am not sure the right answer here. It probably depends on your situation. But it is something to consider.
My Final Thought: Be Resilient
My top tip for a bathroom renovation is to build up your resilience. I am not sure my tips here offer any new insight. They are all quite straight-forward and common sense. And often, better reaslised after the fact.
The main thing is to be resilient. Second fix is a time when things start to finally come together. But as you are installing bathroom fixtures, you are probably going to face challenges. Some challenges of your own making. Like my need to re-board the shower. Some due to others’ shortcomings. Like the issues with missing parts from Fired Earth. Either way, issues will come. How you manage them is the key. Know that they are coming. Prepare yourself for it. And find your inner resilience. You will get through it, one way or another.
On my side, we’ve made progress installing bathroom fixtures. We’ve now gotten the shower tap and riser installed, as well as the shower doors. The correct parts have finally arrived for the toilet, so this will be installed soon. The final missing part is the basin, which I just need to decide if it fits with the existing door. An alternative I am considering is installing a bi-fold door, to provide more wall space for the basin to sit on and create some space away from the shower walls. I’ll keep you posted over the coming weeks.

Next up: wallpaper for the top third of the room. I had hoped to do it before installing bathroom fixtures but needed to work with my plumber’s availability. So I’ll be working around fixtures. But excited for this step, which I have never done before. As well, there are lots of little bits that need to be sorted. Trims, coving and plinths for the door. And silicone for everything, the final step in ensuring a water-proofed room.
Stay tuned, we are almost there.
Happy DIY-ing!








Leave a Reply