
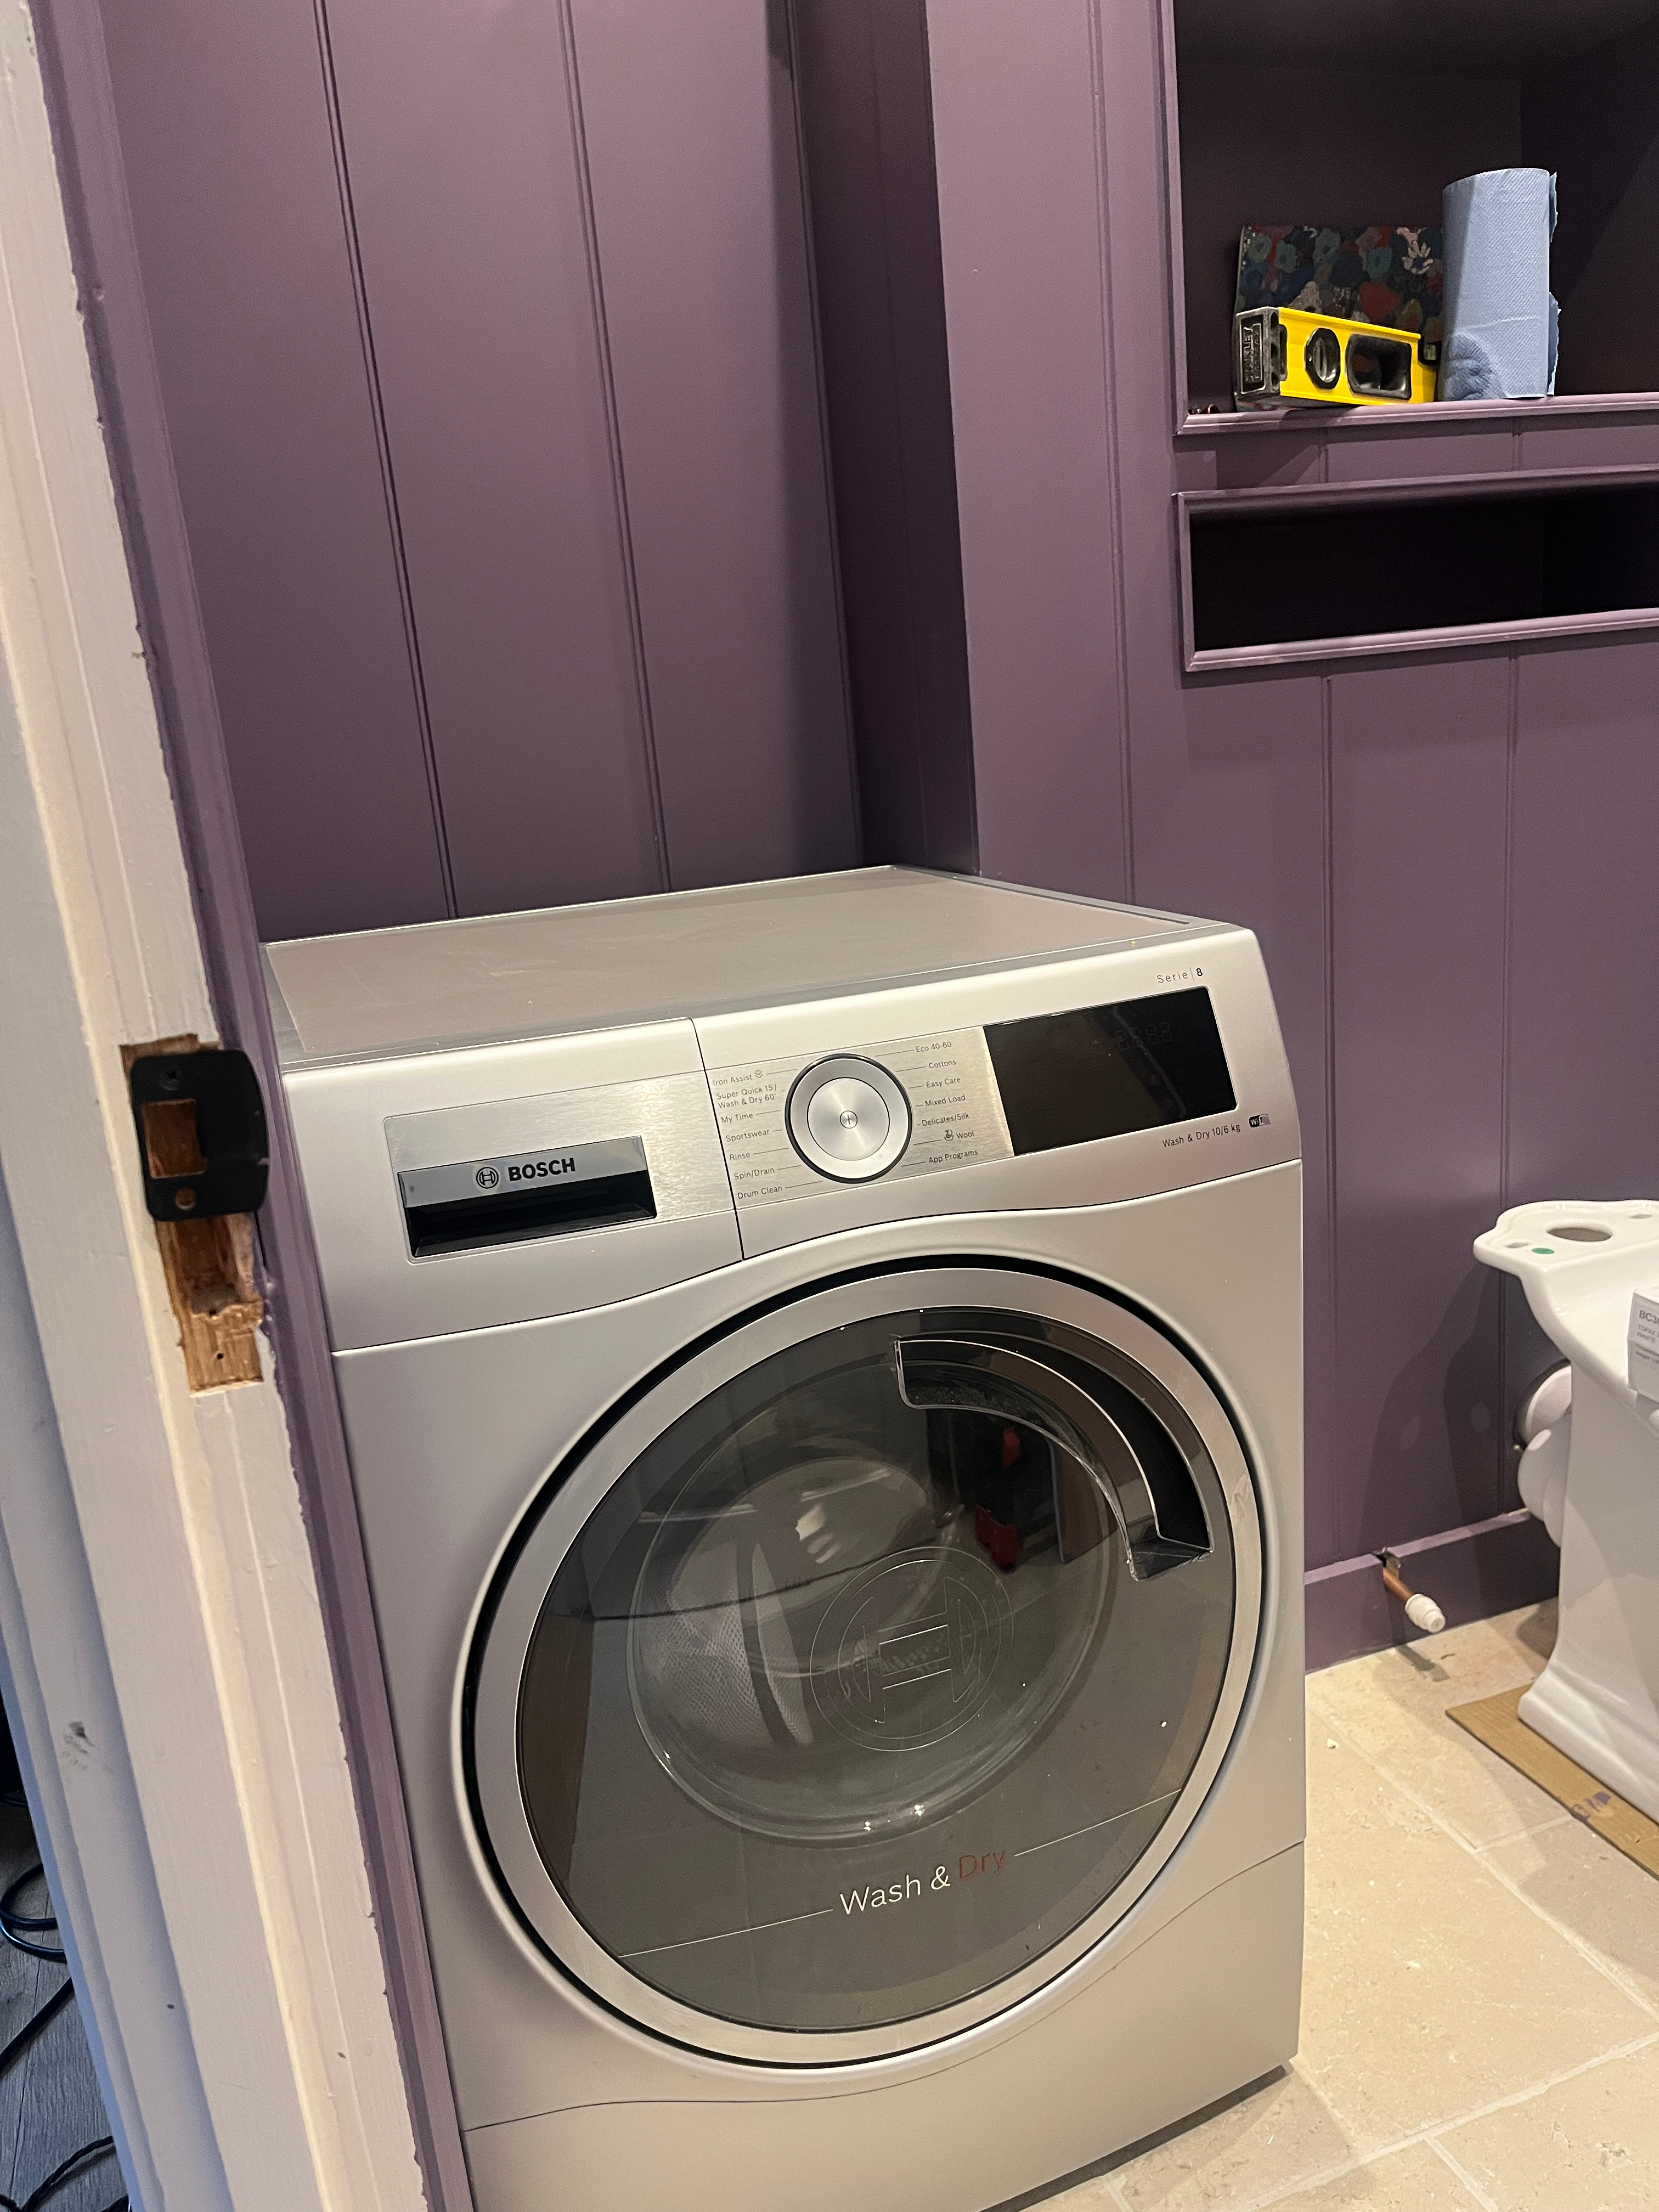
Today, I am sharing a simple but high-impact DIY project that you may not have thought you could do: how to install a washing machine. The few times in my life where I’ve needed this done, I have always hired someone. But no longer. Now, I can do it myself. And you can too.
I have shared previously how much I hate having the washer/dryer in the kitchen, sitting alongside cooking and food prep. But this is standard in Europe. Nearly everywhere I’ve lived in Europe, the washing machine is tucked into the kitchen. Of course, space is always an issue living in the city, so I understand why. But I do not like it.
Ideally, I’d love to have a small laundry room, but that is not possible in our home. So, we’ve ensured there is space in the bathroom renovation to install a washing machine/dryer. This was an absolute must for me when I first started designing the room.
You might remember that when I did a mini-kitchen renovation, I purchased a few new appliances that could easily transition once we do a full renovation. The all-in-one washer/dryer was one of those purchases, and I am so pleased with it. We chose a Bosch and it is a really good machine.

Fortunately, there is space for the machine in the bathroom. Although it is a little more crowded than I would like. Since we removed the bathtub and replaced it with a smaller shower area, we gained a bit of space there. As well, we are moving the basin across the room to the opposite wall, so the all-in-one washer/dryer can tuck into the corner of the room where the basin previously was.
This layout works with my plan to install a washing machine because there is already a water pipe and waste pipe from the basin, which will be converted for the washing machine.
Let me share how I was able to install a washing machine in our small bathroom and free up space in the kitchen, while also moving the laundry area to a more suitable place. Perhaps you can take some of my learnings if you want to do the same. Or, if you are just replacing a washing machine in the same space, I’ll show you how simple it is to install a washing machine into an existing space.
Are You Considering a Bathroom Upgrade?
Get a step-by-step guide and tons of tips and tricks from my own experience renovating my bathroom. From demolition, to water-proofing, tiling, and installing fixtures, this is your ultimate guide through the process.

Choose the Location To Install a Washing MAchine
To decide where to install a washing machine, you will need to ensure you can access a water pipe and a waste pipe. Interestingly in the UK, you only need cold water for a washing machine, because the machine itself has a heating element inside to create the hot water. This may not be the same in other countries, so check your local requirements and your machine’s requirements.
If you do not have the right pipes, you may be able to re-route existing pipes to serve your needs. Today’s post does not cover this aspect, you will need a plumber for this. A DIYer can move pipes, but it is a bit more involved and carries risks. I am not yet ready to teach anyone how to do this, although I hope to one day.
In my case, because I was using the space where the basin was, I had the necessary pipe work.

My plumber simply adjusted the pipes during first fix. He added some PVC piping to the existing waste pipe, bringing it vertically up the wall so the drain pipe from the washer could drop down into it. He also cut and capped the hot water pipe since we do not need it. Then, he cut the cold water pipe to the right height and added the necessary washer valve to it. The connection includes a plastic isolation valve and a threaded connector where the washing machine water hose can be screwed in. (An accomplished DIYer may be able to make these changes, but since my plumber was coming for other bathroom works, he did it for me.)

Because I moved my washing machine into the bathroom, I also needed to have an electric socket added for the machine. In the UK, we do not have wall sockets in the bathroom due to code requirements. I had an electrician add one for the washing machine since it is hidden behind the machine and only used for this purpose. It also has to have an isolation switch to stop the current at the site if needed. The electrician tapped into a wall socket on the other side of the wall, in the hallway.
Build Out Any Shelving To House the Washing Machine
In my case, the washing machine tucks in between the stud wall I built and the existing wall. When I built the stud wall, I left a 63cm space between the edge and the existing wall for this purpose. Most washing machines are 60cm wide, so this gives a little wiggle room for adding paneling on either side. (Honestly, I cut it a bit close, the washer fits very snugly, there is no extra room on either side!)

I had wanted to build a small platform for the washer to sit on, with a pull-out folding shelf and a drawer below, to hold the laundry basket, but the space was really too small. It would have overpowered the room.

So, I just slotted the machine into the place, and I plan to add a counter over the top, to use for folding laundry. I may also add a panel to cover the side and box the washer in, but I will decide this after everything else is in place and I can see how it looks. It does stand out a little now, with the bright silver side.
Install the Washing Machine
Now for the install. Bring the machine into the room and put it in position. Leave it pulled out, you need to be able to access all the pipes on the machine and on the wall behind.
If you are re-installing a washer that was installed previously, ignore this next step. But if you are installing a new washing machine, you will want to follow the instructions to remove the bolts on the back of your machine that are placed for transporting the machine. These bolts prevent the basket from spinning while it is transported. Obviously, you need to remove them so the machine can spin when it is running.
There should be four bolts in the corners on the back of the washer, and when you remove them, you can use the covers provided for the remaining holes. Again, find more detail son this step in your instruction manual.
Next up, take the waste pipe from the back of the machine and simply drop it into your existing waste pipe. It should be smaller in diameter and just slot right in. You do not need to do anything more, other than just make sure there are no kinks in the flexible pipe. You do not need to attach the pipe in any way.

Now, take the water hose from the washing machine and screw the end into your water pipe. You should be able to hand screw it tightly without needing to use a spanner. Once you have tightened it, turn the plastic isolation valve to open up the water. Feel around the connection for any drips.
Once you connect these two hoses and open the isolation valve, carefully push the machine into place. Be careful not to scratch the floor, and pay attention that the pipes are not kinked. Gently arrange them so the water and waste can flow easily.
The final step before you can use the machine is to level it from front to back and side to side. This is quite important, as a machine that is not level can “walk” itself across the floor while on the spin cycle. Use a spirit level and adjust the legs to achieve a level machine from all sides. Then plug it in and ensure the power is on.
Try It Out
Once you’ve installed the washer, put it on a short cycle to try it out and ensure there are no leaks. If needed, pull the machine out slightly so you can watch the water hose connection. If there are leaks, stop the machine and tighten the connection a bit more.

Obviously, if you need to remove a washing machine, follow these same steps in reverse to unhook it. Make sure to close the isolation valve before you remove the water pipe. Leave it closed as long as you have nothing connected to it.

And that is a washing machine installed. Something that seems so difficult is actually really easy. You can do this with a few simple tools and a little time. So rewarding, so satisfying! Now, I’m off to do laundry in my new laundry area!
Happy DIY-ing!








Leave a Reply