
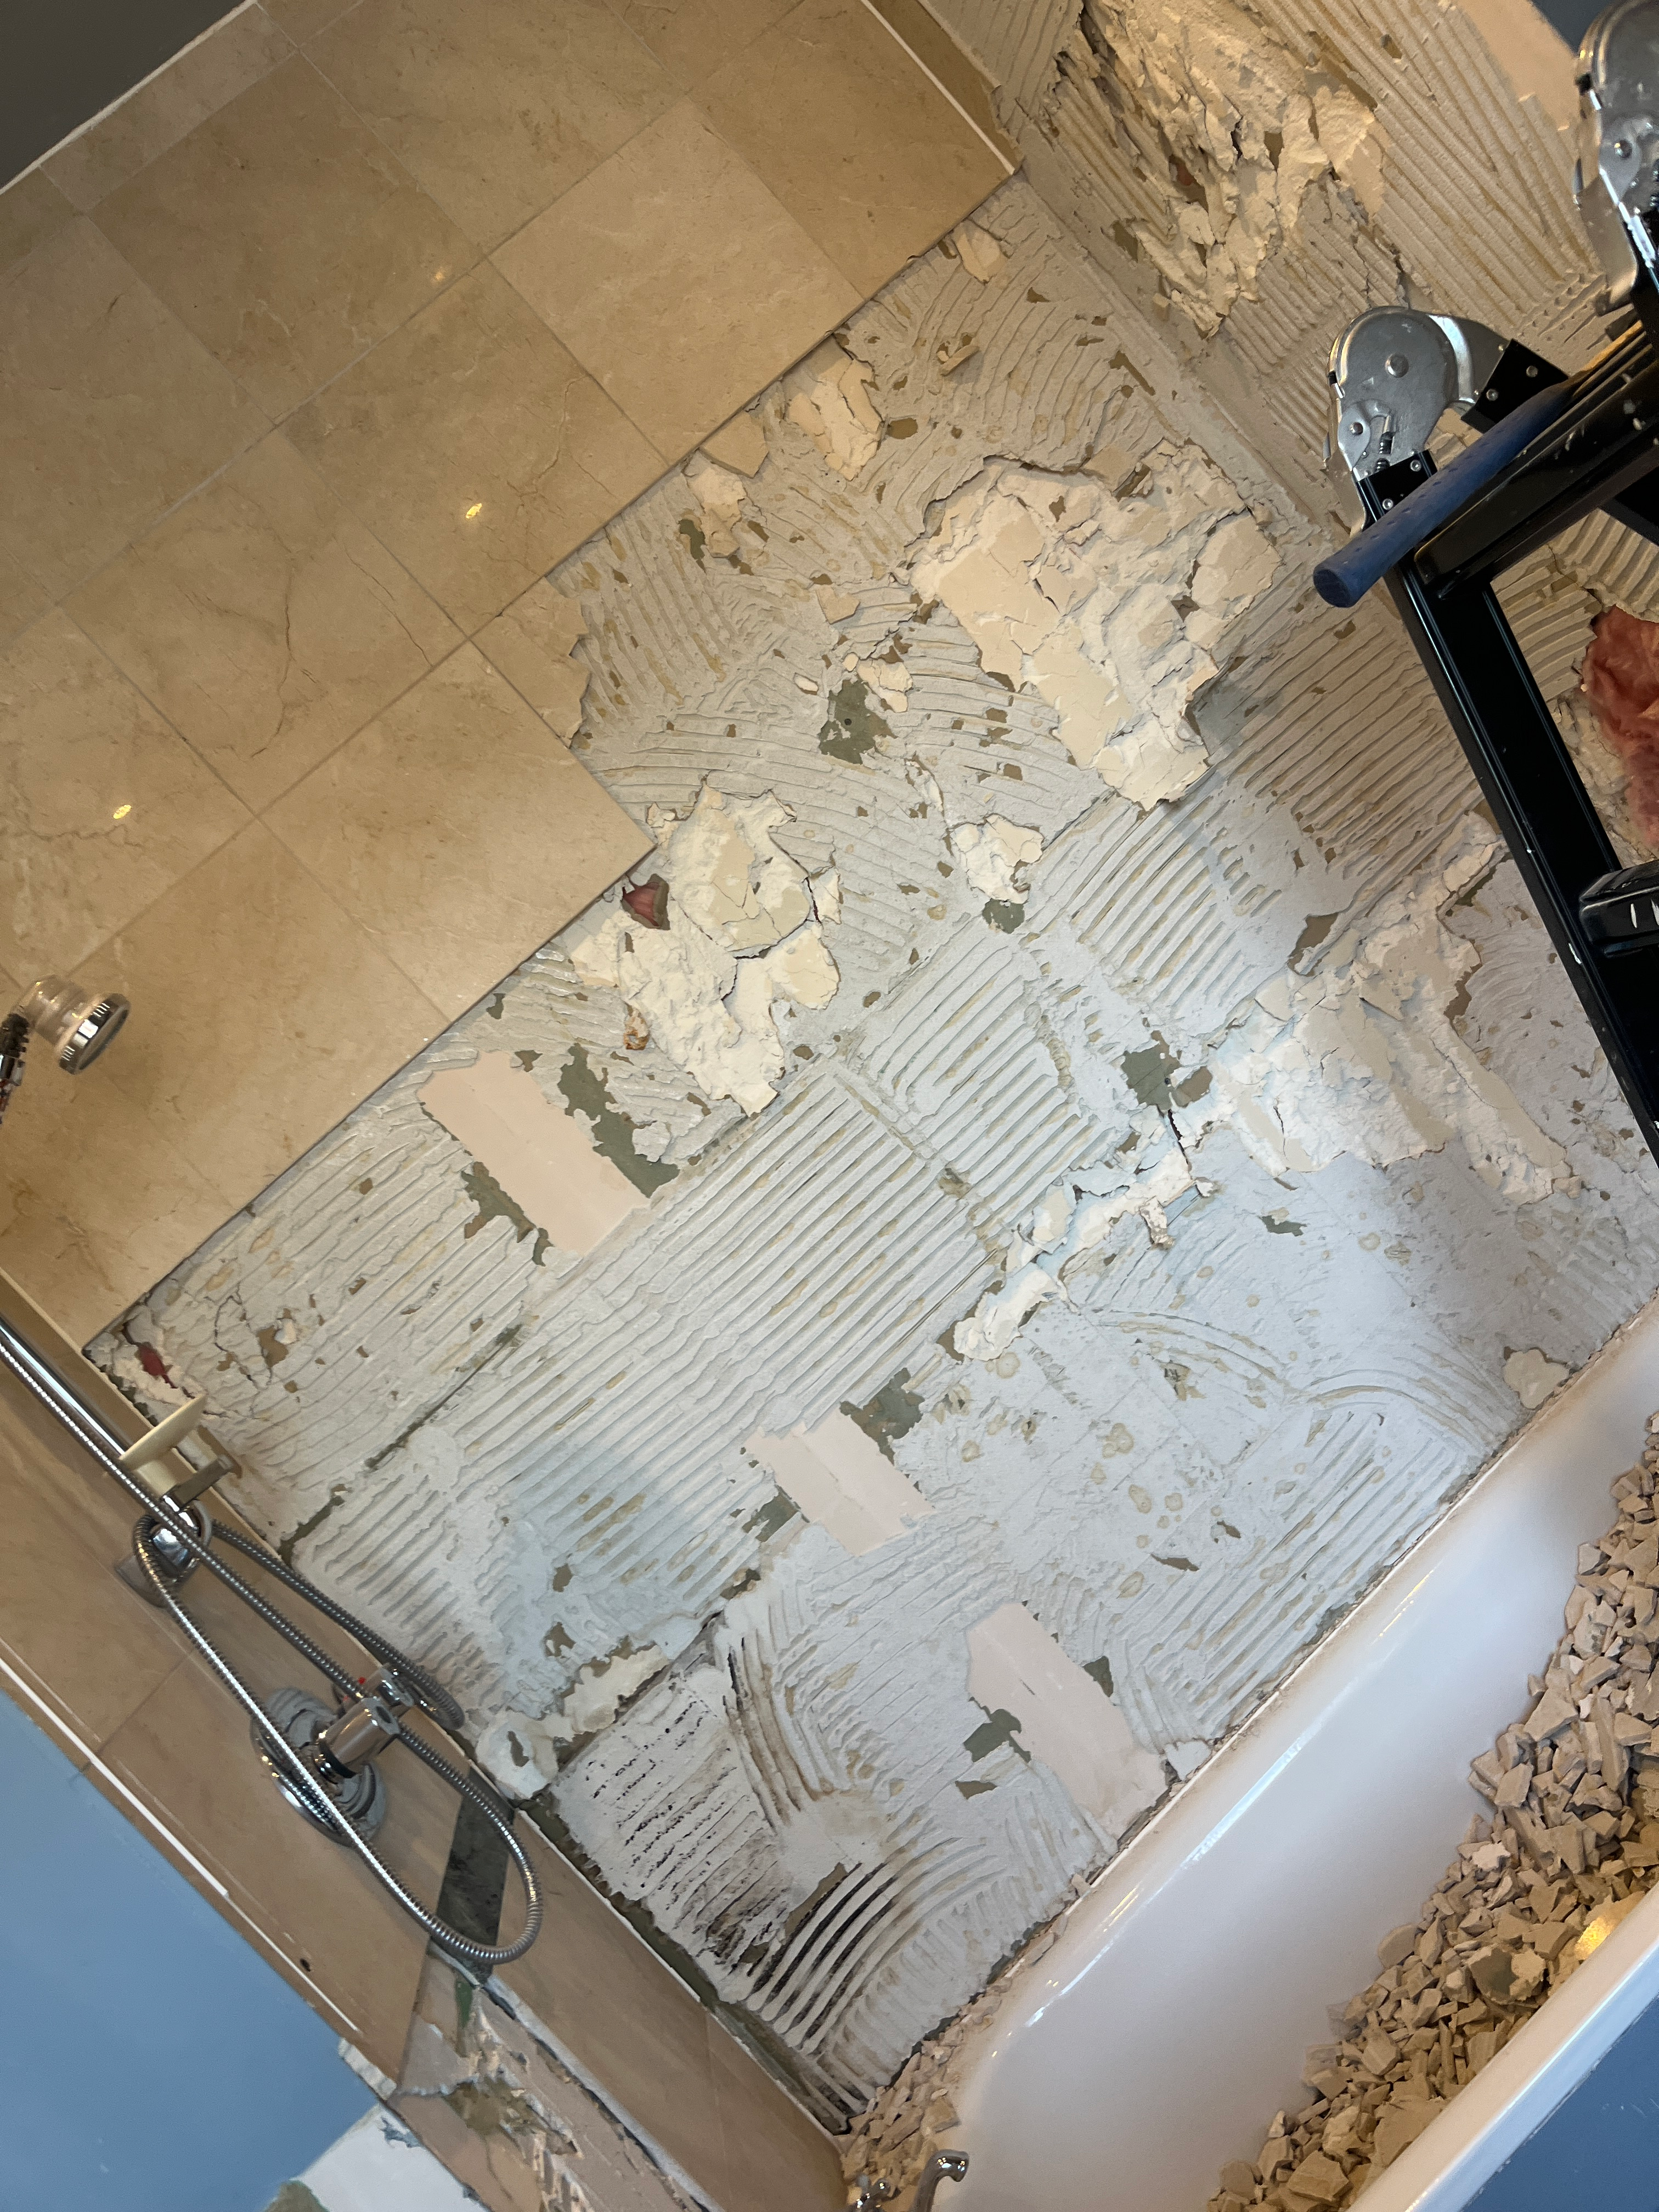
The master bath demolition is well underway. And the part I thought would be so easy is proving to be anything but. Removing the ugly beige and green tiles was supposed to go quick and easy, but I’ve needed to find new methods for removing stubborn wall tiles.

You might remember that when I removed the shower tiles in the guest bath, I found the process to be almost enjoyable. I think I used words such as relaxing and zen-like. Well, that was because the tiles came up with a few taps of a hammer on a chisel under the edge of the tiles. The majority of the tiles came off in whole pieces, and I zipped right through the process. And I felt calm and relaxed at the end of it all.

This time, though, when I tried my same technique, the plaster wall underneath began crumbling. I had nothing to lever the chisel against, and it just ended up making big holes in the wall behind. Clearly, I needed to find a different approach to removing stubborn wall tiles. Apparently, this is more like what tile removal should be like. My first experience in the guest bath was something of an anomaly.

I managed to get part of the back wall off, but the tiles were in hundreds of tiny pieces. And it took longer than it should have, and the wall was completely destroyed. I’m not too worried about the wall, because I will remove the plasterboard and replace it with cement boards.
But how am I going to remove the rest of these stubborn wall tiles?

Worse still, when I finally managed to get the back wall cleared of the tiles, I could not find a way to start the side wall. There was no place to get my chisel under a tile, as the tiles were right up to the edge of the side wall. And they were not coming off easily.
I finally found a suggestion that you need to just strike the tile with a hammer, working at the edges and nibbling away at breaking the tile. I gave this a try, but the hammer just bounced back; the interior wall did not feel like it could withstand the force.
Try and Try Again
In my tried and true fashion when something does not work, I walked away for a few days. When I came back to it, I decided to again try striking the tiles with a hammer, but not be put off by the noise or the fear of going through the wall behind. With a few strong, quick blows, I was able to crack the tile in a few places and pull some shards away. I finally had a starting point! And confidence to continue.
I had thought that once I had a starting point, perhaps the tiles would start to come away with the chisel technique. But these tiles seemed almost super-glued to the wall. With nothing left to lose, I just started hitting the tiles with the hammer. I worked my way along the edges, breaking the tile into small pieces that finally came away with the chisel. Breaking the tiles into lots of tiny pieces seemed to be the only solution to removing stubborn wall tiles.

Essentially, I was beating the tiles off the wall. A great way to release any pent-up anger, but personally, I preferred the zen-like approach. I’m a generally optimistic person; I don’t think I have enough anger for this work.
As I went along, I got better at knowing where to strike the tiles and how hard to hit them. Along the edges and with sharp, quick blows. I got into a bit of a groove, with five or six hard strikes, and then pulling the shards away with the claw end of the hammer. Then more strikes, pulling the tiles away.
It created a lot of debris, and at one point, I could stand on all the debris to reach some of the higher tiles.

The longer I used this method, the better I got. Toward the end, the tile pieces were falling off on their own. As I hit the tile, shattering it, the shards would come away as I continued striking the tile. In some cases, the entire tile came away with no prying or help beyond the hits with my hammer. I simply worked my way along the edges, then moved inward on the tile, creating more and more shards that eventually just fell away.

It was exhausting work. Thank goodness I did not have an entire room to do. The shower is 195cm x 70cm, and the tiles go to the ceiling, which is 320cm. So that was more than enough for me. By the end, I had been able to summon plenty of anger for the work … anger at these tiles! And I still have the floor to do.

A Few Tips and Pointers
If you have a similar situation and anger is not enough for you to beat the tiles off the wall, here are a few tips for removing stubborn wall tiles that I learned along the way:
Wear protective goggles and potentially a face mask. Do not even consider doing this work without goggles. Shards of tile fly everywhere, and you have no way of knowing if some small piece will fly off into your eye. I also found there was a lot of tile and plaster dust, so I wore a face mask too.
Take everything off the walls in and around the area. I removed all the art hanging on the walls outside the bathroom and on the walls on the other side of the bath. I even found that the walls a few rooms down could feel the vibrations, so have someone monitor while you bang at the tiles, and remove anything in danger of falling.
Make short, targeted hits around the open edges of the tile, moving further in as the tile shatters. I found that starting on the open edges resulted in quick results. Once you get a few breaks in the tile, hit those breaks to further shatter the tile. Move inward, away from the free edge, continually striking the tile until it is fully shattered. Most of the pieces should fall on their own, or use a chisel, the claw end of the hammer, or a crow bar to lift the shards away from the wall.
Be ready for a lot of mess. My tiles were in a million pieces. Only three or so tiles came off almost whole; everything else was in lots of tiny bits. I just let everything fall into the tub below, although there were plenty of pieces that bounced off the tub and into the room. And, I kept the door shut to contain the mess and periodically cleaned up outside the tub.

Be patient, and take your time. Beating tiles off the wall is hard. It can wear you out. I set myself little goals and worked at it in small sessions. Two rows of tiles, then a break. Although toward the end, I got in a groove and just kept working, until it was done. And then I took a nap!
The good news is, the tiles are off the wall. I still have to do the floor tiles, and I expect it will be more of the same. But at least I’ve got the technique down.
Other Steps Are Going As Expected
In other good news, I got the basin out all by myself, following the same approach as last time but this time without any help. It took a little more time than I expected, and I completely forgot about the braces holding the basin in until I tried prying it out and it would not come out. But I got there in the end. I accidentally cut the pipe running to the toilet, so that is out of commission. I had planned to leave it running as long as possible, so we have two toilets, but oh well! It would only have been a few days anyway.

I also got the mirror down in a few hours, using the same technique as last time. I won’t bore you with the details of this part of the renovation since it was essentially the same. For this bathroom renovation, I will focus on new learnings and challenges I face that are unique to this particular bathroom. Like removing stubborn wall tiles!

Next up, I’ll be removing the bath tub and toilet, the floor tiles, and all the plasterboard in the shower area.
And to those of you who have a project ahead that includes removing stubborn wall tiles, make sure you find some anger inside to help you get through!
Happy DIY-ing!
Interested in similar posts? Check these related topics out:








Leave a Reply