
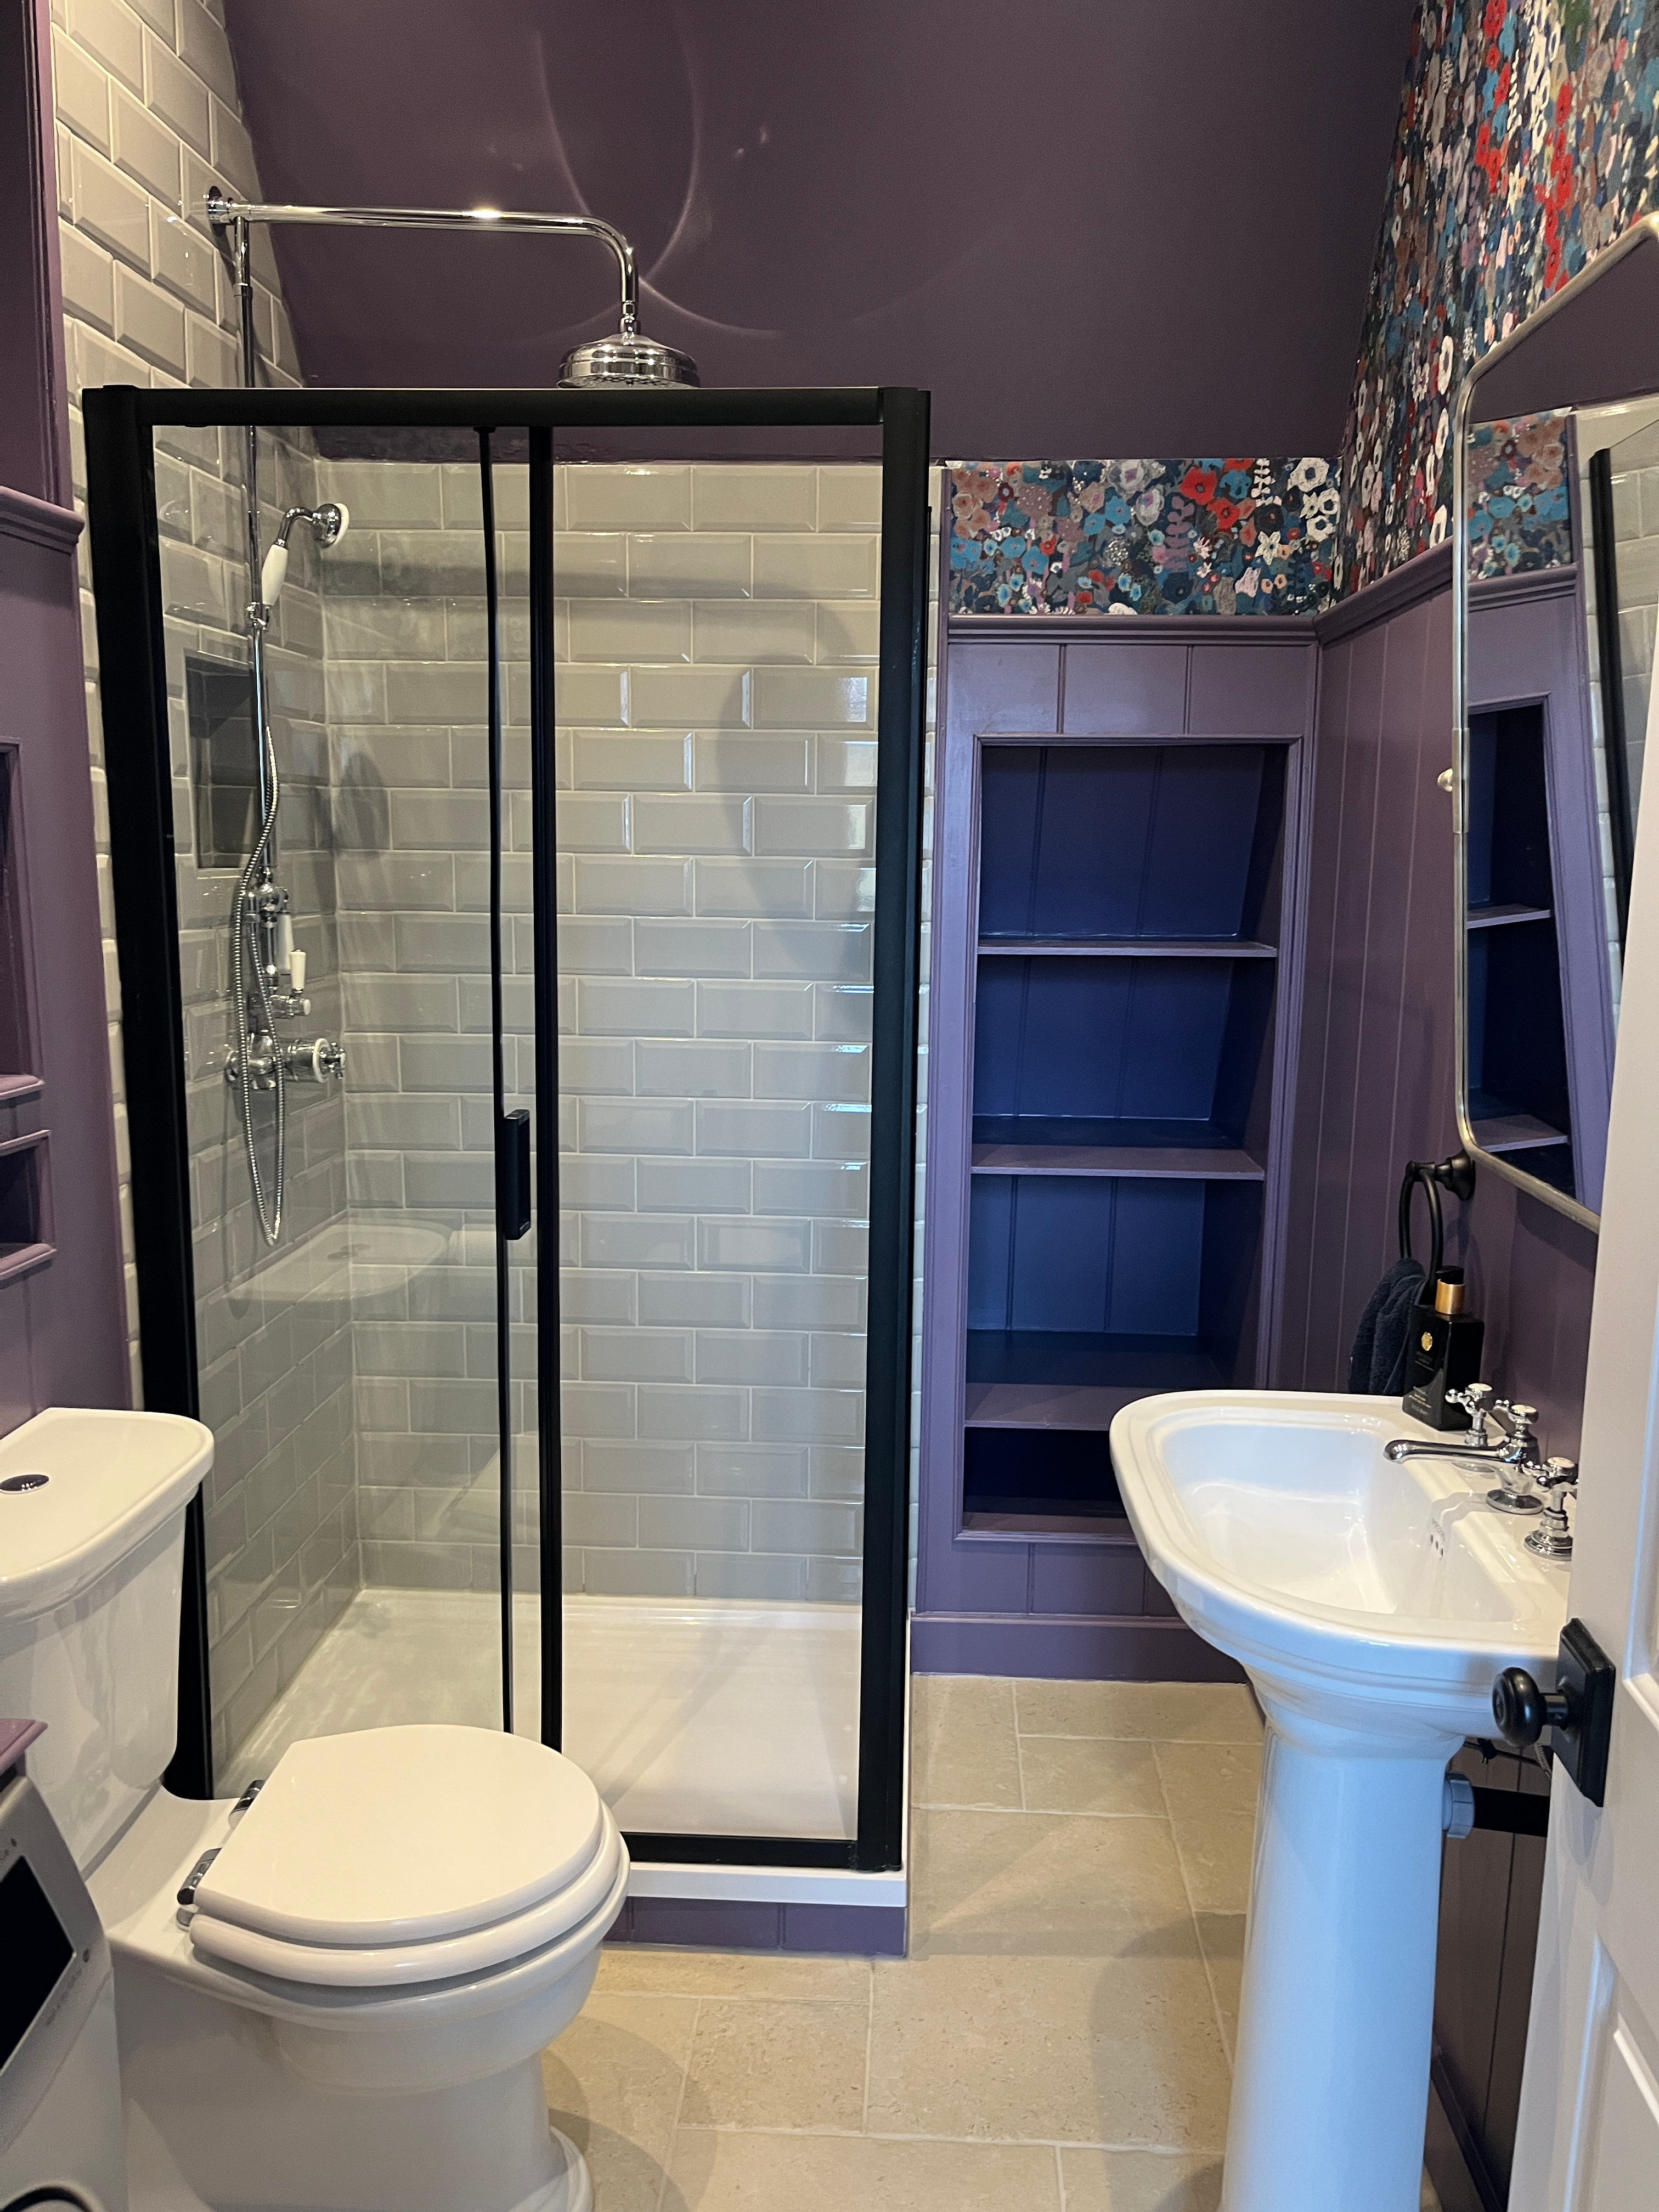
It is done! I am so happy to finally be able to say that I have done a complete bathroom renovation! And it has been a success! With it finally finished, I can now just enjoy my new guest bathroom.
I was finally able to complete all the last little bits over the last few days, including painting, touch-ups, adding some extra trim, patching wallpaper, and adding some final silicone.

For those of you new to this space, I undertook my first ever complete bathroom renovation, starting last July. You can read all about my plans and the mood board. Yes, it took me nine months. No, I am not proud of this. But, I am proud of the final room, which looks amazing.

For those of you considering your own bathroom renovation, I’ve gone through it all and shared everything in great detail. I’ve compiled the perfect check-list, complete with in-depth blog posts for all the steps, to help you in your own bathroom renovation. You are very welcome!
Are You Considering a Bathroom Upgrade?
Get a step-by-step guide and tons of tips and tricks from my own experience renovating my bathroom. From demolition, to water-proofing, tiling, and installing fixtures, this is your ultimate guide through the process.

Let’s take a look at the results, shall we?
Before the Renovation
First up, let me remind you of what we started with. A dated, orange bathroom, which I absolutely hated. I painted the orange tiled floor, but it did not withstand the daily traffic very well. Other than that, we just lived with it until I got the great idea that maybe I could do the renovation myself. (Spoiler alert: I could and I did!)


The Mood Board and Inspiration
The bathroom was inspired by this gorgeous wallpaper from House of Hackney. Called Hollyhocks, in the winter colourway. Isn’t it gorgeous?

Everything followed on from this wallpaper.

The Final Complete Bathroom Renovation
Let’s take a look at the many updates I’ve made in this tiny room over the last nine months.

The Flooring
Let’s start with the gorgeous limestone-effect tile. Spa-perfect, in my view. This tile was hard to lay (think Tetris, in life-size form), but it was well worth it.


I added underfloor heating, which is absolutely glorious and highly recommended.


The Shower
I replaced the bathtub with a shower, complete with glossy, beveled metro tiles in grey; a shower niche to hold all the product; and a very posh shower head. Let me just say, taking a shower is now complete luxury.


The Basin
I know that this style of basin does not provide a lot of storage, but I made up for that in other ways. I love the simplicity and clean lines of a pedestal basin in a guest bath.

This one almost did not fit. It is the smallest one they make that is not a cloakroom basin, and it is a little tight. But, I think it works!

We needed to push the basin as close to the door as we could, which left no room for the wall sconces I had planned. We will use these in the master bath.
The Toilet
Is it odd to find a toilet beautiful? Well, I am okay with that. I love the look of this toilet.

This one caused me a lot of issues and a lot of delays. It was missing parts twice, and even seeing a sample in the showroom before deciding proved unnecessarily difficult. But it was (almost!) worth it.
One more look, shall we?

The Washer
One of my biggest priorities when I started this project was moving the washer from the kitchen into the guest bath. There was a moment when my plumber was recommending against this move, because of the basin spacing. But I stuck to my guns. I would almost rather forego the basin. (Just kidding … sort of!).
I love, love, love having the laundry in this space now. So happy with this decision.


The Storage
And no DIY project of mine would be complete without some form of storage. In this bathroom, I was able to find two places for increased storage: a wall niche above the toilet and a closet built into the eaves. Both give us valuable space that makes up for the lack of a vanity.


As with every other storage I’ve added to my flat, it still needs doors. I cut out pieces of MDF to go over the openings, but they do not look great. So I am technically not finished, as I need to figure out doors. But this will come. I am calling this bathroom done!


A Resounding Success
This complete bathroom renovation has been a success for so many reasons. First, it is a working bathroom that looks great. Certainly better than what we started with, although the bar was not too high!
Second, I did it almost all by myself. A plumber and an electrician, but otherwise, I did it all myself. The demolition, all the tiling, the paneling, the wallpapering, the building of storage. And, I learned a load along the way. Which hopefully will help you if you are planning the same type of renovation in your home.
Disclaimer: There are a few bits left to finish. I need to hang the pendant light and patch the place for the wall sconces that were not to be. I just need to find the right light fixture. And I have a few decorating ideas to implement over the next few months. And of course, I need to figure out the doors for the storage. But, these are small things that will come. For today, let’s just enjoy the joy of a complete bathroom renovation.
UPDATE: Check out my copycat Zara rubbish bin, with a matching wallpaper interior. If you are looking for a rubbish bin, follow my tutorial and make your own with your own customization.

How about a few more photos?
Happy DIY-ing!


Interested in similar posts? Check these related topics out:








Leave a Reply