
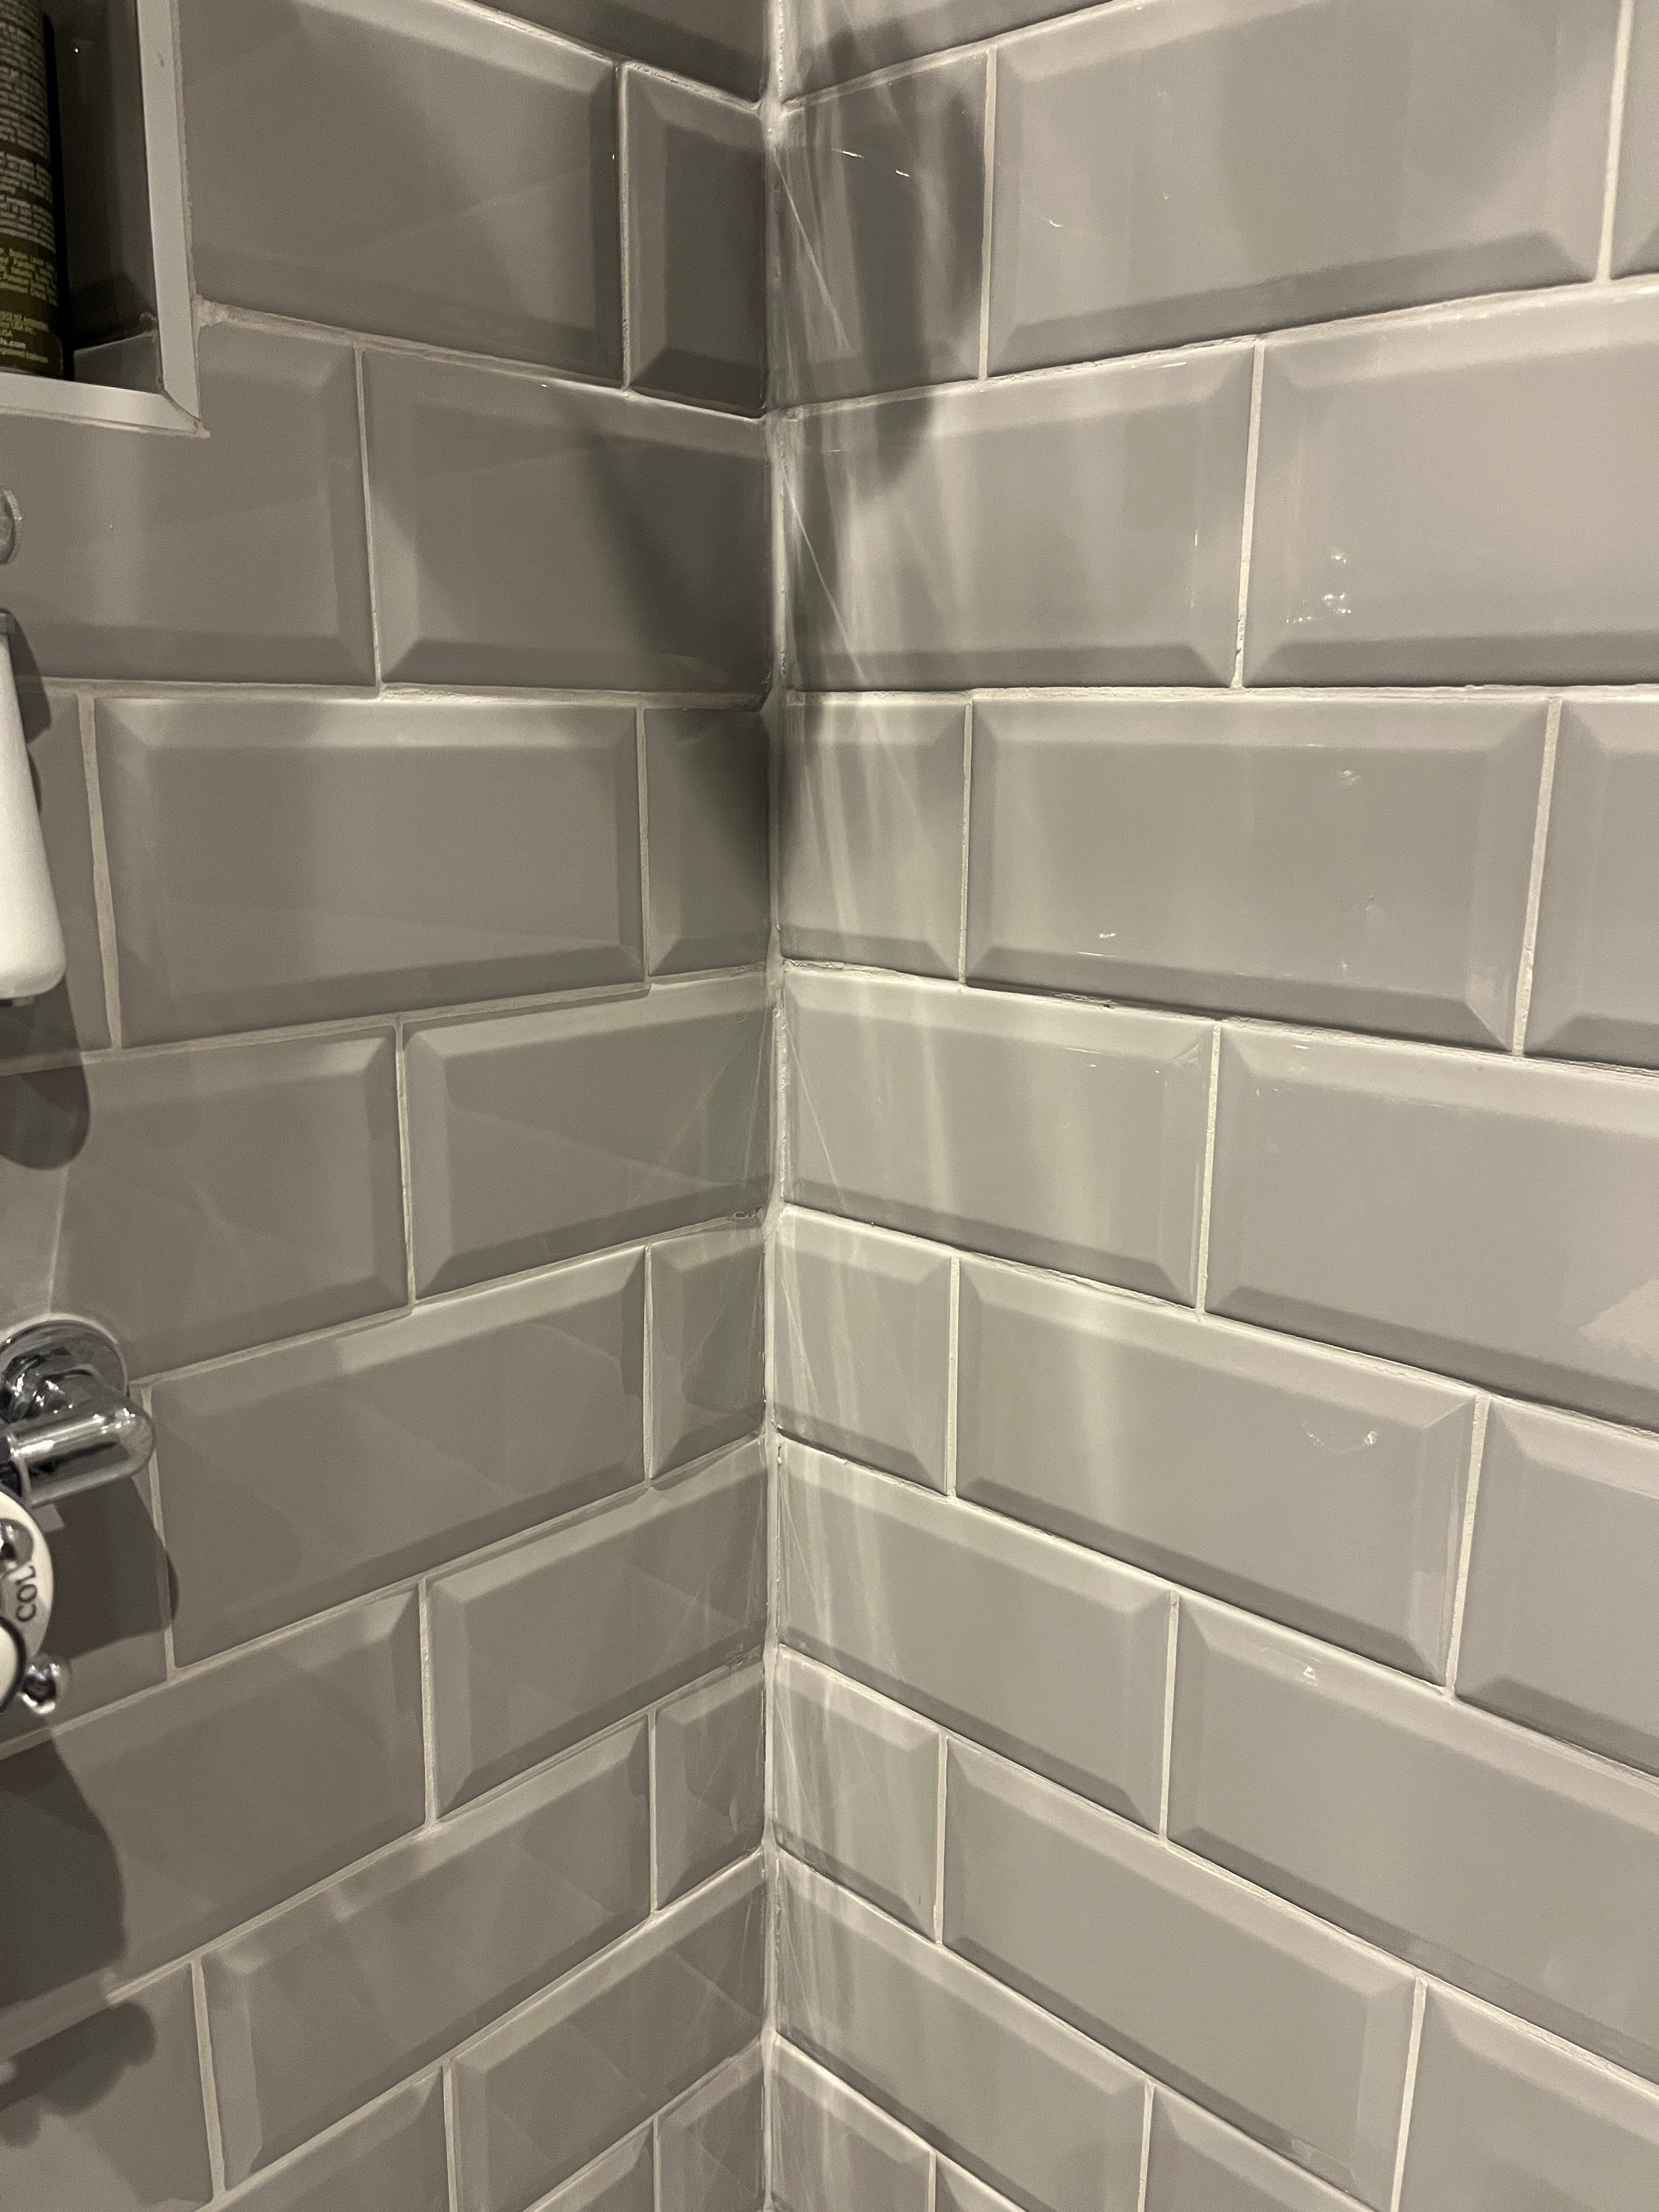
When renovating a bath, it is critical to ensure absolve waterproofing. From cement boards and seaming, to tanking agents and tiling and grouting, several steps are necessary to prevent water ingress. An additional and final step is to apply silicone to protect your bath, at all the edges and seams where water might enter. Let’s take a look at this important step and how to ensure a good application..
Warning: Getting photos of silicone is not very easy, so stick with me on the imagery today.

First up, an important distinction: silicone vs. caulk. They both play similar roles, in terms of sealing seams and edges. However, you use silicone in wet areas, as it will help prevent leaks. You may also use caulk in the bathroom, but only in areas that are not prone to water. Think wall paneling or shelving, but not not in the shower, along the floor tiles, or around the fixtures. Here, you want to use silicone.
In my bathroom, I applied caulk on the wall paneling at the seams, as well as where the paneling meets the skirting boards. I also applied caulk at the trim around the door and on the shelves that I built. Everywhere else, it was all about applying silicone. Where the floor tiles meet the skirting boards. All along the shower wherever there are seams and where the shower doors are installed. And, along the bottom of the fixtures and where they attach to the walls.


If you have applied caulk before, applying silicone is quite similar. But, I found it a bit harder, because silicone is quite sticky and does not allow for correcting mistakes the way caulk does. It also does not get painted over, so it shows a lot more. And, silicone has a profile to it. When applying silicone, you do not use your finger to smooth it out the way you do with caulk. Overall, my silicone application is not perfect, but it is not too bad. But I did have to redo a few areas, which can be challenging.
Getting Started
The first step in any silicone project is to choose the right colour. You actually may need a few different colours in your project. I did. You want the silicone to blend in with the surrounding area, so choose colours that match your tiles and grout, the fixtures, and any other elements in the bathroom. But there is generally no right or wrong answer; it is often a matter of preference.

In my case, I went with two different colours in different places. First up, clear silicone. This is the default, if you cannot find a matching colour. I used clear silicone around the fixtures and around the shower pan, where the tile meets the pan. Also, I used clear silicone along the metal supports for the shower doors, the glass panels, and the walls. While I could have also chosen black here, I was worried it would show too much, and since my technique is not perfect, clear was the better choice for blending in.
The other silicone colour I chose was a grey that matched the grout I used. Mapei makes silicone to match all of their grout colours, which is just perfect. I chose the Silver Grey Mapei silicone from ProTiler Tools, which matches the Mapei grout that I used for both the floor and the shower tiles.
I used the grey silicone around the floor tiles where they meet the skirting boards, as well as in the corner in the shower. We also used it around the shower taps, to ensure the holes for the pipes were sealed.
Specific Tools
Beyond the silicone itself, you do need one specific tool: a silicone profiler. This little tool helps ensure smooth application of the silicone. I purchased my silicone profiler from Screwfix, and it came with numerous profiles and edges, depending on the application.
You can use your finger to smooth silicone, just as you do with caulk. But I read in a few places that using your finger may cause a dip in the silicone that can allow water build-up. You will note that I did use my finger to smooth the silicone in the shower corner, because it just worked better for me. As this is a vertical line of silicone, the chances of water sitting on the silicone bead are limited, so I was okay with it in this case.
You also need a spray bottle filled with water and a bit of liquid washing-up soap. This helps with applying silicone as well.
Finally, if like me, you make any mistakes, you also may need to purchase a silicone removal tool, as well as chemical silicone remover, a liquid gel that helps with the removal. But perhaps wait and see how you get on before you need the removal tools.

Applying Silicone
Choose the Profile
Because silicone can be quite visible, the application is very important. First up, you want to think about the profile of the silicone bead. Use the profiler tool and choose the width and shape of the bead you want to use.
This may vary for different applications. Around the floor, I chose a slightly thicker profile, and the same for the corner of the shower. For the shower rails and door panels, I went thinner, so the silicone did not show too much but still provided protection.
As well, you may want a bead that is flat, or almost curving in, or you may want a bead that is raised and almost curving out. Use your profiler tool to make your decision, and perhaps test a few options on a board.
Once you have chosen the bead style and width, you want to cut the tip of the silicone tube so the opening is the same width as the profile you have selected. Hold the profiler tool up to the tip and cut the tip to be the same size as the edges of the profile you chose. This ensures the right amount of silicone for the bead you want to have. You might need a few different tips depending on different applications.
Apply a Bead of Silicone
Using a caulking gun, apply a bead of silicone to the area you have selected. Start at one end and in one long motion, apply the bead the length of the wall, floor or edge. Maintain a steady flow of silicone, and try not to stop and start if possible. This is not always possible, and that is fine, you can smooth out the bead with the profiler at the next step.
As soon as the bead is applied, spray your profiler tool with the washing up liquid and water combination. You may also choose to spray the actual bead of silicone, but just the tool is generally sufficient.
Place the tool against the silicone bead at the starting point, with the edges of the tool against the surrounding wall. Pull the tool along the bead, smoothing the bead out and removing any excess silicone with it. Stop as needed to wipe excess silicone off the tool.
Try not to touch the silicone, as it is quite sticky and you can mar the surface. The washing up liquid helps prevent the stickiness so the profiler tool can glide across the surface.
Make sure you are removing any excess silicone along the wall or floor. You want to ensure just the bead of silicone remains. It is easy to not notice excess silicone and then it is hard to remove. I know this from experience!
Learn From Me: Some Tips and Tricks
Overall, the concept of applying silicone is quite simple, but the actual experience can vary. I found it to be easy in some areas, but very challenging in other areas.
For example, applying silicone along the shower pan where it meets the tiled wall was quite simple. I used clear silicone, with a decent-sized bead, and it went on really well.
It also went on quite well along the floor where the tile meets the skirting board. I have one area where there was some excess that I did not notice, but some of the silicone removal gel helped with that.

Around the fixtures, my plumber added the silicone, so it was beautifully applied, of course!

Making Mistakes and Removing Excess Silicone
Along the shower door rails, though, it was a bit trickier. I needed to use a thinner bead, so I cut a second tip with a thinner opening to help. It was also hard to maneuver around the walls with the caulking gun. It is not a big space and with the shower taps added in, plus the glass wall and rails, it was tight. I ended up getting some excess silicone on the black metal rails, which was hard to remove.
To remove the excess silicone from the shower rails, I found that using my thumb to rub at it after it dried to be the best option, but it took a long time. I also had excess silicone on the surrounding tiles. Here, I tried using a thin razor blade and the head of a chisel covered in blue roll. But, I worried that I would scratch the tiles. So in the end, my finger was the best removal tool.

Until I purchased a silicone removal tool, which was an amazing little piece of kit. It is essentially two tools, made from plastic, one with a flat head and one with a corner-shaped head great for corners. You could pull or push them through silicone, and with the addition of the silicone gel, it really worked a treat.
Silicone Redux in the Corner of the Shower
My biggest issue was in the corner of the shower where the tiles meet up. This has always been an issue, if you recall that when I did the tiling, the corners were off by a few millimetres. While I did fix it, the corner was not perfect, due to uneven walls and the bevel of the subway tiles, laid in an alternating pattern.
I had grouted the corner, but I wanted to also add silicone, to help neaten it up and ensure absolute watertight seals at the seam. The overall silicone bead was pretty good on my first try, but it was quite wide. And, I missed removing some of the excess along the sides, due to the beveling. Because I used the grey silicone, it matched the grout perfectly, so I did not realise until it dried that I had quite a bit of excess along the seam.


I lived with it for a few weeks, while I worked on other things, but it was just too wide and too messy. So I decided to remove the bead and try again. And this took some time. I tried removal using a razor, a flat-head screwdriver, and a chisel covered in blue roll. But again, I was worried about scratching the tiles.
In the end, it was this corner that convinced me to purchase the silicone removal tool and the removal gel. And I am glad I did.
Removing Silicone
It took a bit of time to find a good technique, but essentially, I brushed the silicone gel onto the silicone that I wanted to remove (it has a very convenient built-in brush applicator), and then waited 15 minutes for it to penetrate. Then, I used the two tools to scrape at the silicone and push it off the tile. Dried silicone is very rubbery, so you need to work at it. Dig at the edges, getting the tool up underneath the edge, and then push it up or across the bead, keeping pressure on the tile. Because the tools are plastic, there is no worry about scratching the tiles. But they are quite sharp and do a good job of getting under the silicone.
At first, I found the flat tool easier to use, but I then tried a few different approaches with the corner tool. I thought it needed to cut at both edges of the corner equally, but when I tilted the tool toward one wall or another, I got a better grip on the edge and was able to peel the silicone away on one edge before moving to the other edge. The edge of the corner tool seemed a bit sharper, so I felt like I could get more of the silicone off the tile with it.

I also used a razor blade to cut through the silicone, so it could peel away in two halves. This made removal a bit easier. And it helped allow the silicone gel to penetrate under the silicone. As well, I scraped as much as I could, and then I applied another coating of the gel, let it sit, and scraped some more. In a few areas, I applied the gel four or five times before I was able to get all of the residue off the tiles.
It took some real effort to remove the corner bead of silicone, but I made it in the end. Better to get it right the first time, but good to know there are options if you mess up.

Re-Applying Silicone, With a More Precise Approach
For the second application in the corner, I didn’t want to take any chances. So I used a trick my dad taught me: apply painter’s tape along the area where you are applying silicone, on either side, creating a boundary. Then, apply the silicone in the space between the tape. The tape creates a nice edge and helps catch the excess silicone, which is where mistakes can happen.

I was light on the application this time, as I really wanted a lighter line. And, I used my finger, sprayed with the water and washing-up liquid, to smooth the bead out. While I needed to apply more silicone in a few places, smoothing it out and relying on the tape helped ensure a clean border.

Once I was happy with the bead, I gently pulled the tape away on both sides and made any final adjustments with my finger and additional silicone.
It is not perfect, but it is a lot better, and quite honestly, I do not think anyone will be studying the silicone application in the corner of the shower. As well, the colour is such a good match that it is not too visible.

Silicone for the Shower Head and Taps
I also had a situation where the holes I cut in the tiles for the shower taps where just a bit too large. You could see the holes in the tiles after the taps were added, which is not a good look. And not good for ensuring a water-tight seal. My plumber helped me to seal these holes, using the grey silicone, so it matches the tiles and grout. For the next bathroom renovation that I do, I will need to be more precise with the holes I cut for the pipes. I thought I had done well, but they were just slightly too large. Lesson learned.

Silicone for the Win
I really do not love applying silicone. It requires real precision that probably needs a professional to get it perfect. But overall, I am pleased with the final result in our bathroom renovation. Including the need to redo some of my silicone application, the final look is good. And I am confident it is helping ensure a perfectly waterproofed room.

The end is in sight. I just have some small bits to sort, as well as the decorating. I am still deciding on lighting and some decorating bits, but I hope to share a final reveal in the coming weeks. Stay tuned, if you are as ready as I am to complete this long project and move on to the next big thing!
Happy DIY-ing, and Happy New Year!








Leave a Reply