
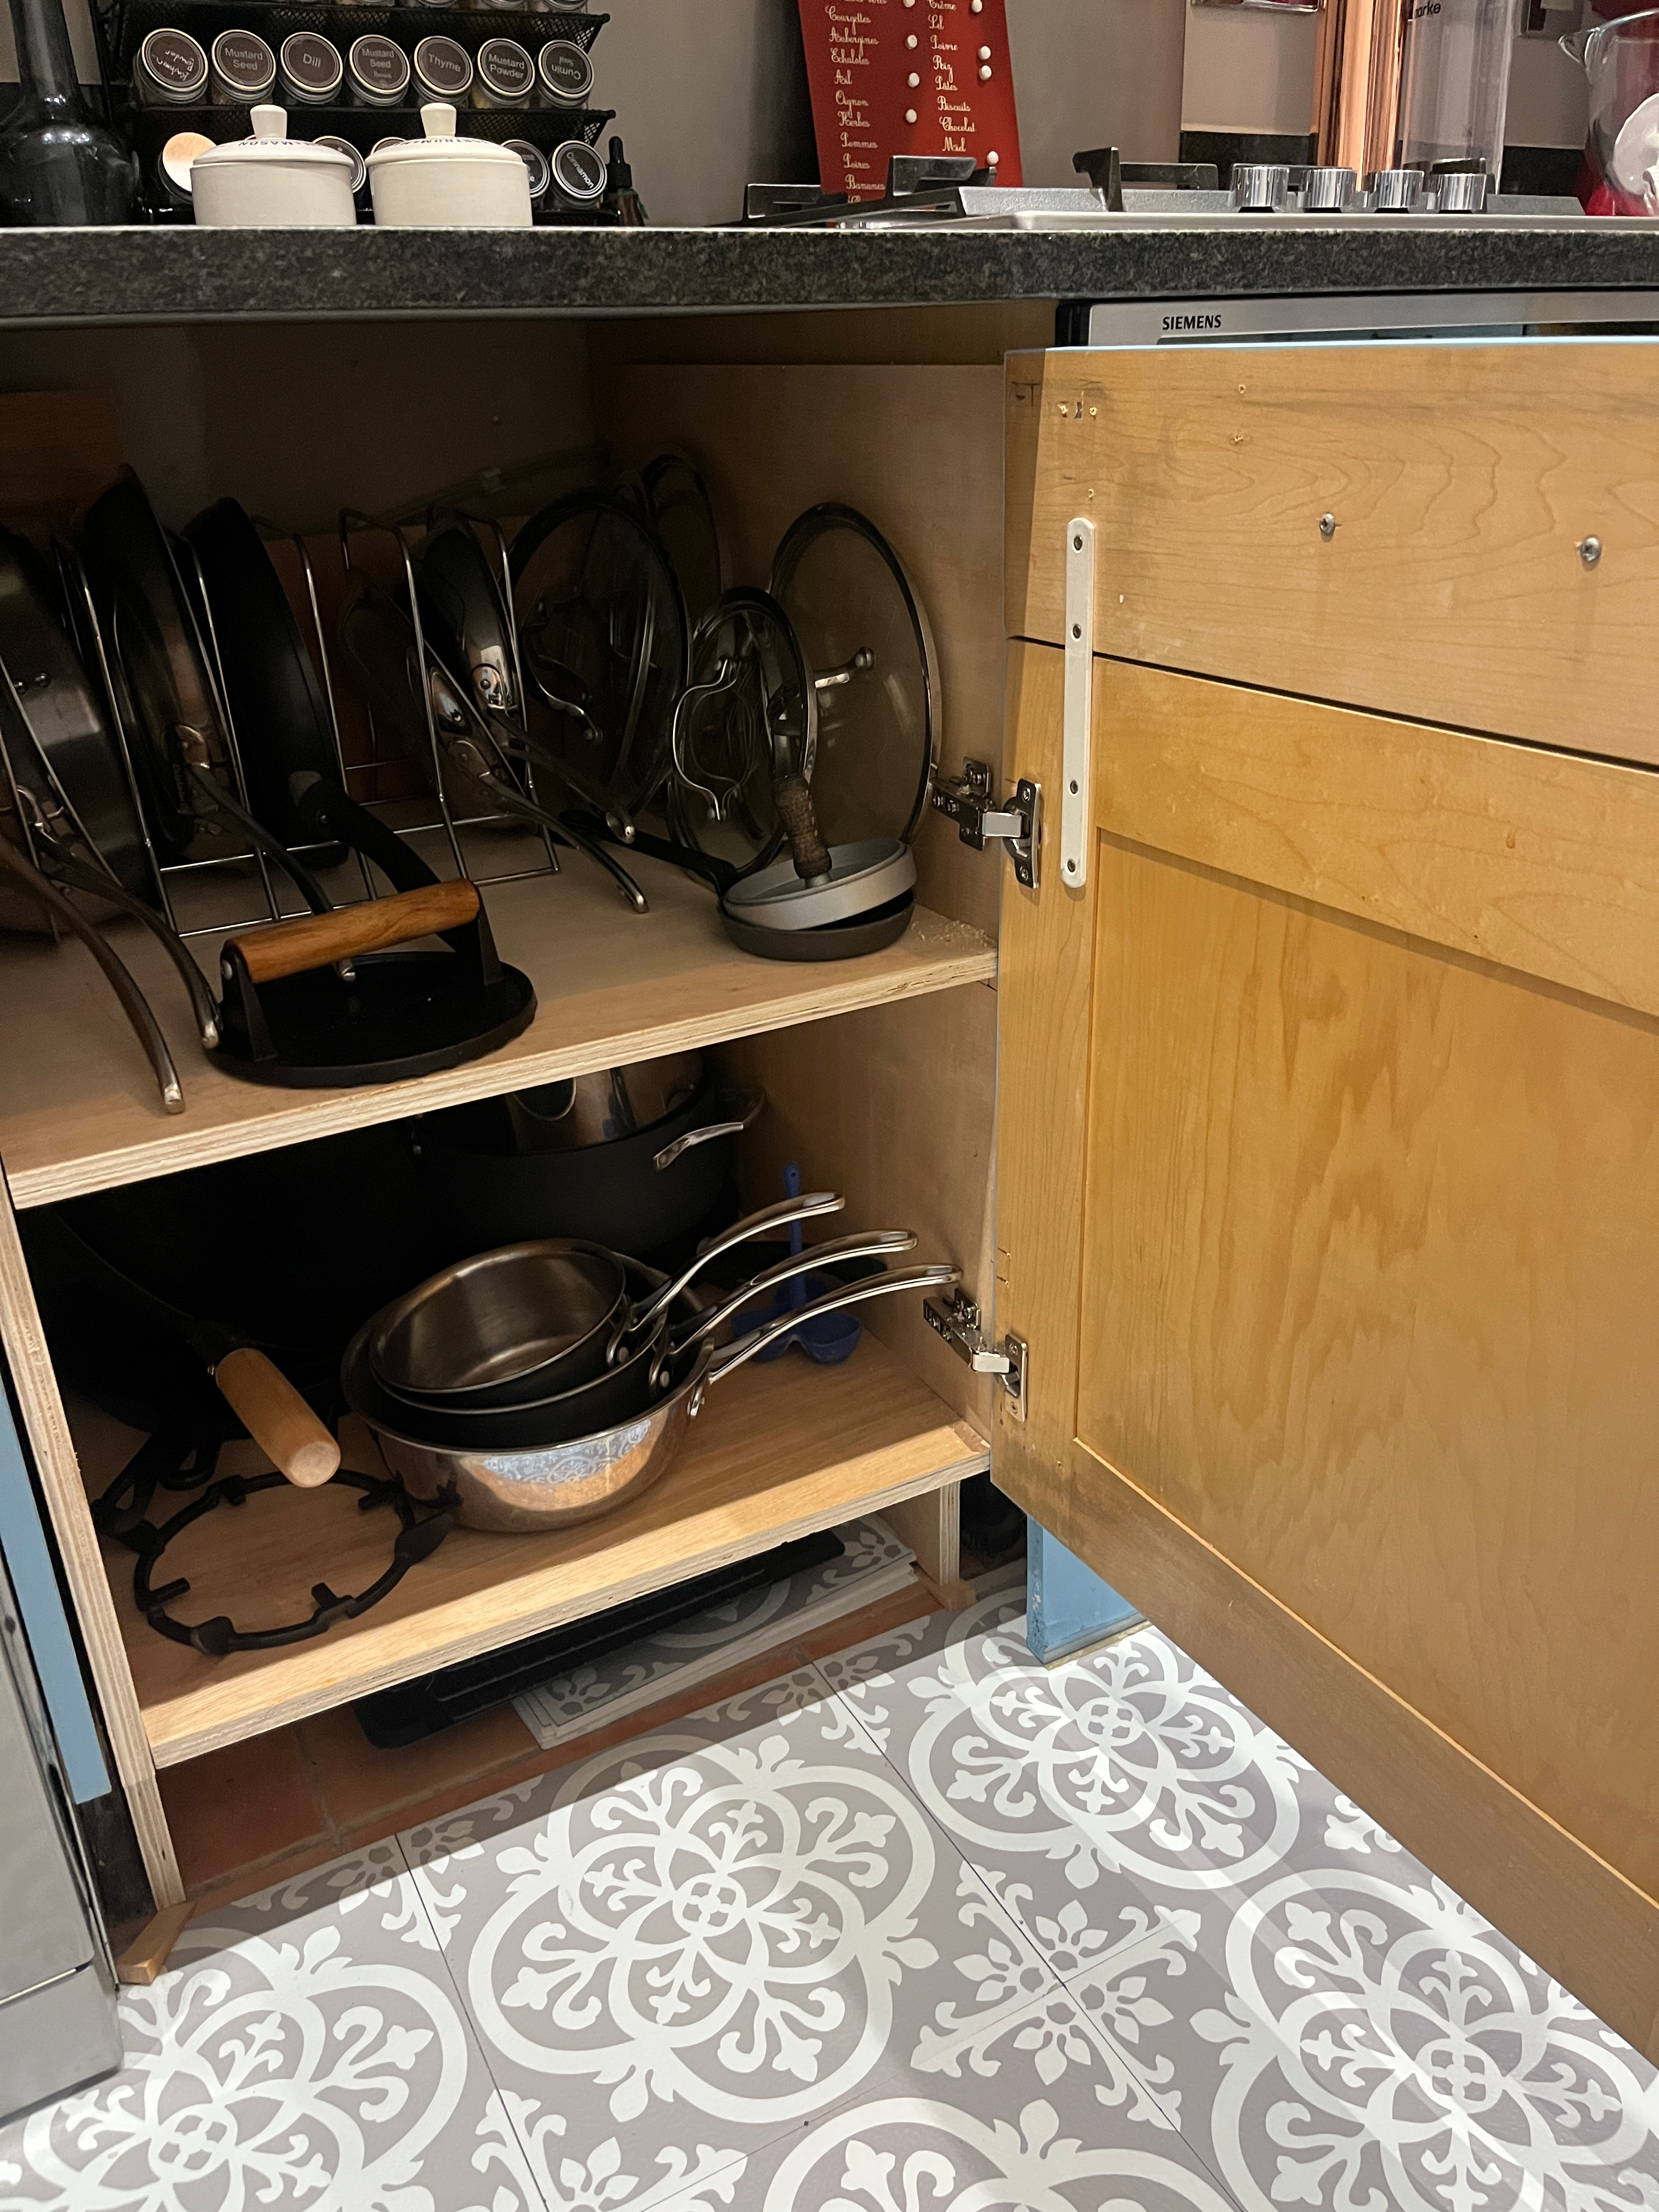
I am living my best life this week as I enjoy a clean and de-cluttered kitchen! Because I finally made time to build a kitchen cabinet for the empty space in the kitchen where the washing machine used to be. Let me be clear, adding a cupboard of this size has changed my life! (Am I being too dramatic? I don’t think so!) New storage space in a small flat is like gold, and now I’ve got it in abundance. And you can too, just follow along.

Before I share more, let me reassure my regular readers that progress on the master bath continues, although rather slowly. There is not much new or interesting to share these days, although I hope to soon start tiling the floor, which will be cause for celebration. As with all DIY projects, there are ebbs and flows, and this week, things have been a little slow as we dealt with first fix and some more tedious bits. I’ll share more in the coming weeks.
So in the meantime, I’ve also been trying to catch up on some outstanding projects around the house. This week, I was able to finally add some new storage in my kitchen. To build a kitchen cabinet into the dead space in my kitchen brings brand new storage for all the pots and pans. If you have space in your kitchen, or anywhere for that matter, consider taking my lead and build your own cabinet. Let me show you how.

The Background
In the UK, most flats and homes seem to have the washer/dryer in the kitchen. I really hate this. I do not want clean (or dirty!) laundry in the place where I cook dinner. Plus, I need that space for my many kitchen appliances and paraphernalia. When I renovated the guest bath, my number one priority was making space for the washing machine, and I’ve never looked back. One of my best improvements in this flat.


By moving the washer, I gained prime real estate in the kitchen, between the stove and the dishwasher. A perfect place to build a kitchen cabinet, don’t you agree?
However, almost one year on, and I’ve had this empty space in my kitchen taunting me. I do not know what took me so long, but I finally filled it, and today, I want to share the process with you.

Note: To build a kitchen cabinet is a fairly simply project and one that you can do. And, it will pay dividends in terms of space and storage. If you are not sure, or you just need a bit more encouragement, download my Intrepid DIY-er Starter Kit. Build your skills and your confidence.
So, let’s get started.
The Supplies
- Plywood:
I used 18mm for the main build (carcass), because I wanted a strong and sturdy cabinet to hold pots and pans, including several cast-iron skillets. You also will need ply for the backing, which can be thinner; I used 12mm, which I had left-over from another project - Pocket hole jig and screws (if you do not have a pocket hole jig, you can use adhesive and regular screws)
- Nails and hammer or a nail gun (this is my nail gun, which I love!)
- Circular saw and cutting guides (I used my Kreg Accu-Cut to cut down the ply; you can also ask the store where you buy your plywood to cut it to size; they might charge a small fee for the service)
- Hinge jig, hinges, and drill if you will be adding a door
The Process
Measurements
As always, take your measurements for the cabinet you are building. In my case, I had a very defined space, with the dishwasher on one side and the oven on the other, and divider boards in between. I also had several pipes, including the washing machine pipes and a waste pipe for the boiler sitting at the back of the space. (Note: If you have a similar situation, ensure the pipes are capped off and any waste pipes are also secured in place. I purchased 2 manifold caps for the two water lines, and I added plastic holders to ensure the pipes were secure. The bottom line is ensuring these pipes will not leak once you cover them over with the cupboard. Seek a plumber’s advice if you are unsure.)
Take measurements for the two sides (depth and height), as well as the shelves (depth and width). For the shelves, remember to subtract the thickness of the two side walls from the total width.
For my shelf, I want two shelves, or one shelf and the bottom of the cupboard as the second shelf. I did not add a top to the cupboard because it sits underneath the counter top. You could add some slats of plywood across the top if needed for support, particularly if the cabinet is not supported on both sides by other cabinets. Or, if it is freestanding, add plywood to the top, the same width as the shelves.

Cut the Plywood
I cut two sides at 85 x 66 cm. I cut two shelves at 58.5 x 66 cm.
For all measurements, I left a small amount of space (approximately 2mm) between the two fixed sides, so the shelf could slot in easily. When cutting the shelves, I cut their width minus the two shelf sides, so subtracting 3.6 cm.
I used my trusty Accu-Cut from Kreg to make precise cuts with my circular saw for all the parts of the shelf. For those of us without a proper workshop or a table saw, this is a great option for cutting down large sheets of plywood.
You may need to cut out the front of the cupboard, to create a tow kick. I measured the toe kick on another cabinet in the kitchen, and replicated this onto the cabinet. I cut the toe kick out with my jig saw.

Pro Tip: Because I need to set everything up for cutting the wood, I tend to try to do batch cutting for numerous projects. I had ordered three large sheets of 18mm plywood, which I used for cutting out the kitchen cupboard, all the shelving for the master bath, and a new wine rack for the kitchen (more on that another day!). I just find it easier to cut multiple projects at once while I have all my tools out.
Assemble the Cupboard
To actually build the kitchen cabinet, drill pocket holes into the two shelves. I recommend four pocket holes per side, depending on the length and depth of your shelves. Mine are quite large, and since it will be holding pots and pans, I wanted to ensure it is very secure.
Using corner clamps, screw the bottom shelf into one side, ensuring it is square and level. Repeat on the second side. Then, do the same with the next shelf and however many other shelves you have. Make sure to check for level and square throughout.

Add the Backing
Once the cabinet is assembled, this is when I like to cut out the backing. Lay the backing on the ground and place the cupboard on top of it, with the back of the cupboard against the backing. Trace around the cupboard with a pencil. Then, cut the backing out with a circular saw or jig saw.
Attach the backing with nails. You can also use adhesive if you want.
In this particular case, because this is a temporary cabinet until the big kitchen renovation in a few years, I tried using materials I already had. Plywood is not cheap these days, and I have a lot of scraps that I need to store. Better to use them if I can.
For the backing, I had several odd cut-outs of 12mm ply, so I played a bit of Tetris to create a backing. Full disclosure: I could not completely cover the back, so there is a gap at the top, but it allows me to see the pipe behind and make sure it stays in position. And it is high enough up in the cabinet that it will not disturbed when putting away the pans.
My backing does not completely cover the back and does not look great. But this is a closed cupboard, and because it is temporary, since I plan a full renovation in the next few years, I am okay with this. I would rather not spend the money, so I am using what I have sitting around. But ideally, if you build a kitchen cabinet, your backing should be a single piece of ply that covers the entire back.
Finishing and Installation
Now is the time to put the finishing touches on the shelf. Fill any nail holes and sand the shelf. You can then paint or stain, and you may also want to add edge banding to the raw edges of the cabinet that will be showing. In my case, I did not paint, stain or add edge banding, again because this will be hidden and temporary.
Slot the cabinet into place, and use shims as needed to ensure it is level. You may want to affix it to the neighbouring cupboards, depending on your set-up.

I loaded the cabinet up immediately. And it holds a lot. More than the small cabinet I used for pots and pans before building this one!
Adding a Door
Long-time readers know that I have issues with doors. I have built a lot of storage options over the last two years, but I still have not gotten doors built for many of them. My extra storage in the guest bath. My closet expansion in the bedroom. My appliance garage in the kitchen. They all need doors! But, I have a huge mental block with using the router, so I keep procrastinating on door building. One day, I will get past this and have a door-building extravaganza!


But for this kitchen cupboard, I am delighted to say that I already had a door. I had a few cabinet doors left over when we removed the tiny fridge and freezer in the original kitchen mini-renovation, and there had been one covering the old washer as well. One of them was in terrible condition so I tossed it. One of them I tried to cut up and re-purpose to work for the appliance garage. But it was very well made and I ended up destroying it when trying to take it apart.
That leaves one door remaining, which fits the space perfectly. YAY! What a joy as I build a kitchen cabinet to already have a door ready to go!

The door did not have pre-drilled holes hinges. I cannot remember how it might have been attached previously. The good news is, I purchased a Kreg hinge jig and several sets of hinges in anticipation of the door-building extravaganza. So I was able to quickly learn a new skill and hang a door on the new cabinet.
How to Install Hinges
The Kreg jig is a masterful piece of kit. As are most Kreg products in my experience. It has a plastic base with a hole, with stops to ensure accurate placement on the door. Following the instructions, you set the stops for how close the hole needs to be the door. My hinges did not specify this, so I measured another door in the kitchen. It suggested I use the shortest distance.
You clamp the jig to the door, and you add the drill bit with the guide to the drill chuck. It looks like a hole saw with a guide, much like the one I used to change out all my door knobs.


Then, you simply drill the hole using the guide. Be warned if you have not done this before, it can take a bit of time. You are essentially shaving the door off bit by bit. Stop often and let the drill cool off. If you smell burning wood, definitely stop and rest. You could get some burnt marks, which is not a problem since the hinge will cover them, but you do not want the drill to overheat.
The drill bit has a guard to stop it at the right depth (you also set this according the door thickness following the instructions). It really is quite easy.
BEFORE you unclamp the jig from the door, you also want to drill the two small holes for the screws. There is a guide for these, and you just need to change out the drill bit for the recommended size. You do not need to go deep, the screws are not that big.
Rinse and repeat for the second hinge (and third, depending on how tall your door is).

Then you simply install the hinge itself into the door, following the large hole and screw holes. Once that is done, hold the door in place against the cabinet and mark where the screws go. Drill these holes, screw in the second side of the hinge, and voila! You might need some help holding the door in place to mark it. I propped it on my foot and held it in place while I marked it.

Doesn’t this new addition to the kitchen look great? I am so pleased that I finally took the time to build a kitchen cabinet in the dead space. Completing a project that has been on the to-do list for almost a year feels great, and the actual storage we’ve gained is amazing.
As well, I’m thrilled with my new hinge installation skills. One more skill under my tool belt. And just maybe, this will be just the push I need to get going on building all the doors!
Happy DIY-ing!
A quick P.S. — As you may have noticed, I’ve made a few updates to the website. Next week, I’ll be sharing my manifesto on what it means to be an intrepid DIY-er. Stay tuned! Or better yet, subscribe to stay in the know on all the DIYs and get them delivered straight to your in-box.








Leave a Reply