
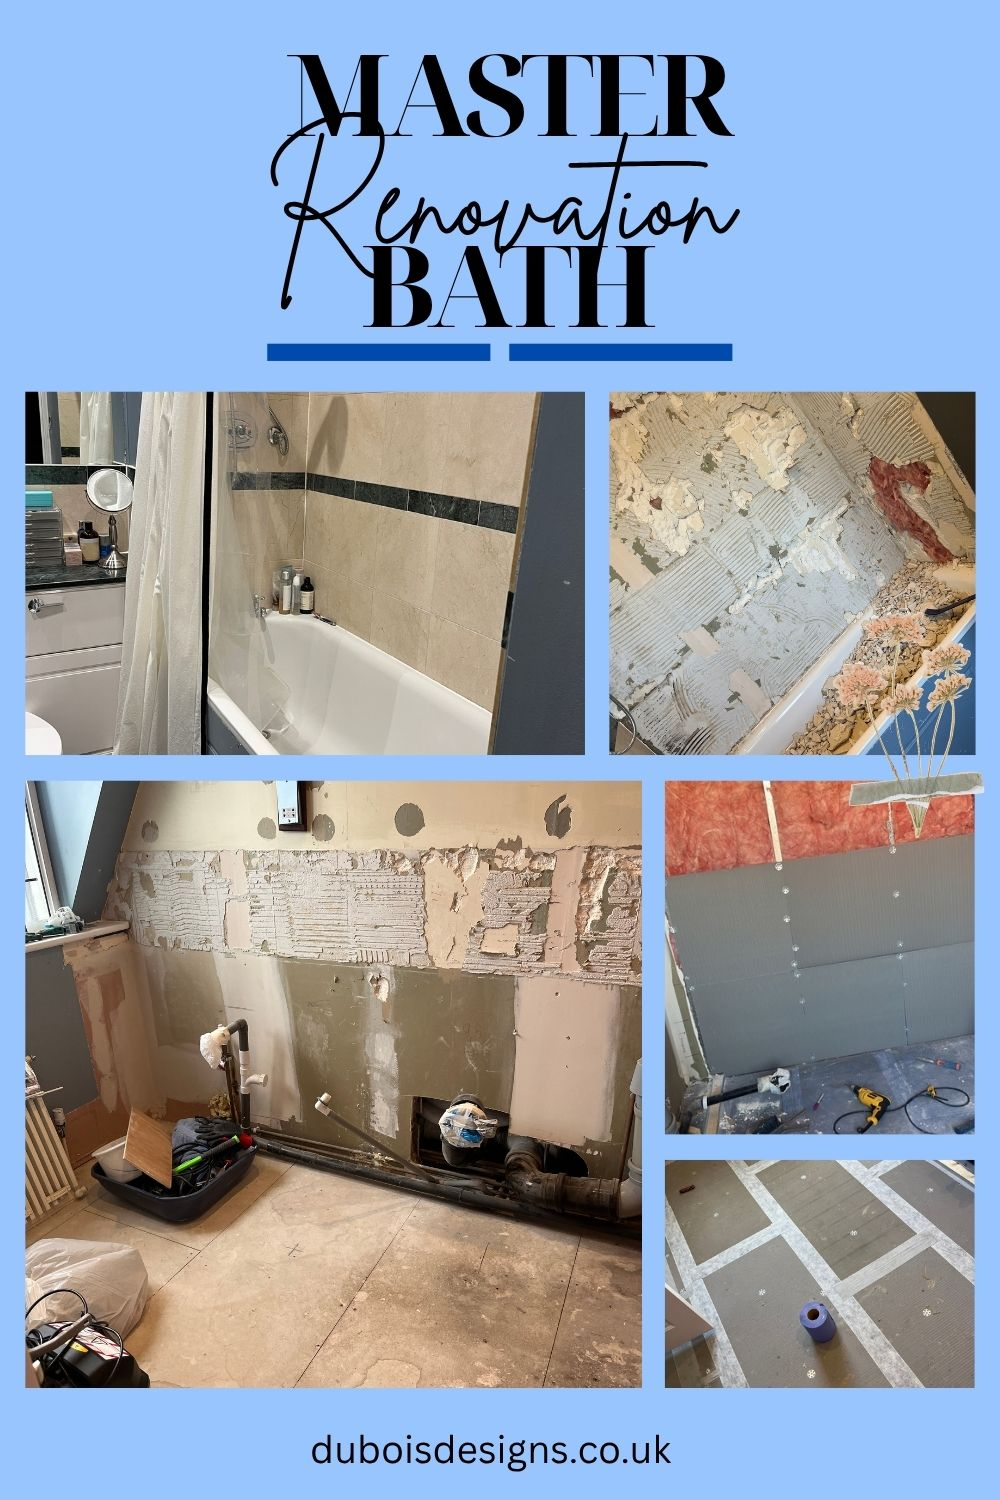
Today, I am excited to share that the master bath renovation is finally moving forward. There has been some good progress over the last few weeks.
I know my last few posts have been more general design- and planning oriented. You just might be wondering what happened with all my enthusiasm for demolishing my master bath. Did I give up on the project?

I did not give up on it, but sadly, it has been a very slow process. Right after I got started with the demo, I ended up having to travel quite a bit for work. When I finally got home for a decent period of time, I just needed some time to recover and reconnect with friends and family.
But happily, things have now begun again in earnest. The demolition is complete, with the difficult wall tiles out, all fixtures removed, and the under flooring taken up. I needed to do a bit of repair work on one area of the floor where the sub-flooring had rotted a bit from water ingress. But otherwise, everything was in good shape. And ready to go full steam ahead on the renovation.

Progress So Far
Last week, the electrician came out for first fix. He did all the wiring for the crucial underfloor heating and moved the shaver port to a more out-of-the-way location. He also wired the room for a centre light (I am hoping to install a small chandelier!) as well as the wall sconces I could not use in the guest bath.
The plumber also came for first fix, prepping the water and waste pipes for the shower, basin and toilet. And, he ran new pipes for the separate stand-alone bath, which is exciting. I am still deciding what exactly I want for the freestanding bath, but there is time to make that decision.
I then was able to start prepping the flooring and walls. As with the previous bath, I cleaned the sub-flooring and painted it with Zinsser, to ensure any possible mold would be stopped in its tracks. On top of the Zinsser, I laid Jackoboards, first doing a dry fit. I then installed them on the floor with mortar, washers and screws. I added board adhesive to the seams, covered them with seam tape, and did a first coat of the tanking agent.


Then, I began reboarding the walls. Jackoboard in the shower area and plasterboard in the dry areas. Right now, I am in the midst of reboarding and hope to finish it up in the coming week. Then I’ll tank the room before building the wall structures to cover the pipes. And then I’ll lay the underfloor heating, add self-leveling, and get ready for tiling.
A Change in Approach
With the master bath renovation, I’ve changed a few things, since I know a bit more and feel a bit more empowered on this second go. Plus, this bathroom is a bit different. Easier in some ways, and harder in others.
Order of Steps
First, I’ve changed the order of steps a bit. I had the electrician and plumber in earlier than last time, to do first fix for the room. I’m re-boarding the shower walls at the same time as the floor and before I build the structures to hide the pipes. And, I am waiting a little later before laying the underfloor heating and doing the self-leveling, which I did earlier in the process last time.

I share this all to say, you can vary the order of steps a bit. I am trying something a little different based in part on what I feel like doing and in part on what supplies I have available. There are some things you cannot vary, of course. Tiling can only come after re-boarding and water proofing. Painting and wallpaper are late in the game. But generally, you can adapt and adjust certain parts of the master bath renovation as needed.
This time, I also have more confidence to do things without needing a consult with my plumber. This frees me up a bit, which is a great feeling. #diyconfidence
Improved Techniques
I’ve improved some of my techniques with the master bathroom renovation. For example, I’ve been faster with the demolition simply because I know more of what to expect,. And I am moving faster with the renovation because of increased confidence.
I have also adapted my approach in a few areas. You may remember when I did the guest bath that I could not figure out the best way to use the board fix adhesive that came as a part of the Jackoboard system. This time around, I’ve got it. I first tried applying it to the edges of the boards before laying them, but with the mortar, it is a mess. Instead, I ran a line of the adhesive along every seam (which I did last time) after the boards were laid, but this time, I ran my finger over the line to smooth out the bead and press it into the seam. This is a much better approach, as it ensures no raised seam when the adhesive dries, and it ensures a secure seam with no place for leaks. A similar approach to caulking or silicone, but neatness does not matter as much.
Ordering Supplies
Unlike my first bath renovation, for the master bath renovation, I am ordering supplies as I need them. Last time, we ran out of places to put everything. This time, I am taking a more relaxed approach, only ordering the things I need for the next few steps. This helps keep the clutter (a bit) more manageable.

There are a few exceptions. I’ve ordered a few decorative bits like these adorable rabbit hooks because they were on sale and they are tiny, so I have space to store them.

I’ve also ordered the tile, because the tiles I chose a few months back are now out of stock. I had to find a similar tile and order a sample to make sure I like it. So I went ahead and ordered it before it goes out of stock. But, I still need to order the shower and basin taps, the shower enclosure, the toilet, basin, and of course, the bath tub.
The good thing about this more relaxed approach is that I can make changes as I need to. For example, had I already ordered the shower enclosure, I would have gotten the wrong thing, because we’ve realised that the original plan will not work. We’ve adapted the plan, due to the size of the shower pan, so we need a different enclosure. I am really liking this more relaxed approach to ordering supplies, but there are risks, like delays in delivery or not being able to move forward when I want to if something is not yet here. We’ll just have to see how it goes.
Shower Pan Placement
In the last bath reno, I had the shower pan put in place during first fix. Because first fix came later in the process, I had done the floor boards, underfloor heating, and self-leveling already. So the plumber put the pan in place, so I could then tile right down to the pan when I did the wall tiles.
It worked great, but I had a layer of plaster board on the wall for the pan to rest against. In the master bath renovation, the walls are down to the studs. I want to make sure the wall is covered with a cement board, which had not happened at the time of first fix. So this will come later.
As well, I would prefer to have the pan out of the way while I do the majority of the wall tiles. Last time, I dropped a few tiles and damaged a small edge of the pan. I will need to figure out how to get the pan in place and the waste pipe hooked up before I complete the shower tiles, but if I can do most of them before, that will be great. WE will see if this can work.
Exciting! The Tiles Have Arrived
When doing a bathroom renovation, it is important to have little moments of joy in the midst of what can be challenging. Boarding walls and building structures are important tasks, but the tiles, the paint, the fixtures are what really make you feel like you are making progress. At least for me!
The tiles arrived this week, and they have got me so excited! I cannot wait to get to tiling, but it will probably be a few more weeks. Assuming all goes to plan. Which it probably will not, knowing how DIYs tend to go.

The floor tiles were the original inspiration, and they are every bit as lovely as I hoped. And after the disappointment of my original wall tiles being out of stock, I was able to find the same ones but with a different vendor, and they’ve arrived too. The two together are going to look great. And unlike last time, in this master bath renovation, there are no beveled tiles which should make things a bit easier. We will see!

Next Up: Dealing With Metal Studs
So that’s the progress for now on the master bath. It is exciting to see how much I know, yet I continue to remind myself that there will be plenty of surprises and learnings as I continue with the master bath renovation.
In fact, I’ve already learned something that I’ve needed to learn for awhile. How to drill into metal studs. I’ve finally got it, but that is for next week. Stay tuned and I promise to share what I’ve learned on that front. And of course, on so many other things as the master bath renovation really gets going! Thanks for tuning in.
Happy DIY-ing!
Interested in similar posts? Check these related topics out:








Leave a Reply